Hunting Headwinds

  • Trips
  • Gear
  • Conservation
  • About

Autumn Kayaking in the North Channel

October 09, 2024 by Andrew Godfrey in Trips

I’ve been hopelessly addicted to paddling on Georgian Bay since I was a kid. If I’m not on the bay, you better believe I’m planning the next trip.

It started with day trips within the protected bays of Camp Hurontario, in cedar strip canoes. It’s since expanded to multi-day adventures in sea kayaks, smashing into waves on open water.

At this point I’ve meandered across most of the coast of the Thirty Thousand Islands, from Honey Harbour to Killarney, with few areas unexplored. One of the last stretches that stoked my curiosity was the North Channel.

Despite appearing to be beautiful territory for adventures, there’s very little information online about sea kayaking in the North Channel. Is it too exposed to explore? Too far from Toronto for traffic? Are people keeping it a secret? In October 2024, my brother and I decided to find out.


The Route

Until a few weeks ago, I knew very little about Georgian Bay’s North Channel other than that it exists, and you can see it on a map.

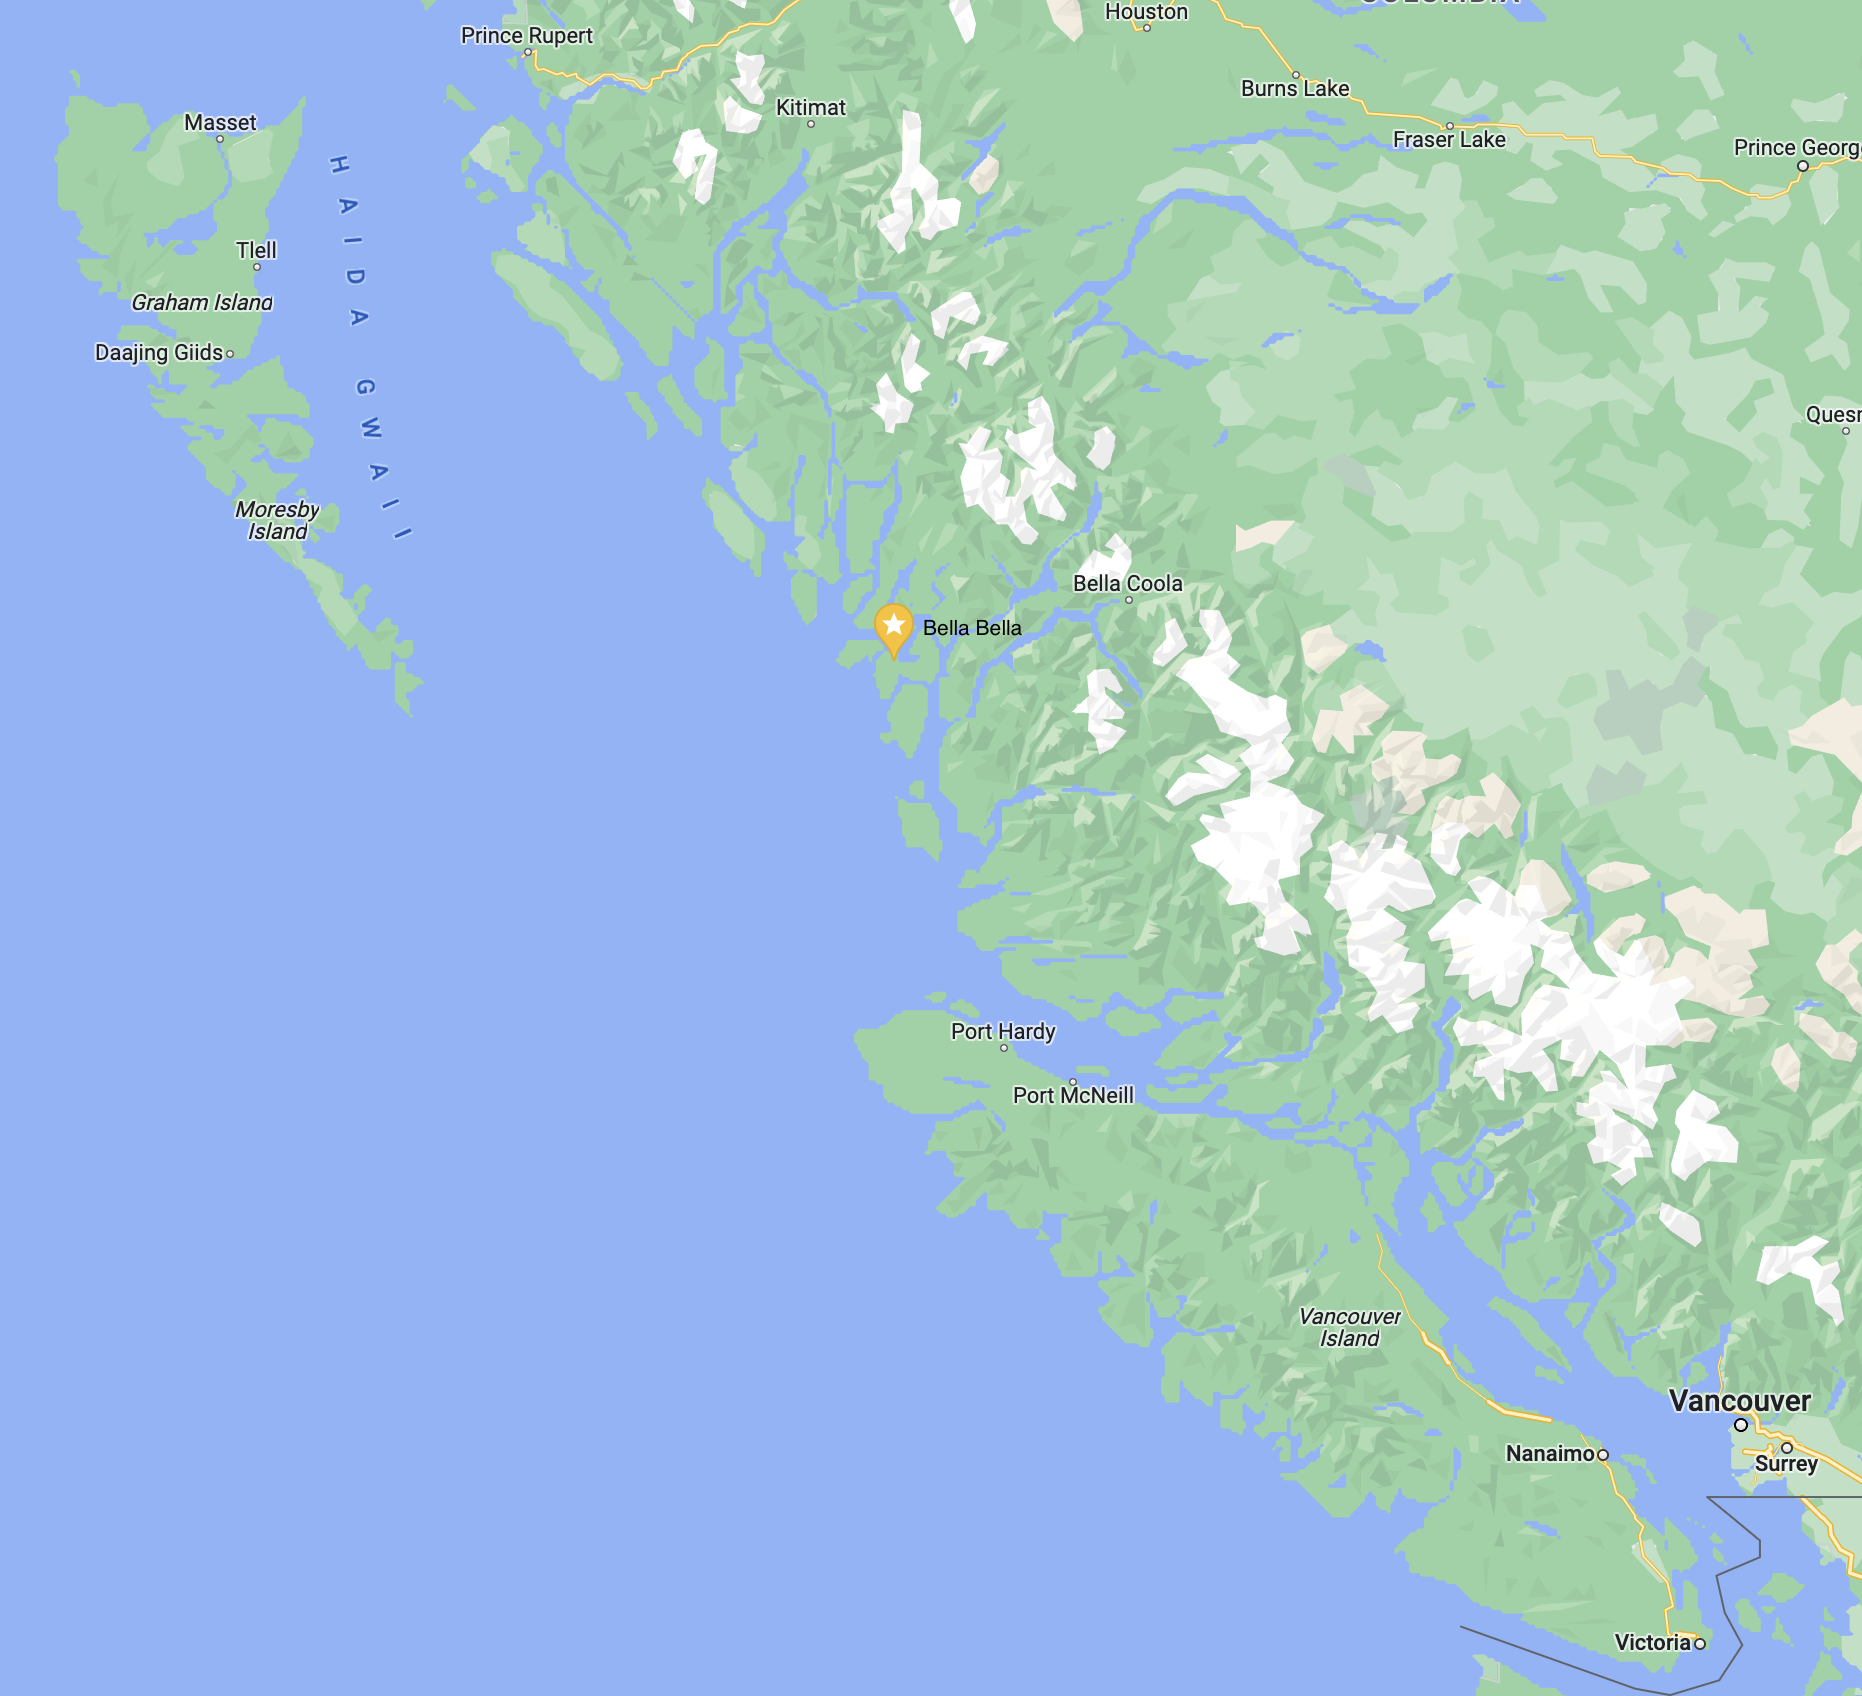
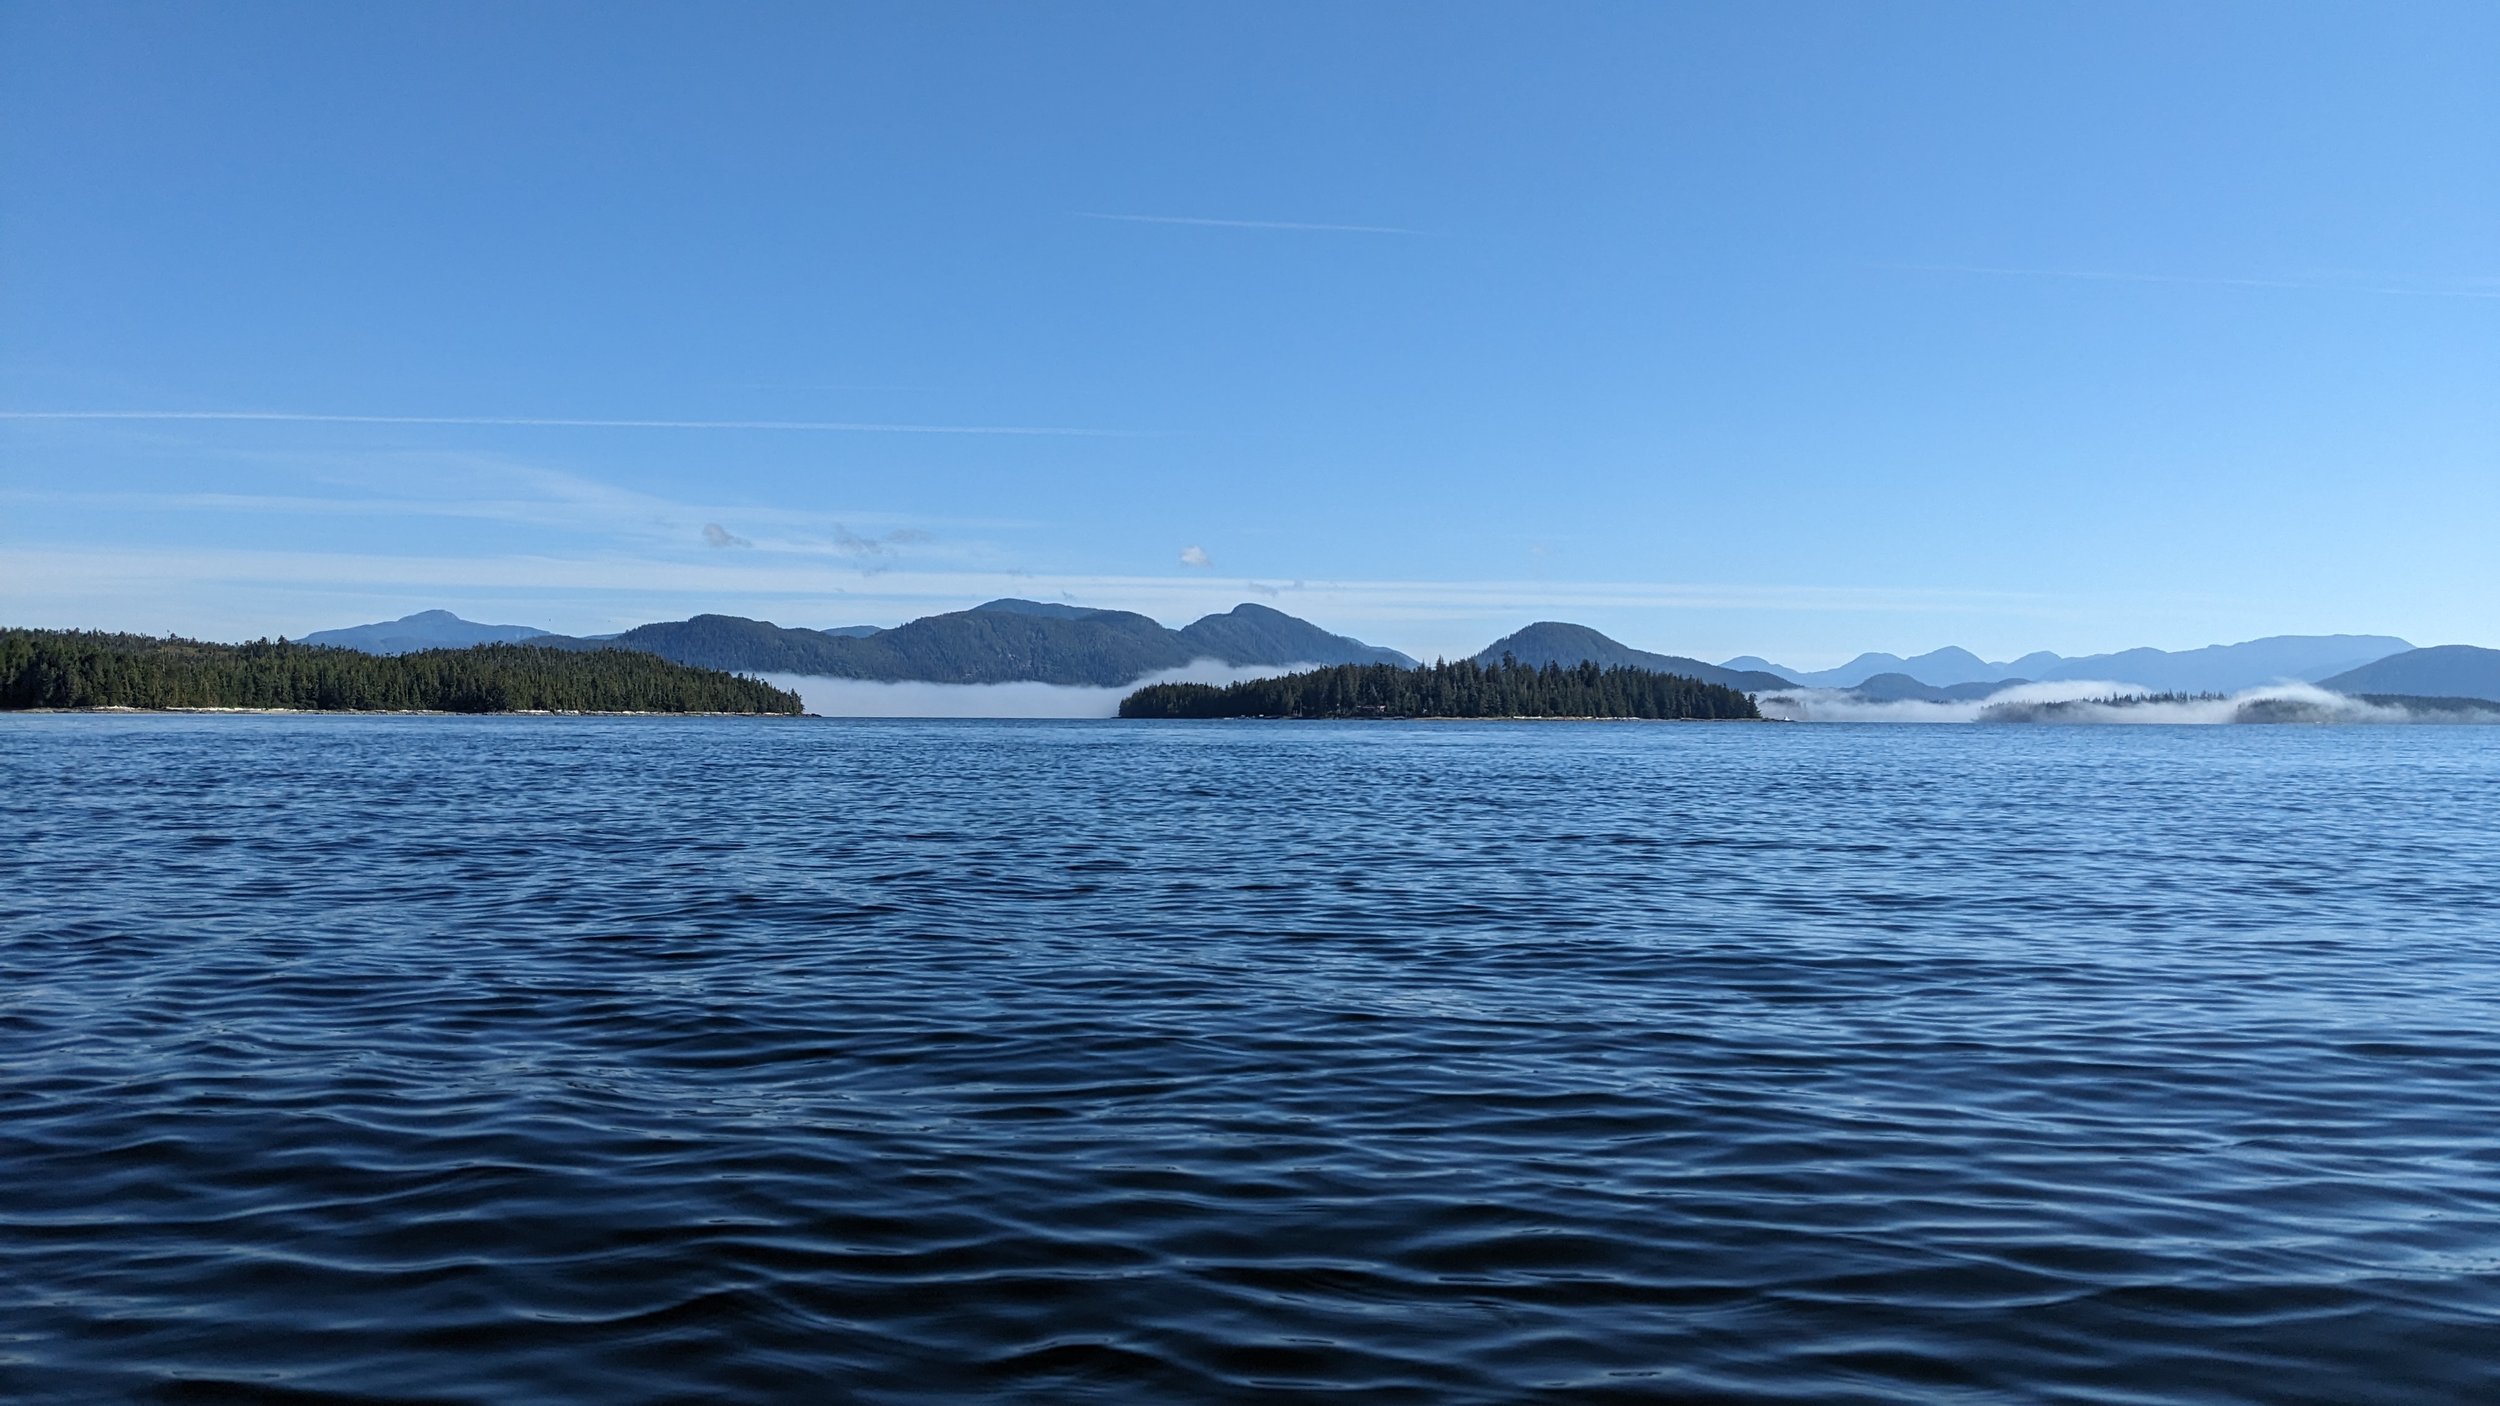
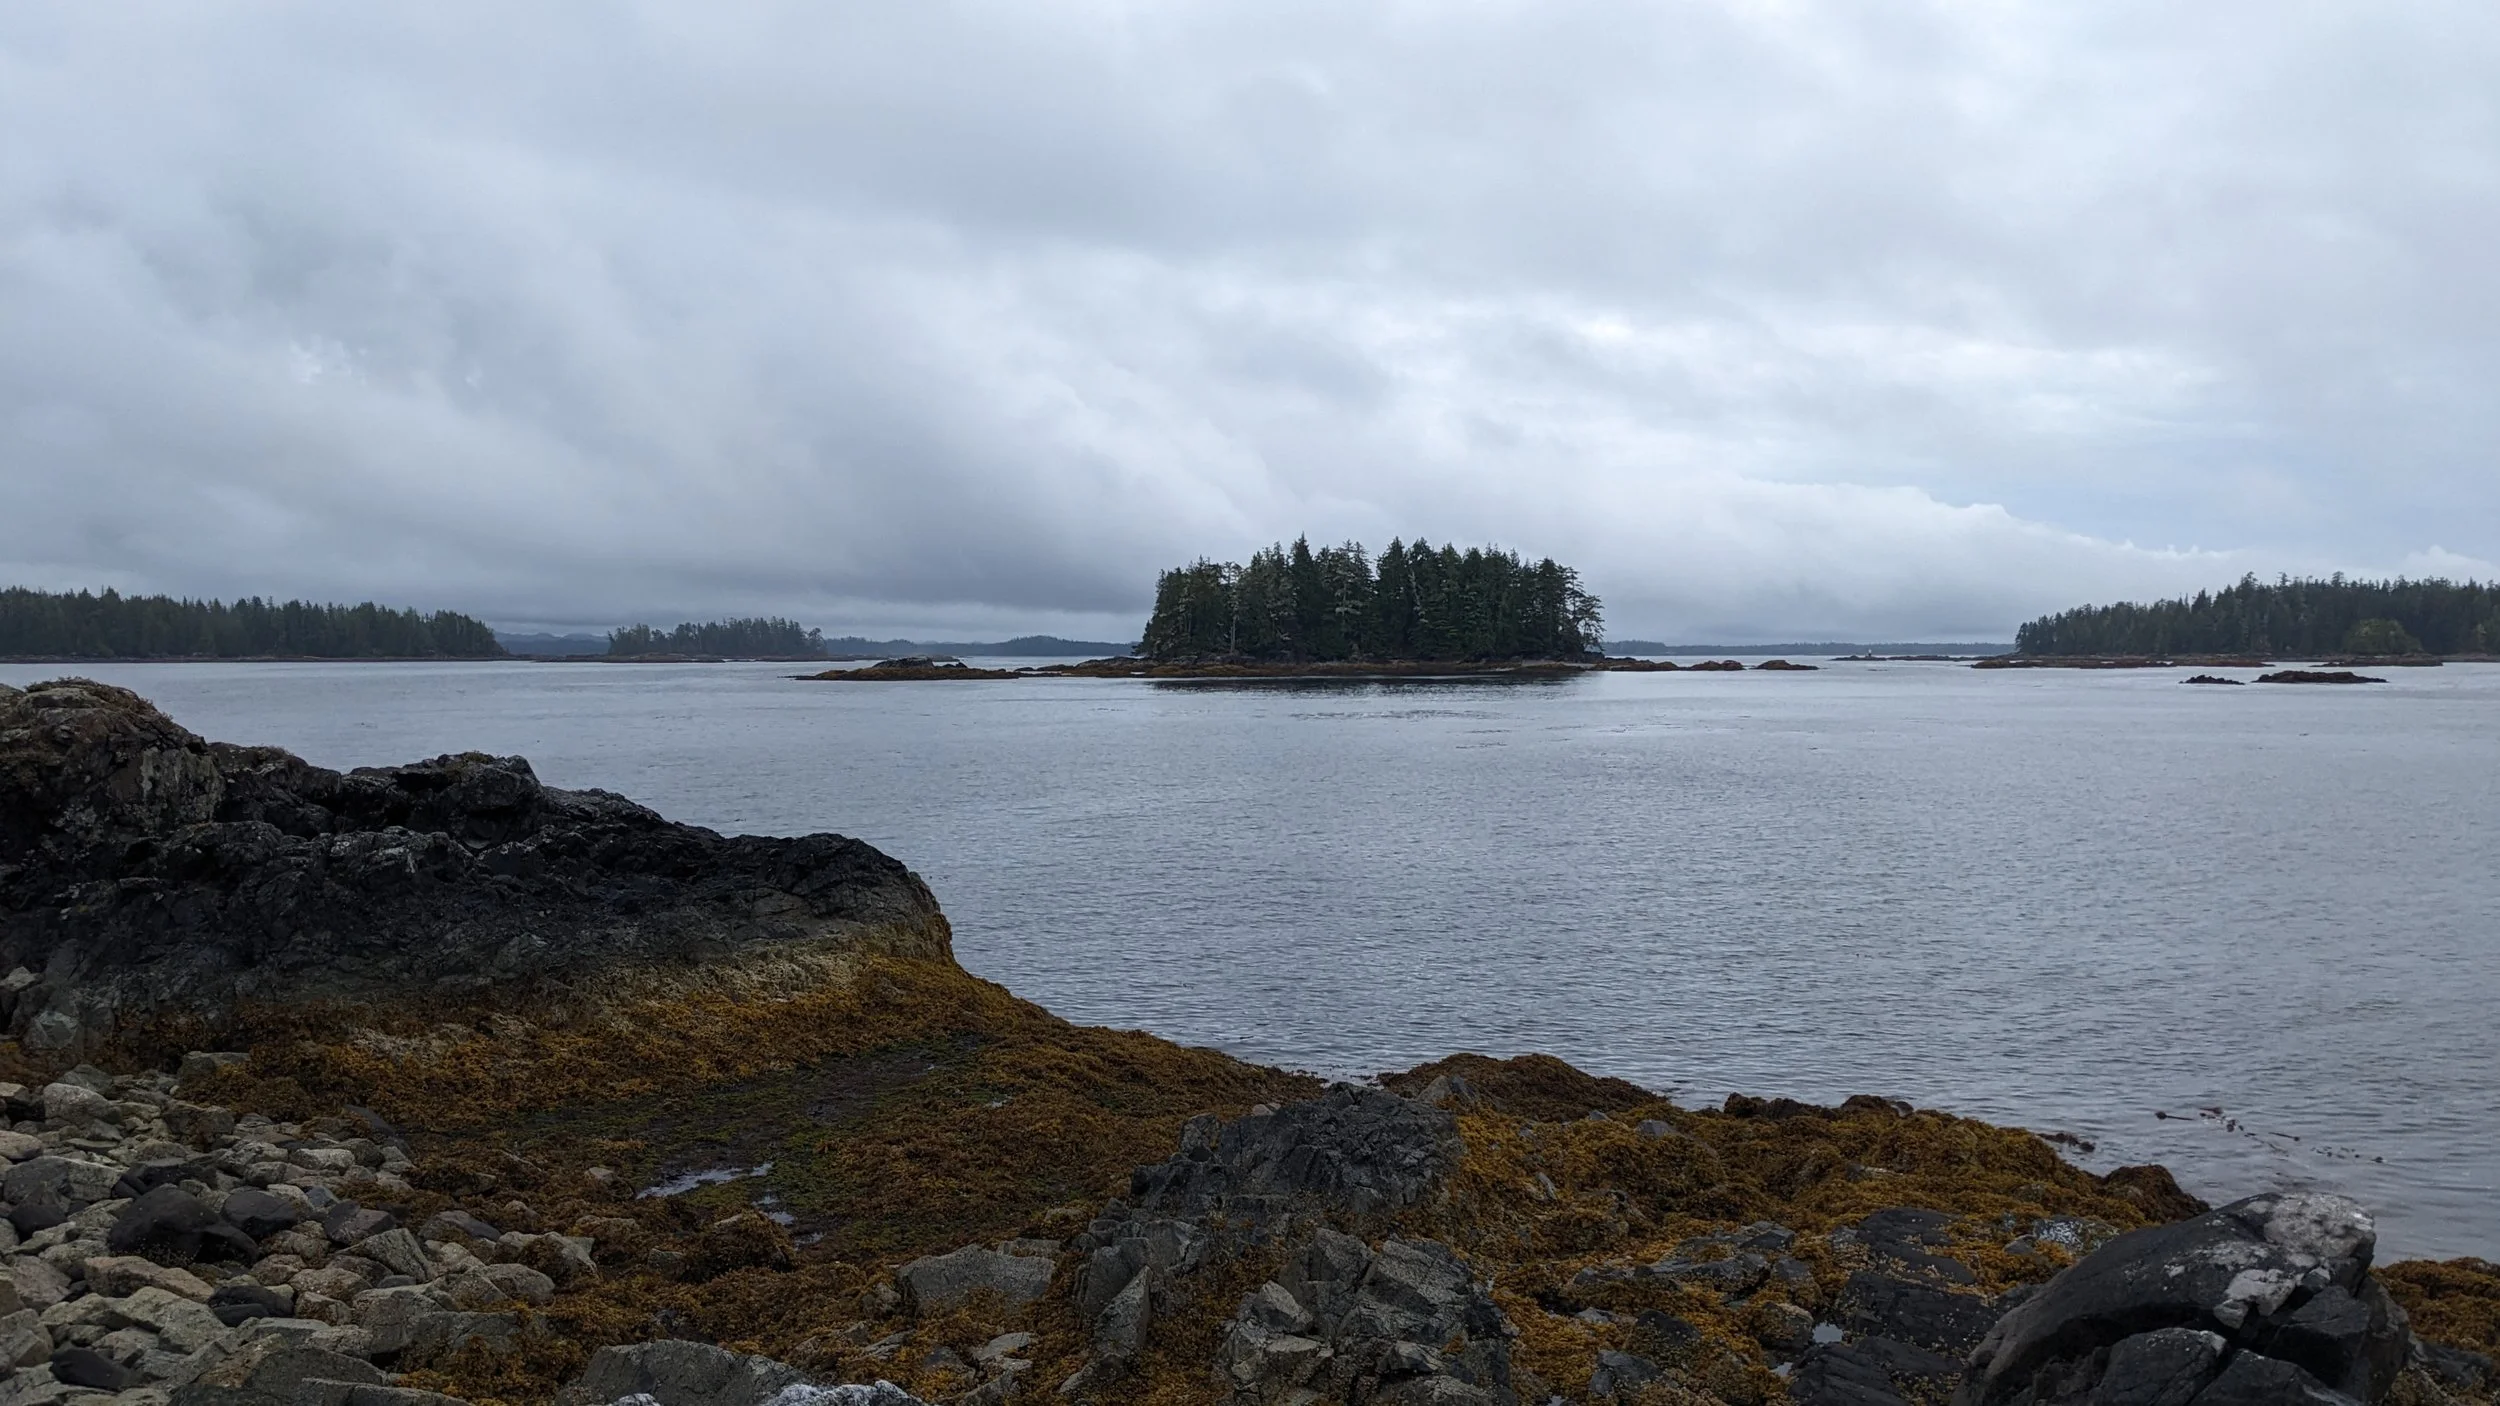
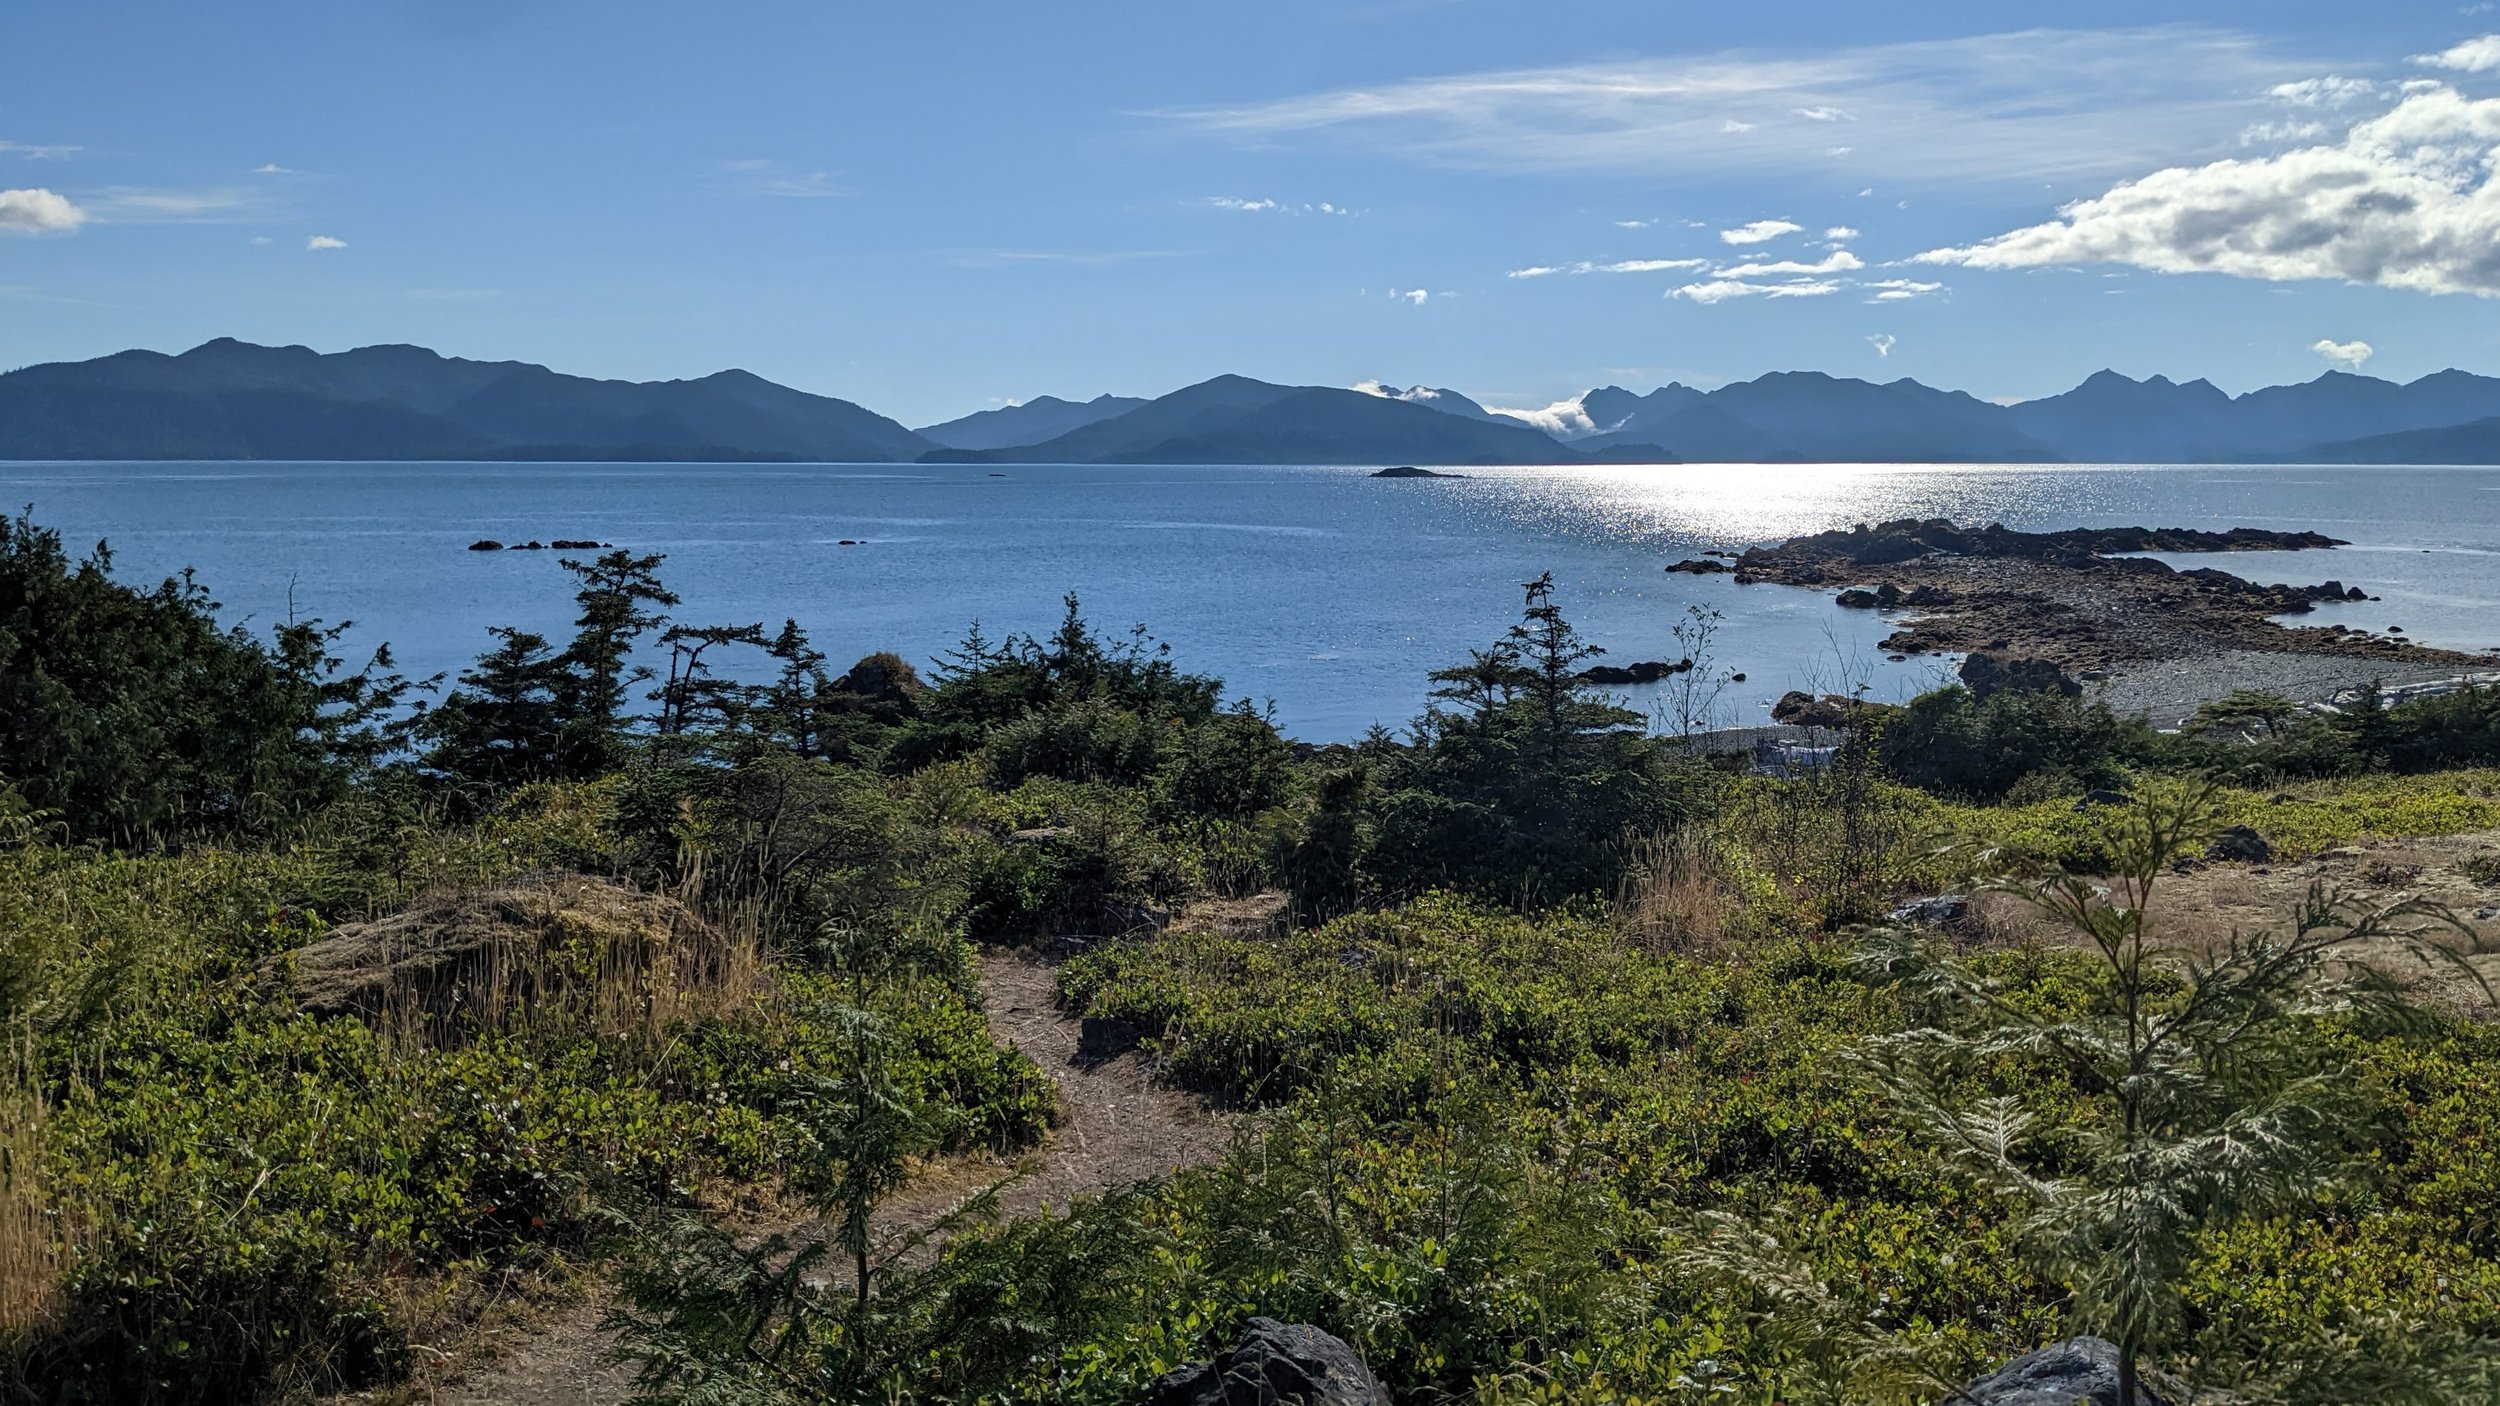
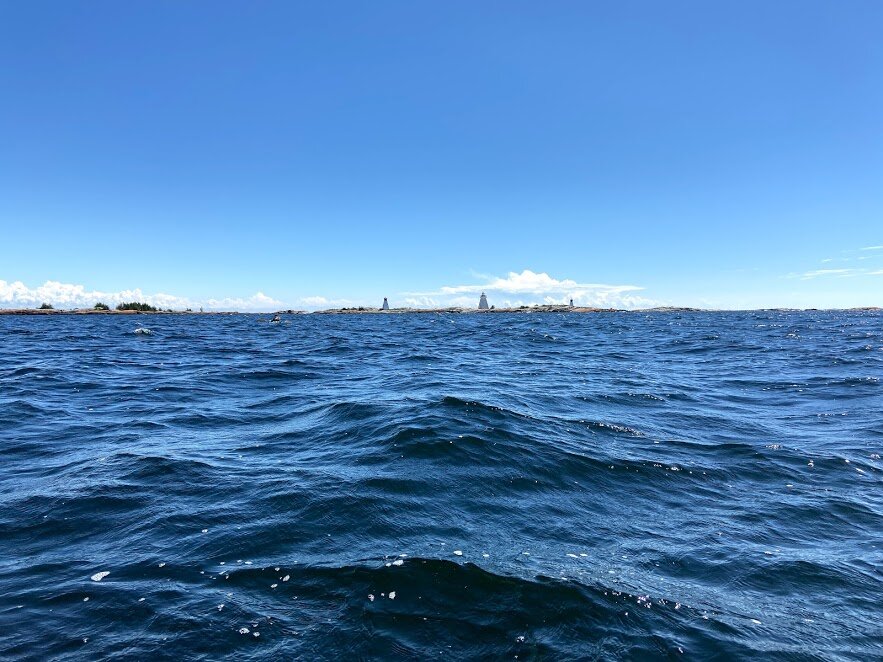
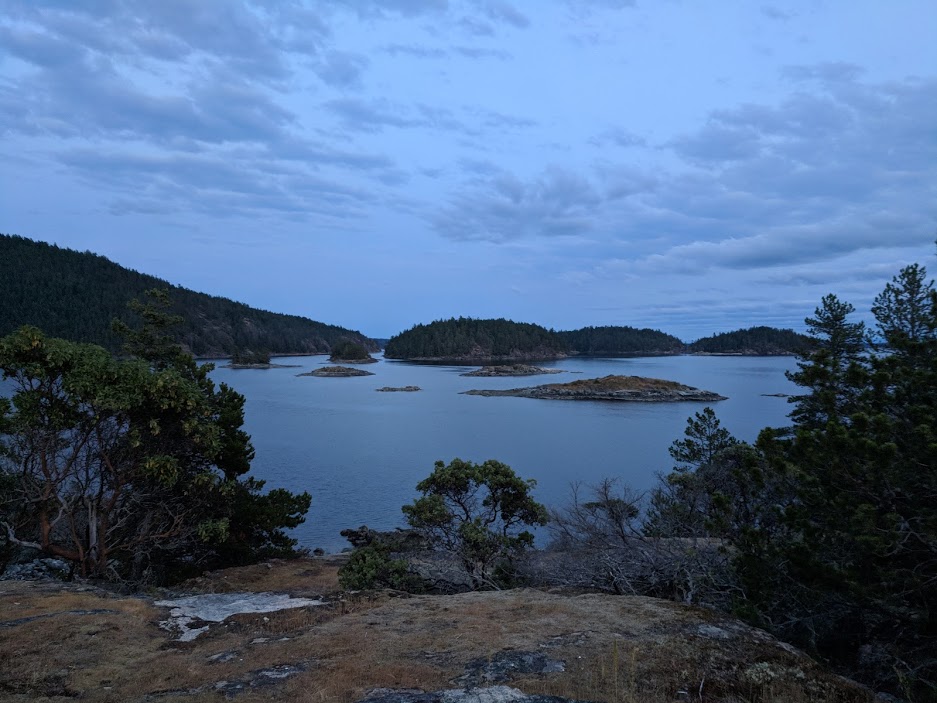
The North Channel sits above the world’s largest freshwater island (Manitoulin), below the LaCloche mountains, and runs over 150km east to west between Whitefish Falls and Michigan’s Upper Peninsula. There are islands sprinkled along the northeastern shore, before the Channel turns to open water west of Algoma Mills. At its widest point, it’s over 30km across. To put that in perspective, it’s about 50% wider than the Queen Charlotte Strait in BC.

A billion-year old lava flow.

The geology of the North Channel is incredible. The Canadian Shield’s billion year old granite and gneiss bands meet the quartzite of the LaCloche range and crash against the limestone deposits that are so familiar along the Niagara Escarpment. We wanted to see it all.

The majority of the route planning for this trip was done via Google Maps satellite view and the Crown Land Atlas. Much of this area has been tagged as a potential expansion for the LaCloche Provincial park, so it sits somewhere between crown land and park status and I couldn’t find any map publishers who had sites and trails in the area.

Instead, I used satellite views to look for familiar ‘shieldy’ type clearings that look campable, and compared them against the Atlas to make sure I wouldn’t end up on private land. Beyond enjoying a trip on the bay, I was keen to make a mental map of an unfamiliar area - finding campsites, routes, and scenery that would paint a picture for future expeditions.

Unlike the coast of Georgian Bay, the islands in the North Channel are fairly far apart. There aren’t many places to hide, and it doesn’t take much distance for the wind spirits to throw up a fuss and make inter-island travel dangerous if not impossible. We kept our route options open until the very last minute, glued to the weather reports, given that both air and water temperatures drop by the day this time of year.


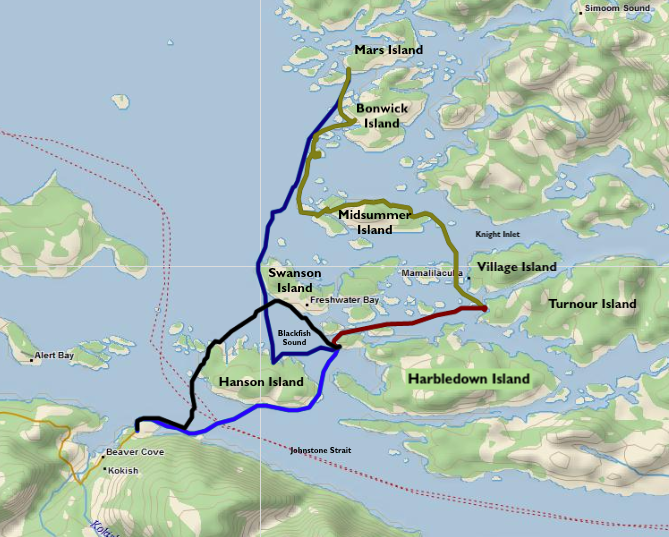
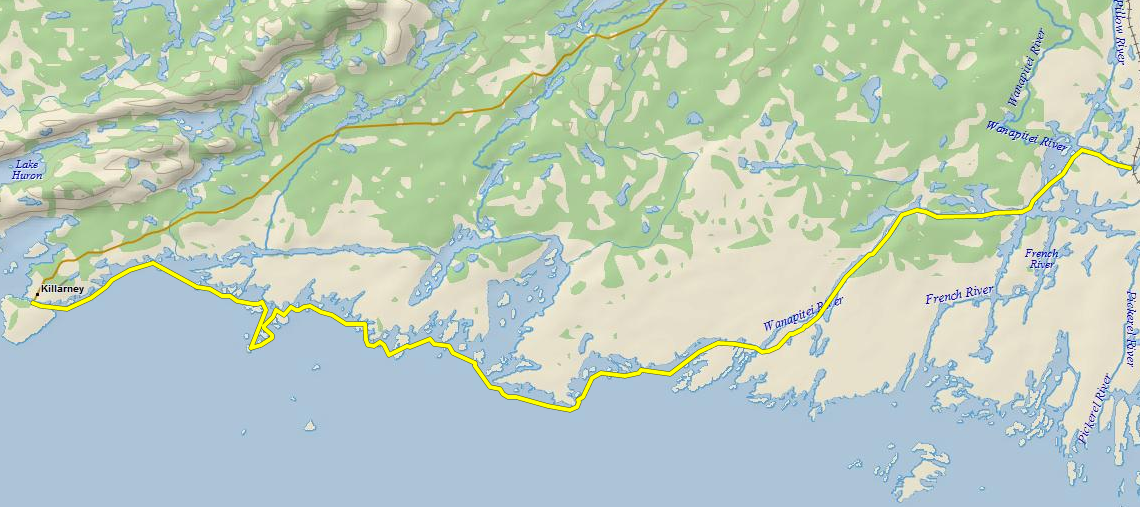
Our route from McBean Harbour, around Fox Island to Croker and the Benjamins. Download the GPX file here!


Thankfully, there are lots of options to launch kayaks up here: to the south, Little Current on Manitoulin Island; to the east, Whitefish Falls; and to the west, the town of Spanish. With heavy western winds on the forecast (as is tradition), we settled on launching along the north shore, at McBean Harbour, and venturing into a few of the central islands of the North Channel for a chill(y) long weekend.


The Trip

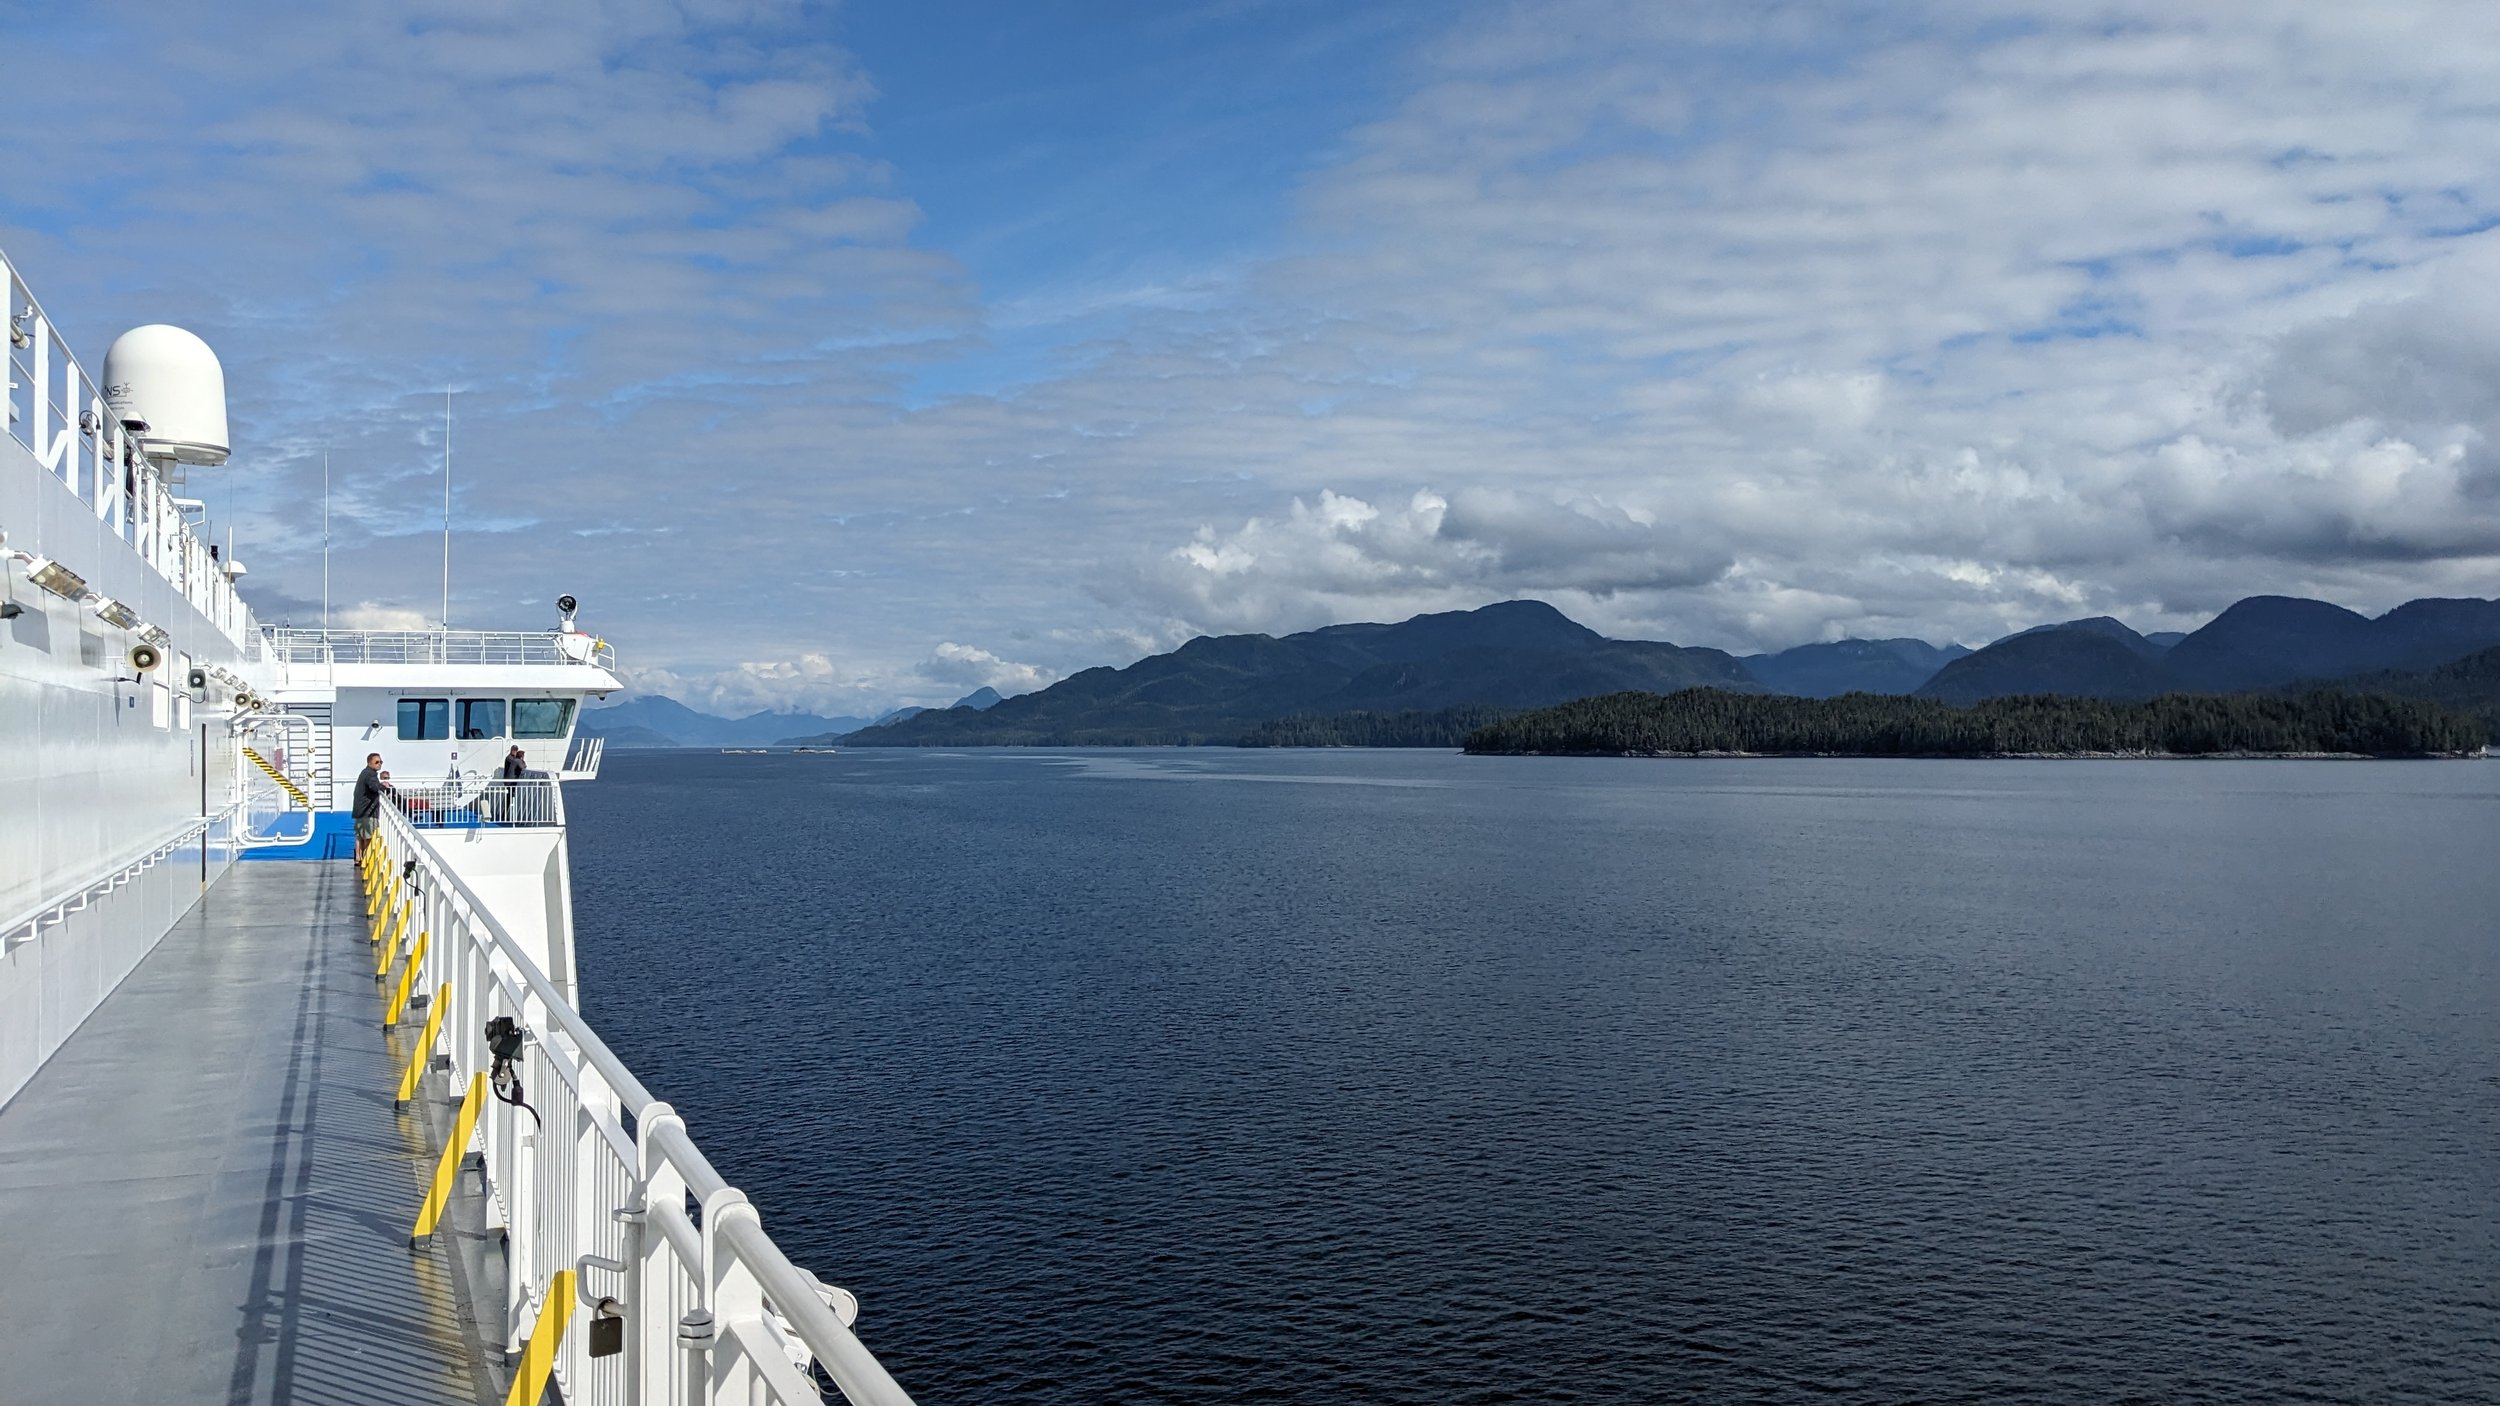
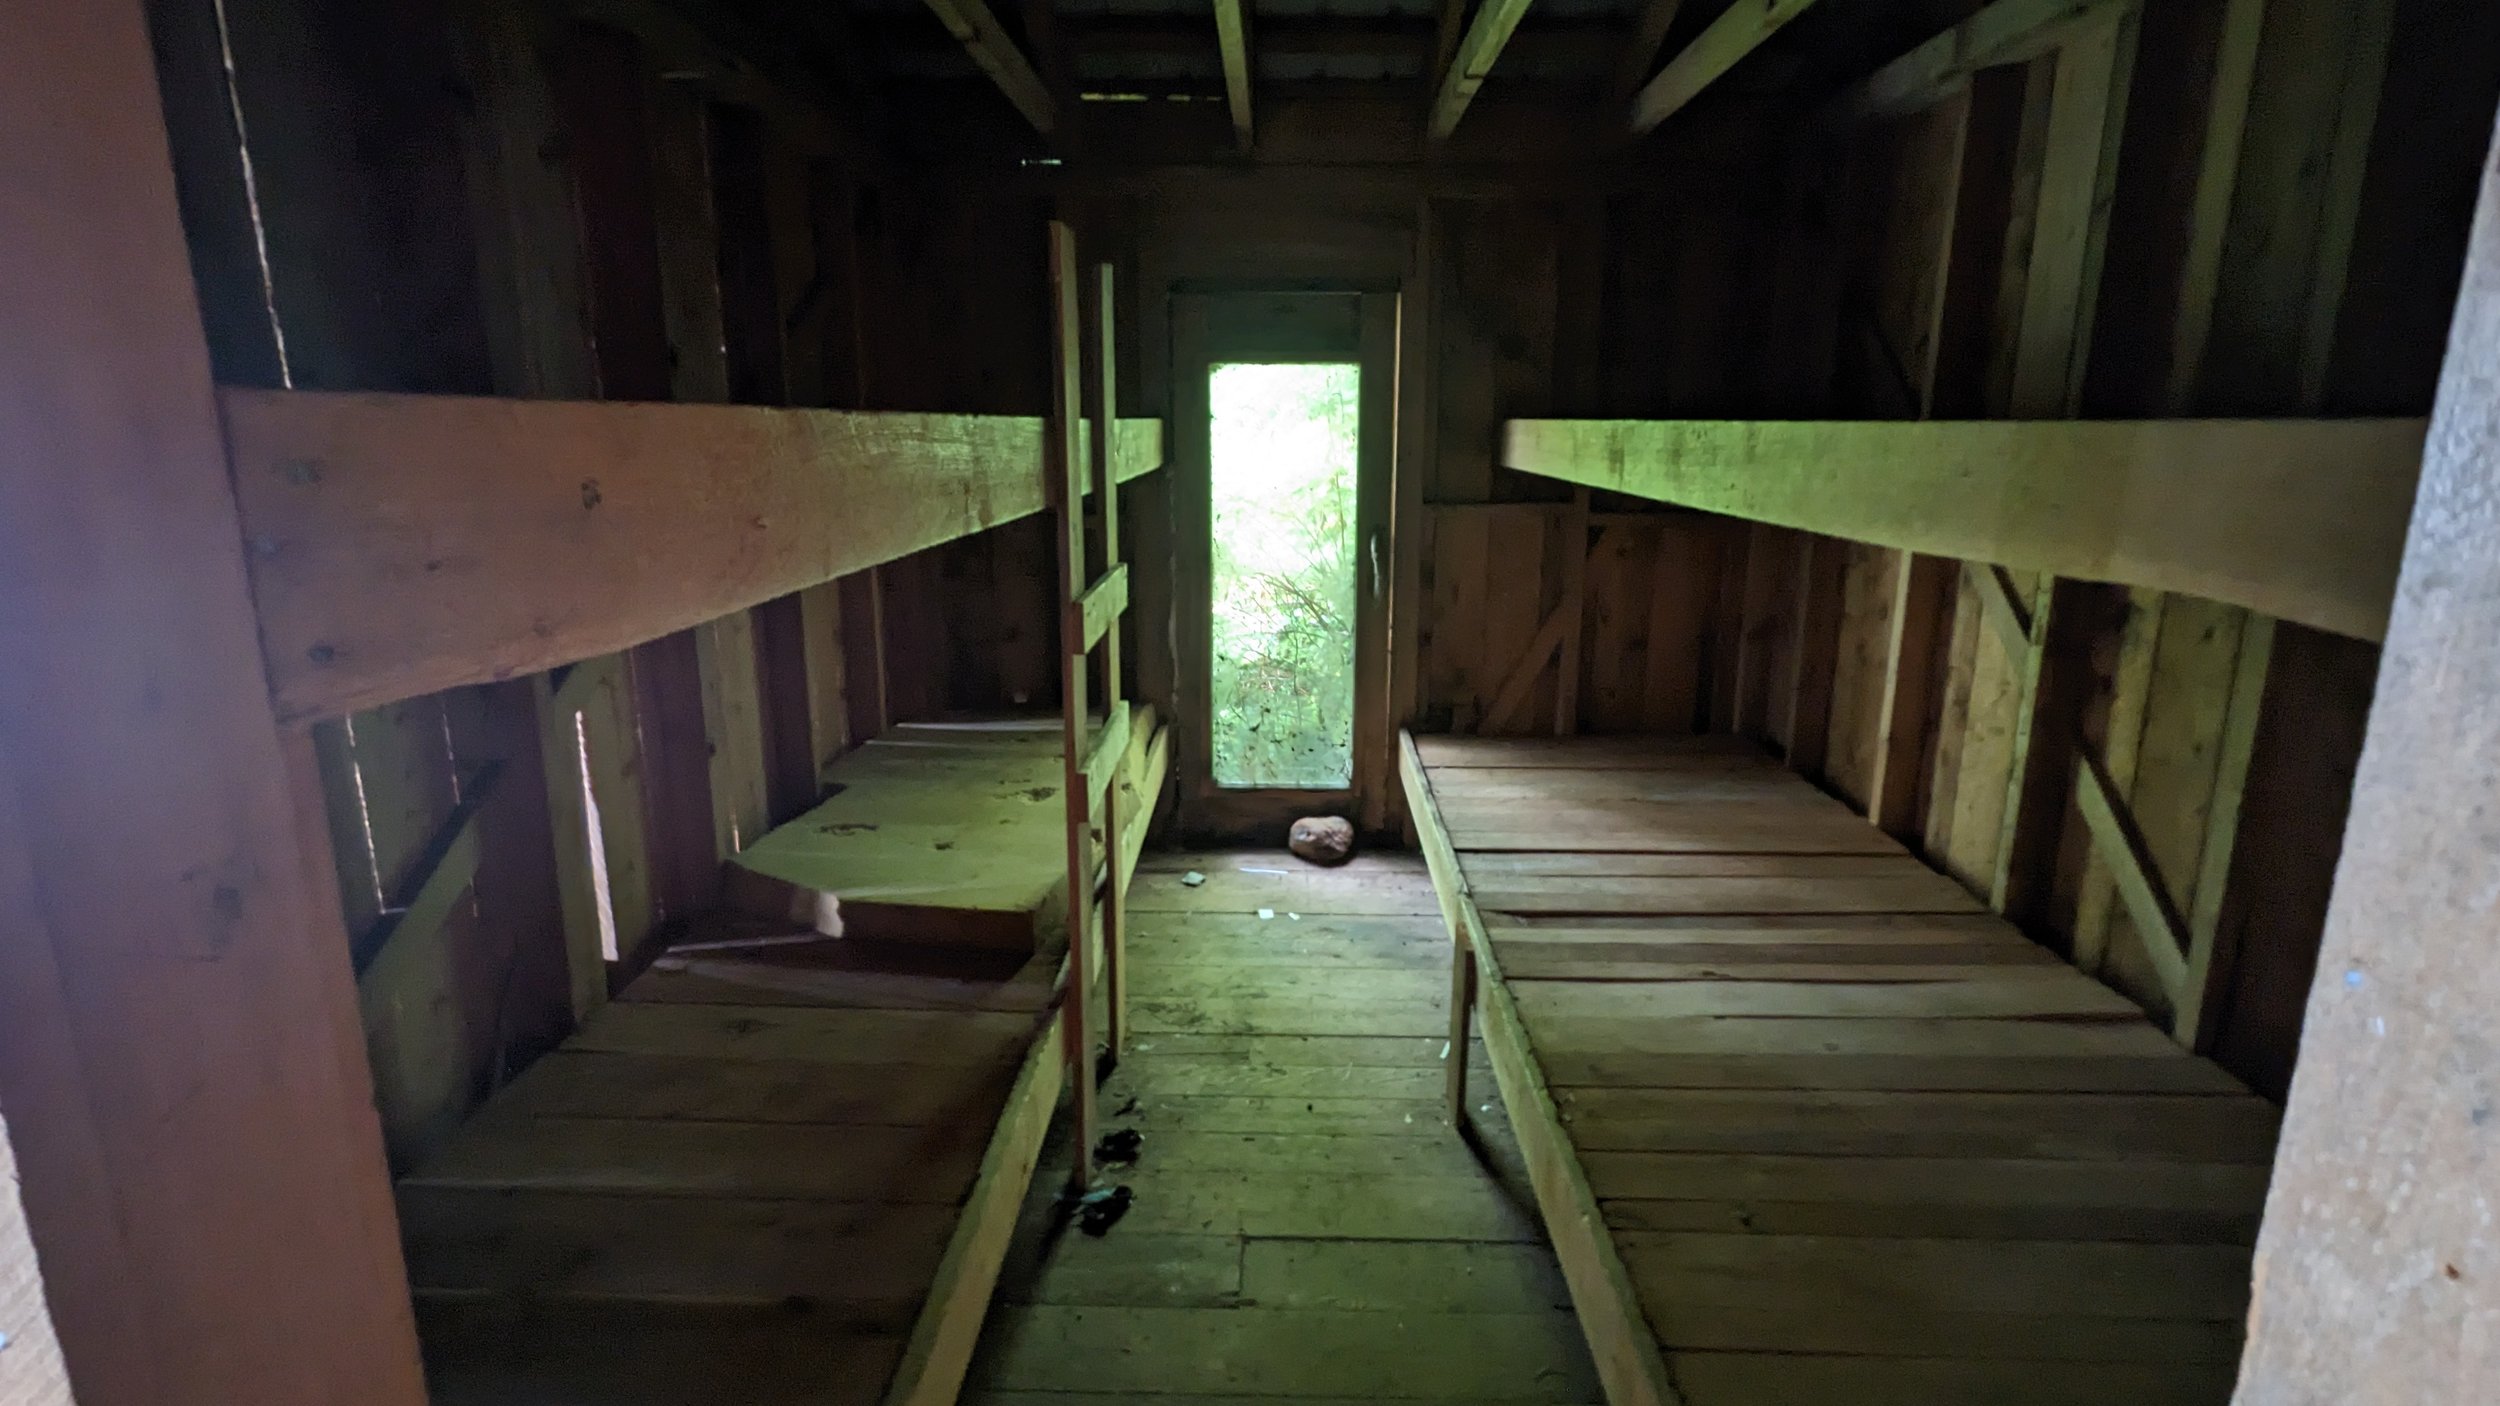
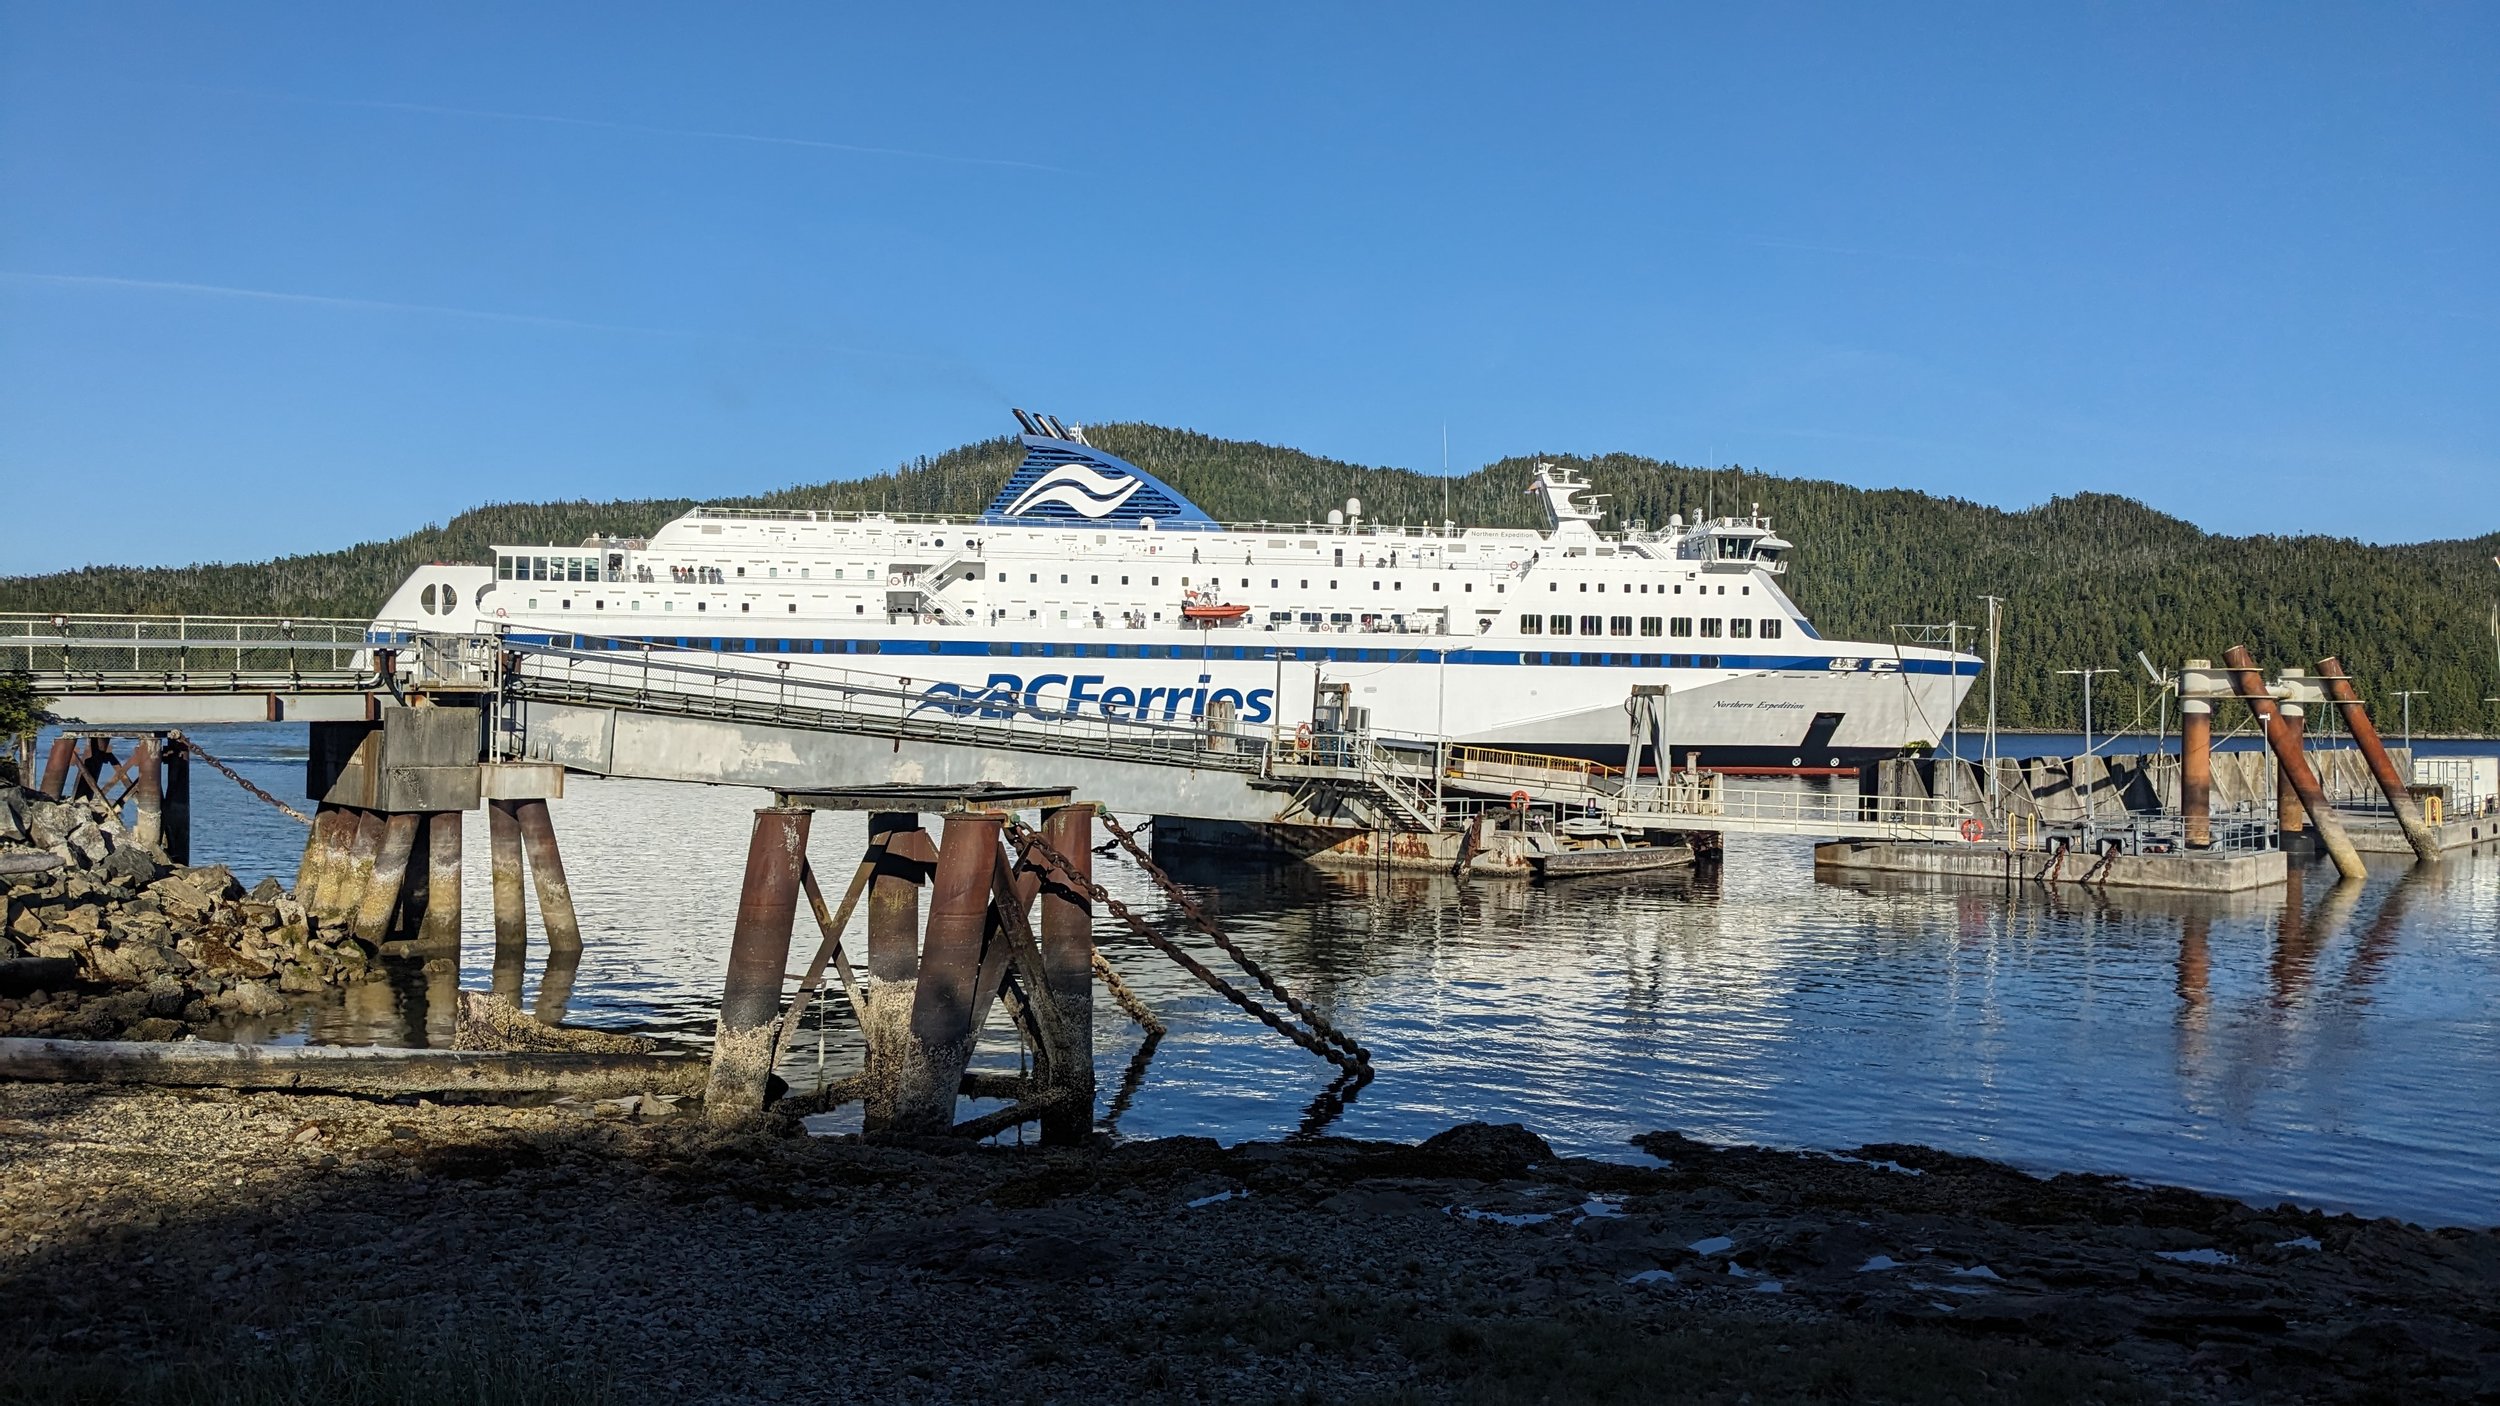
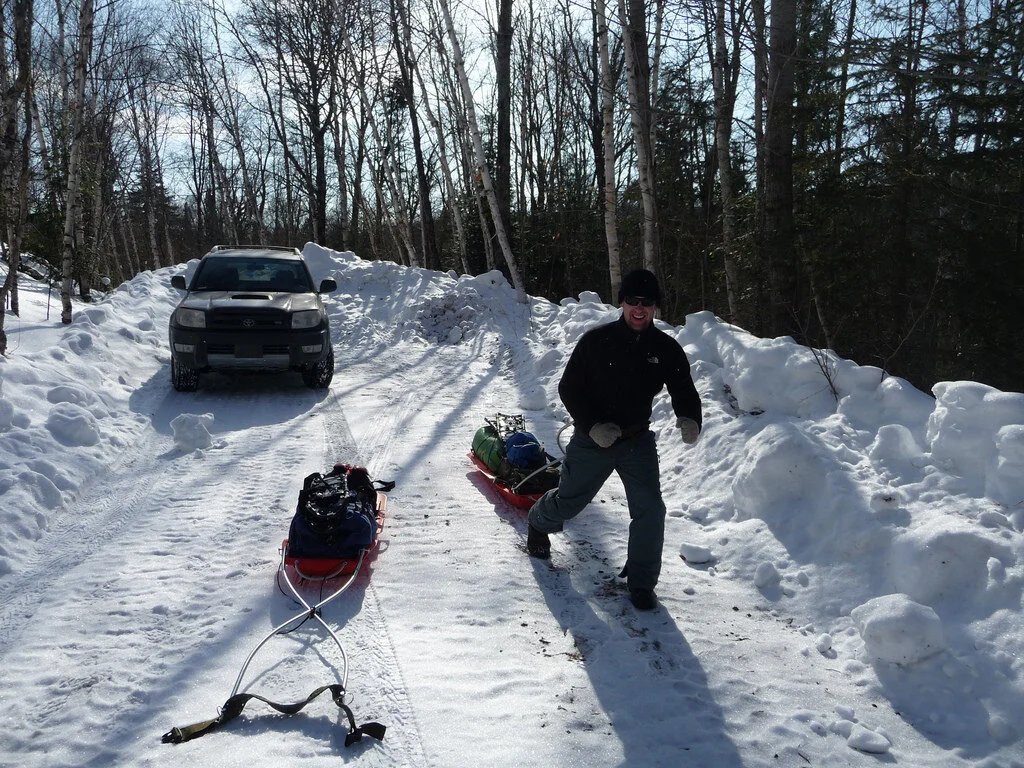
As with all of our adventures, this trip began with a long drive before getting to put our kayaks in the water. To cut some of the drive time, we opted to let the Chi-Cheemaun ferry usher us across to Manitoulin. 2024 marks the 50th Anniversary of the Chi-Cheemaun, and the ship was full of artifacts highlighting the rich history of ferry travel along the Great Lakes.

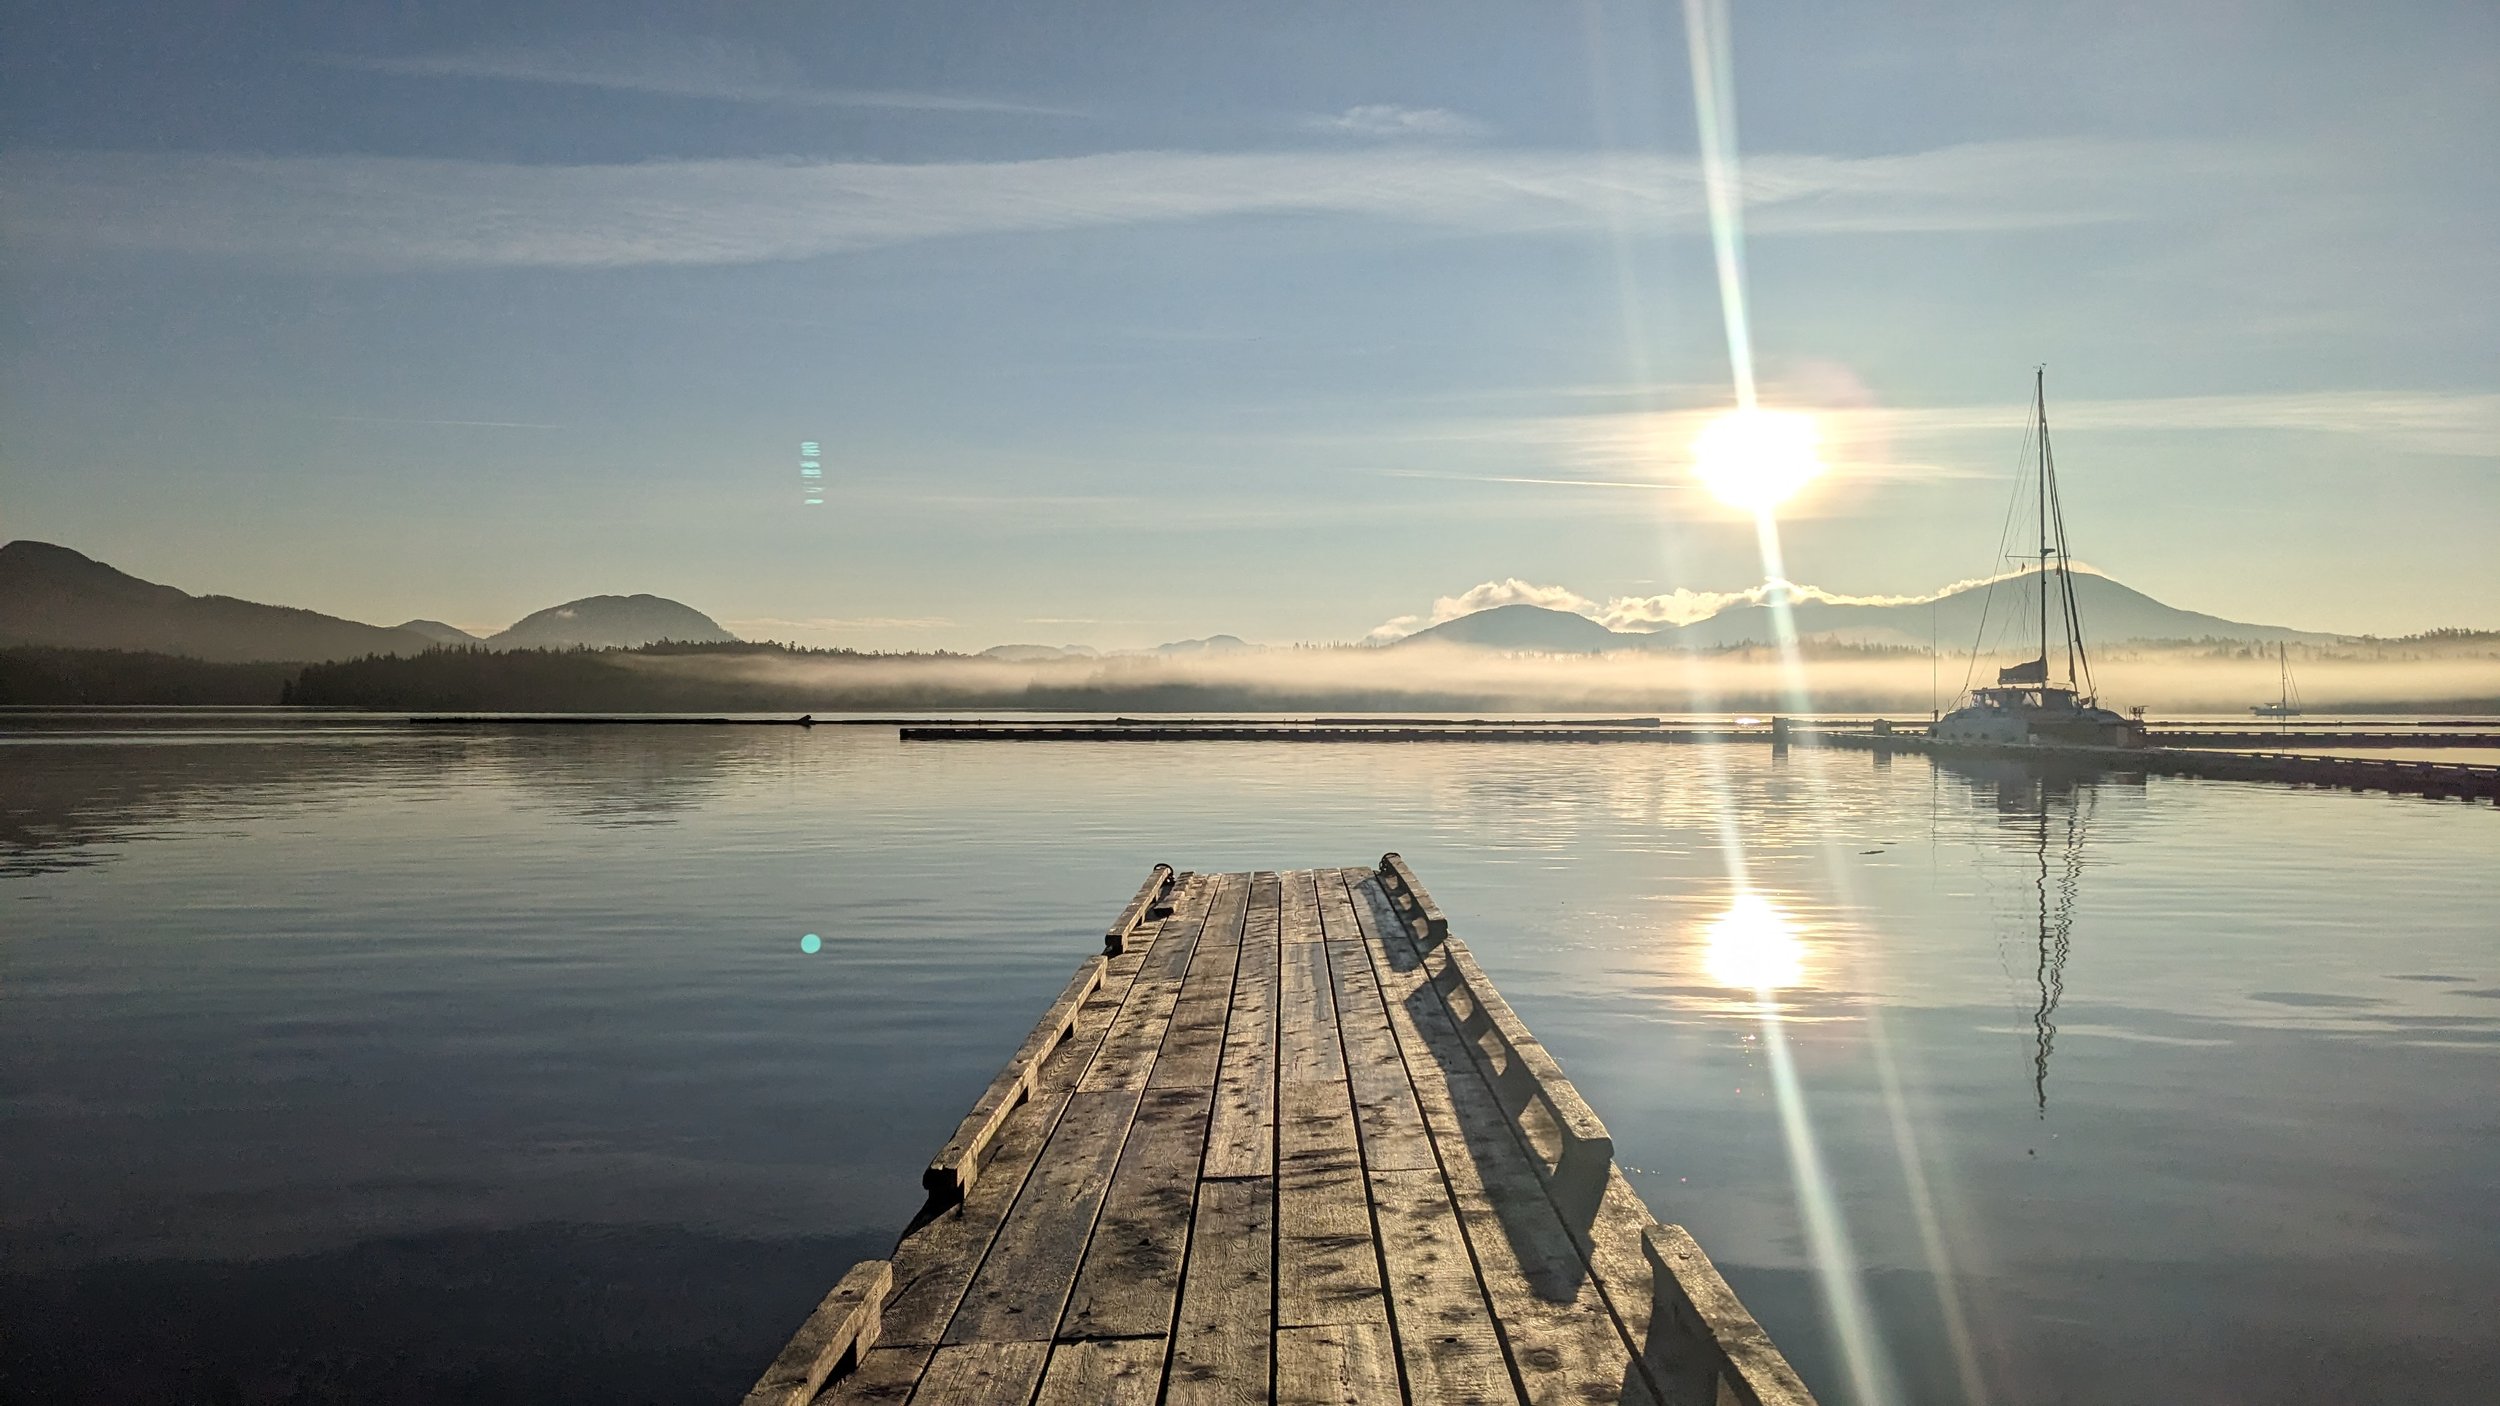
We soaked in the sunrise topside before landing in South Baymouth and finishing the last leg of our drive to McBean Harbour.

BC Ferries eat your heart out!

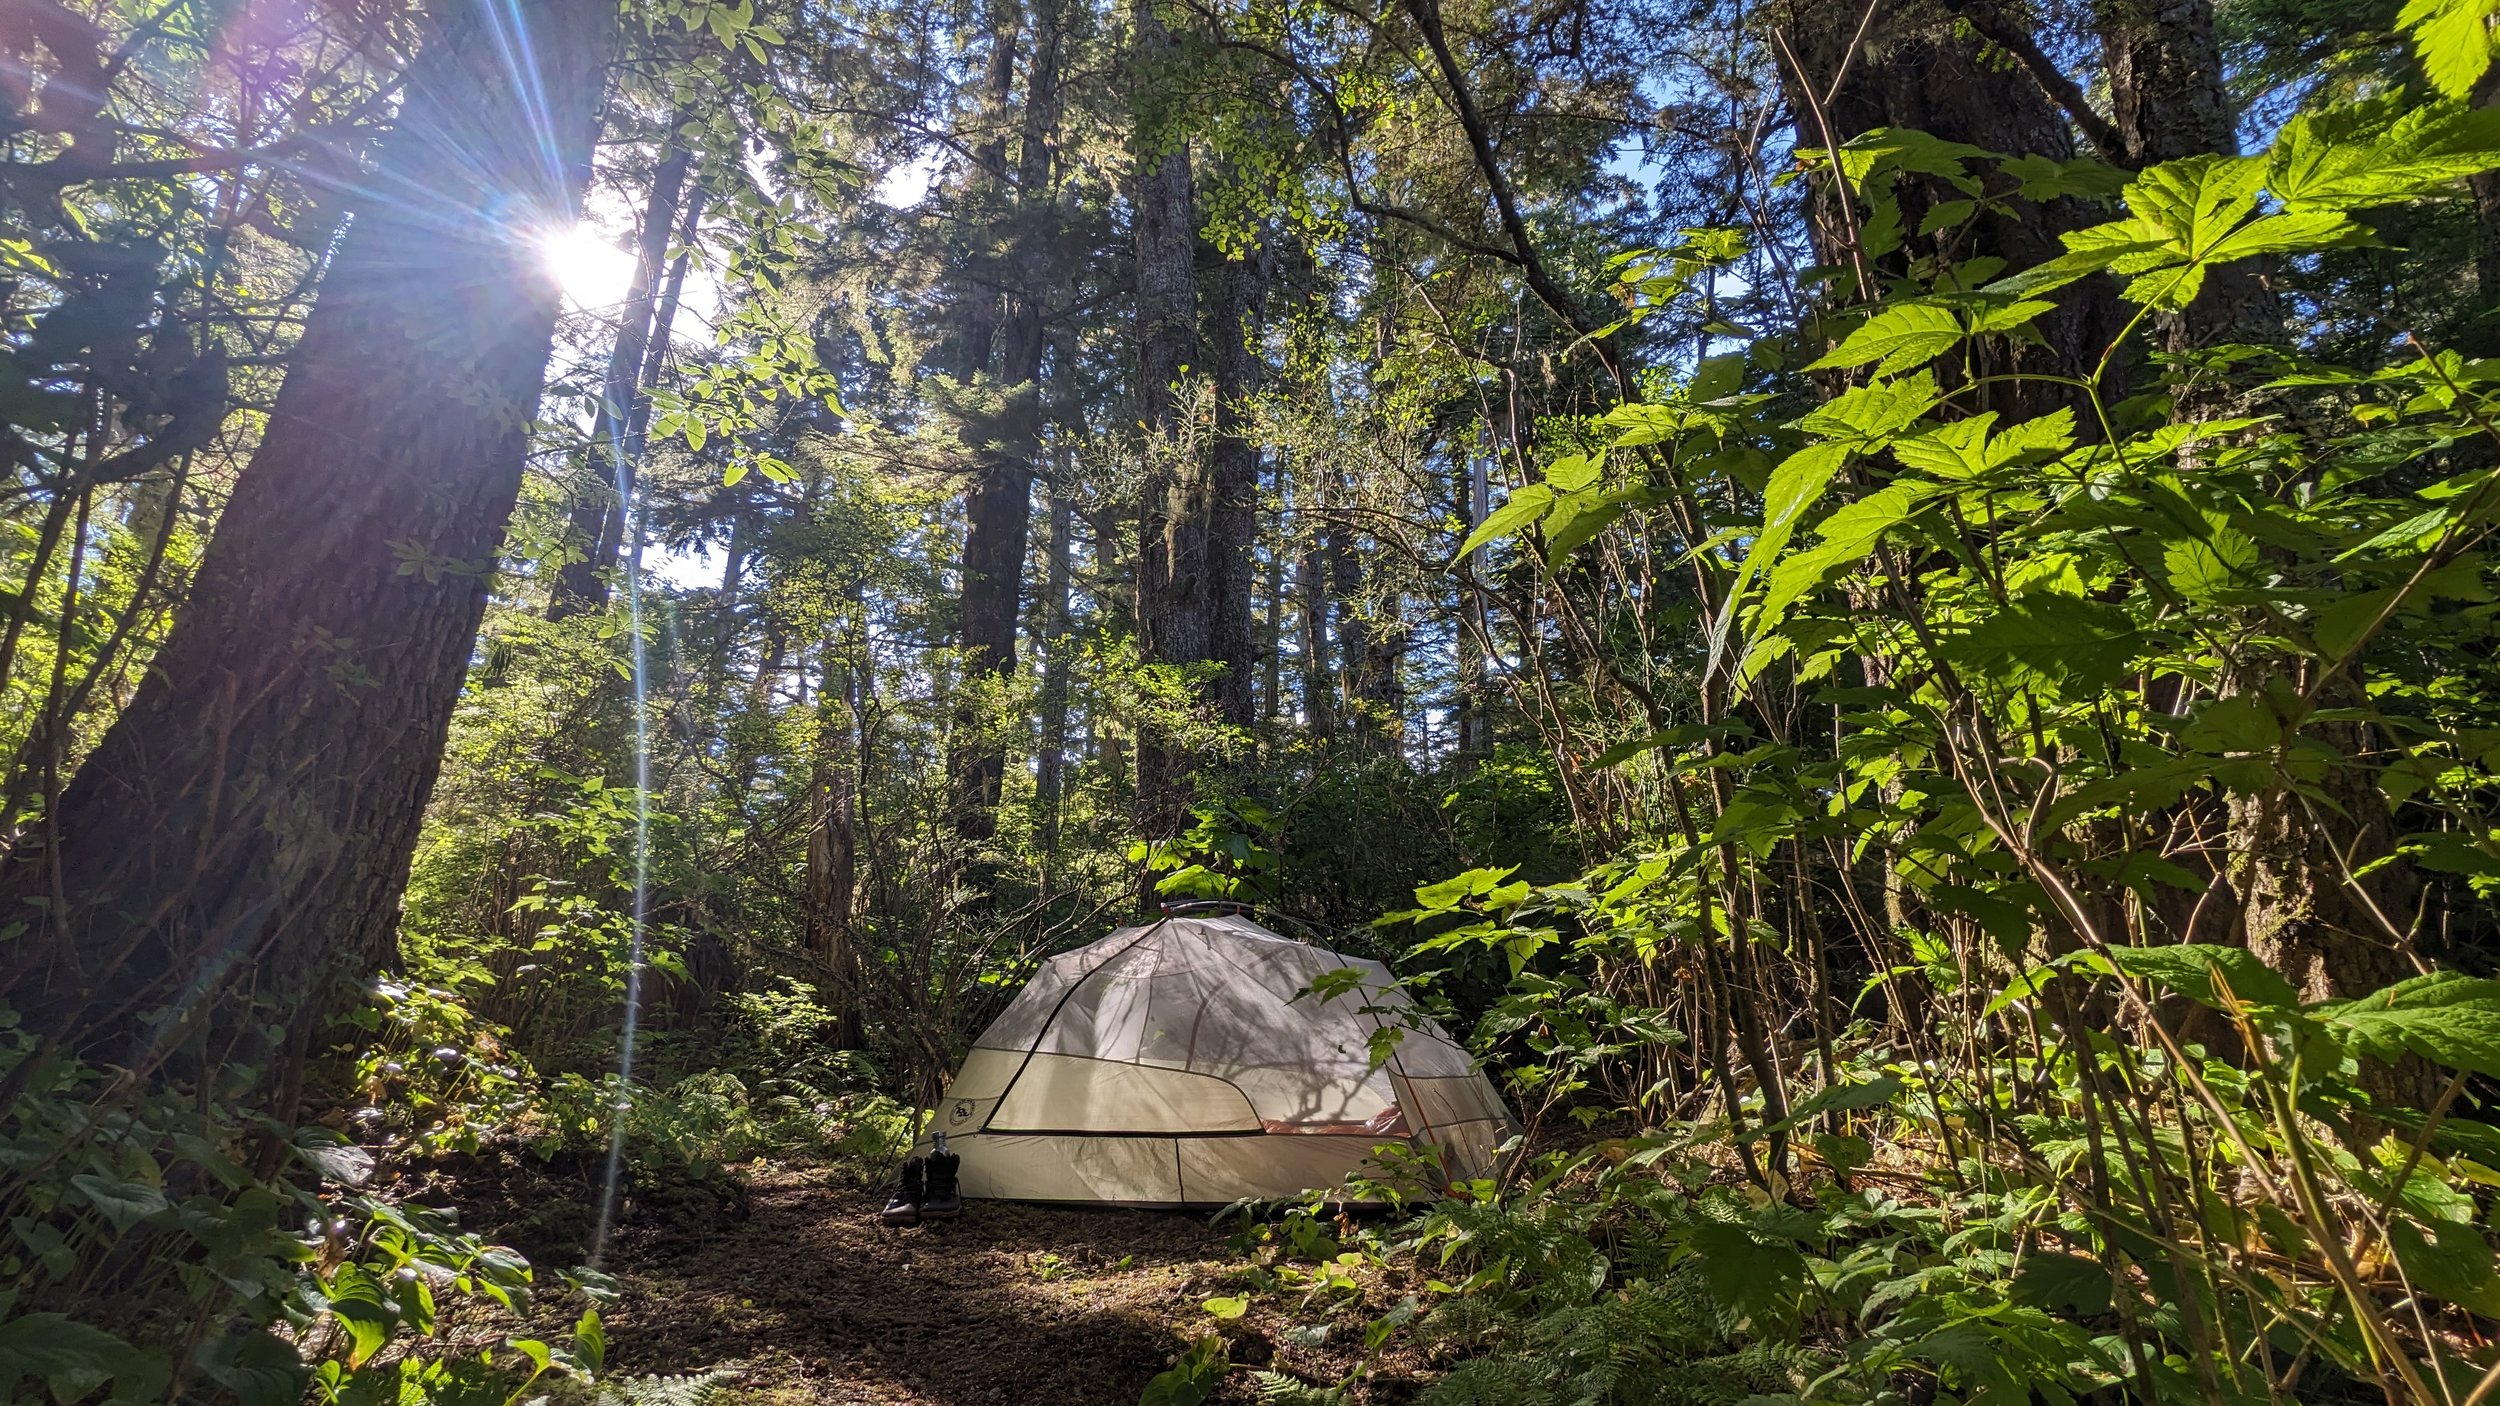
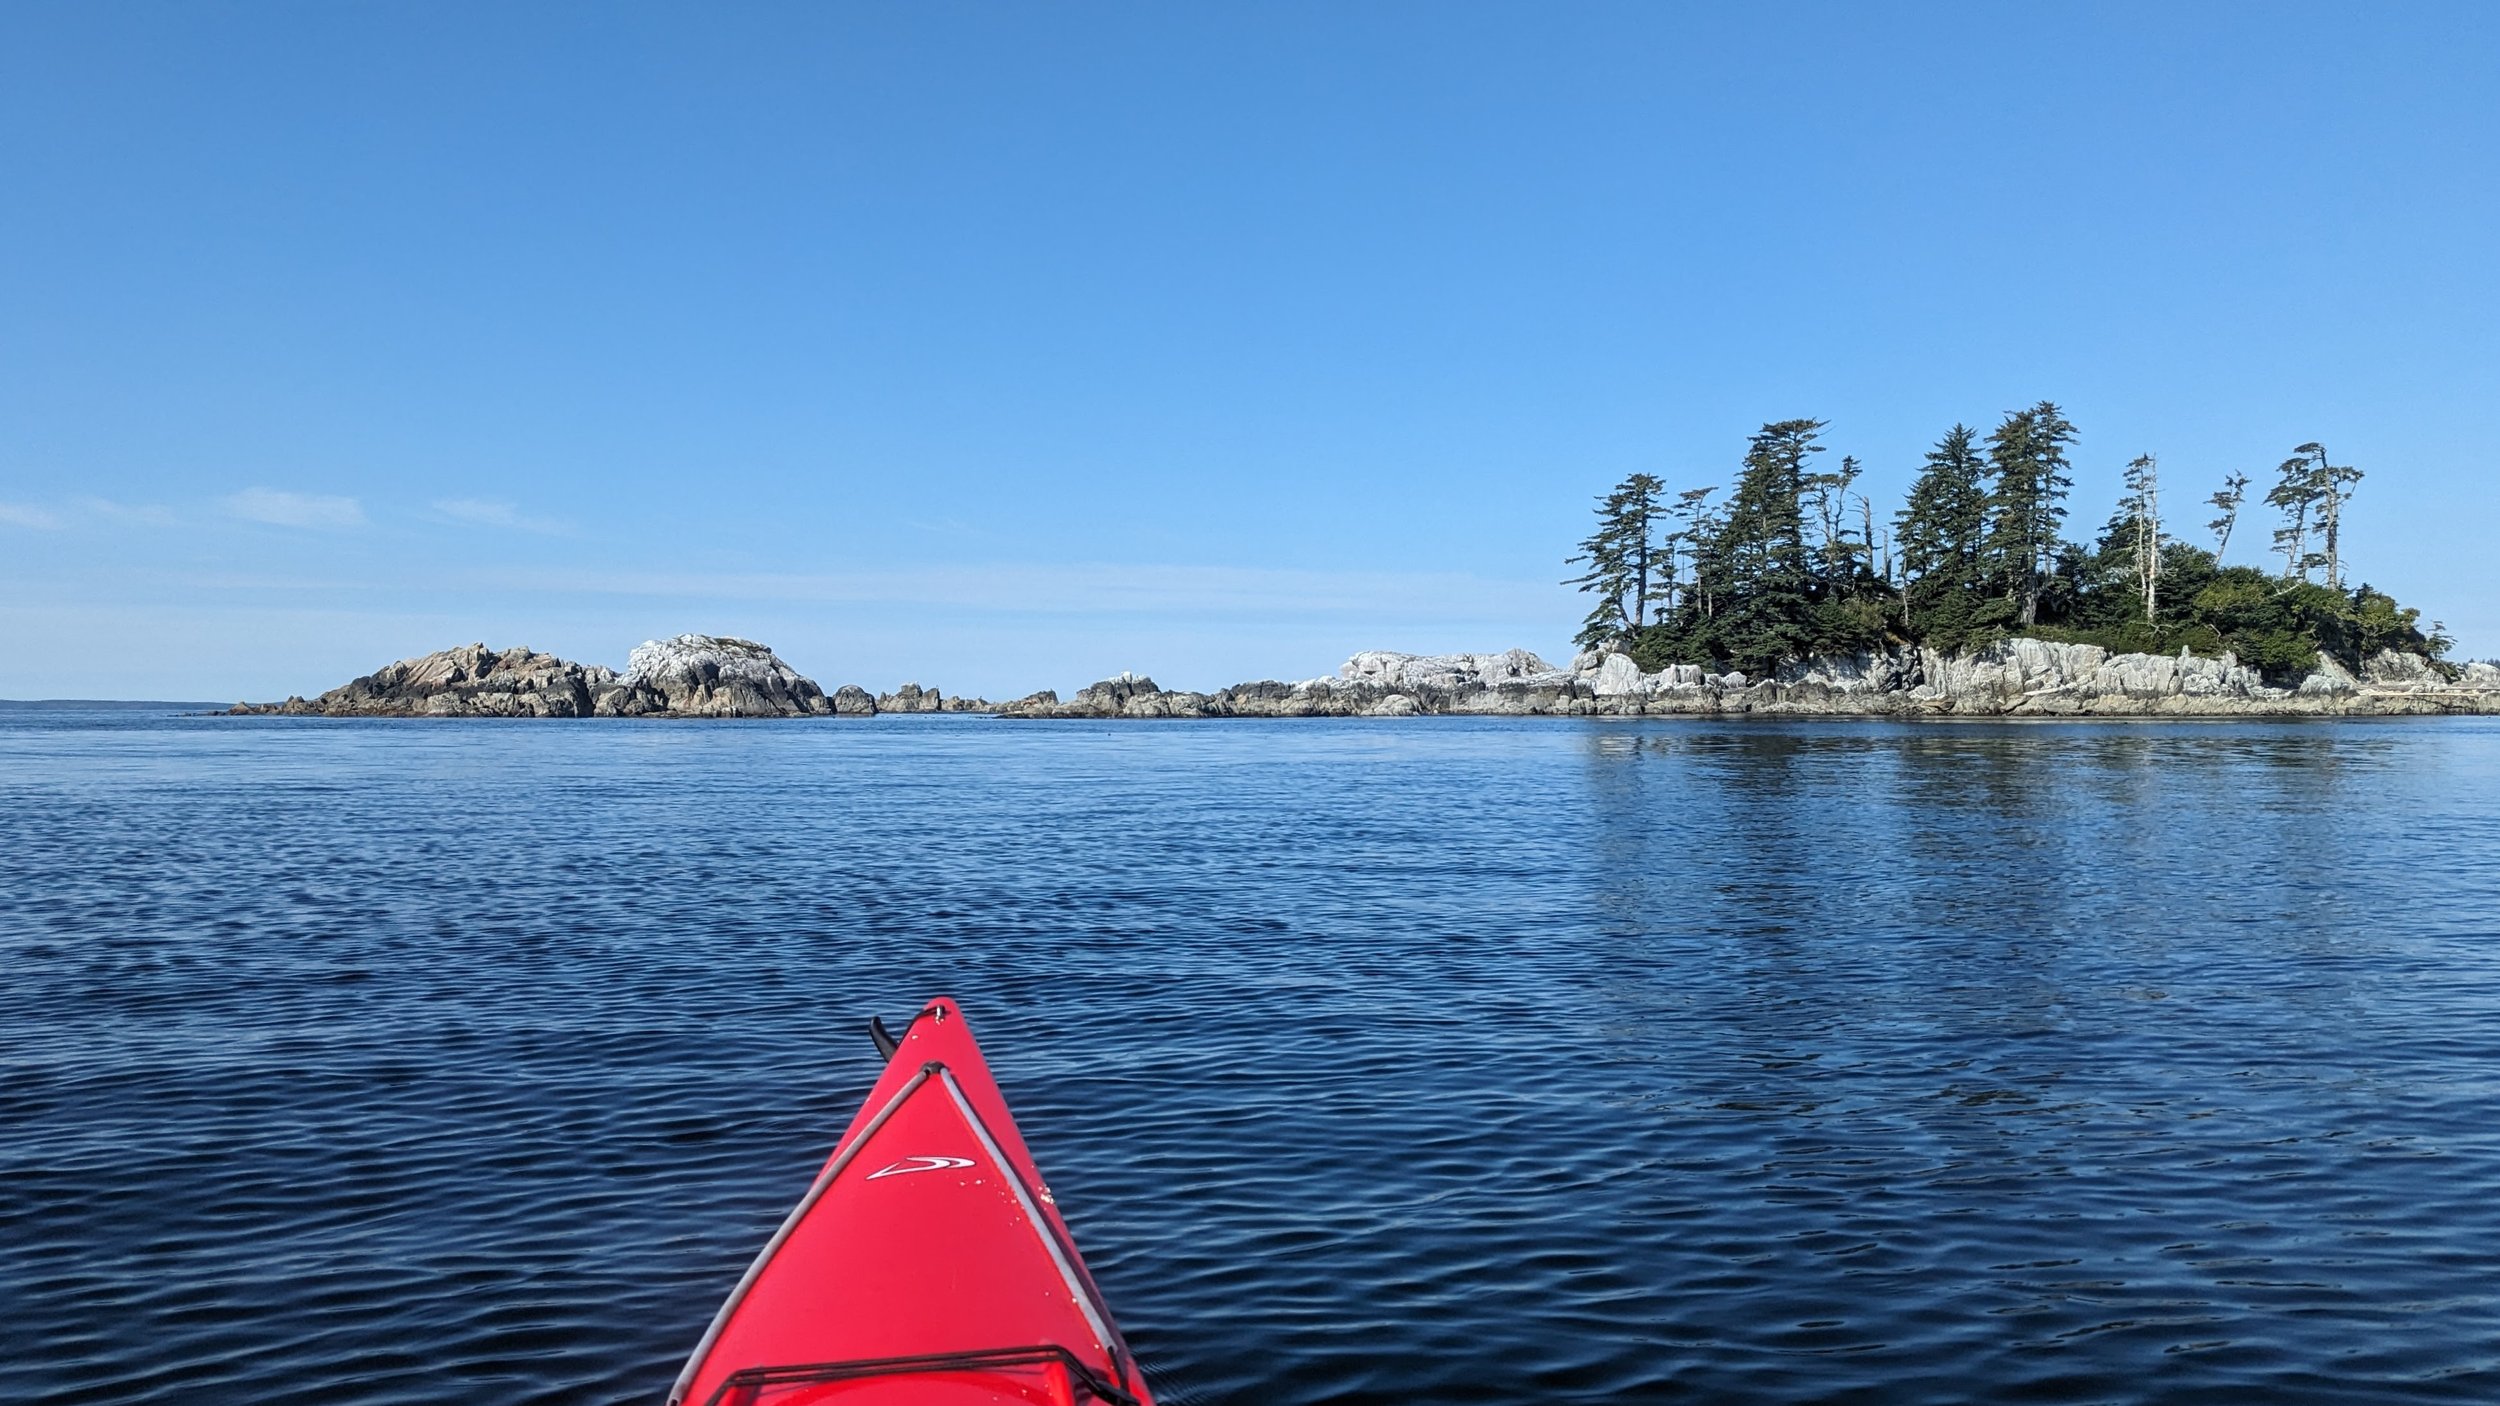
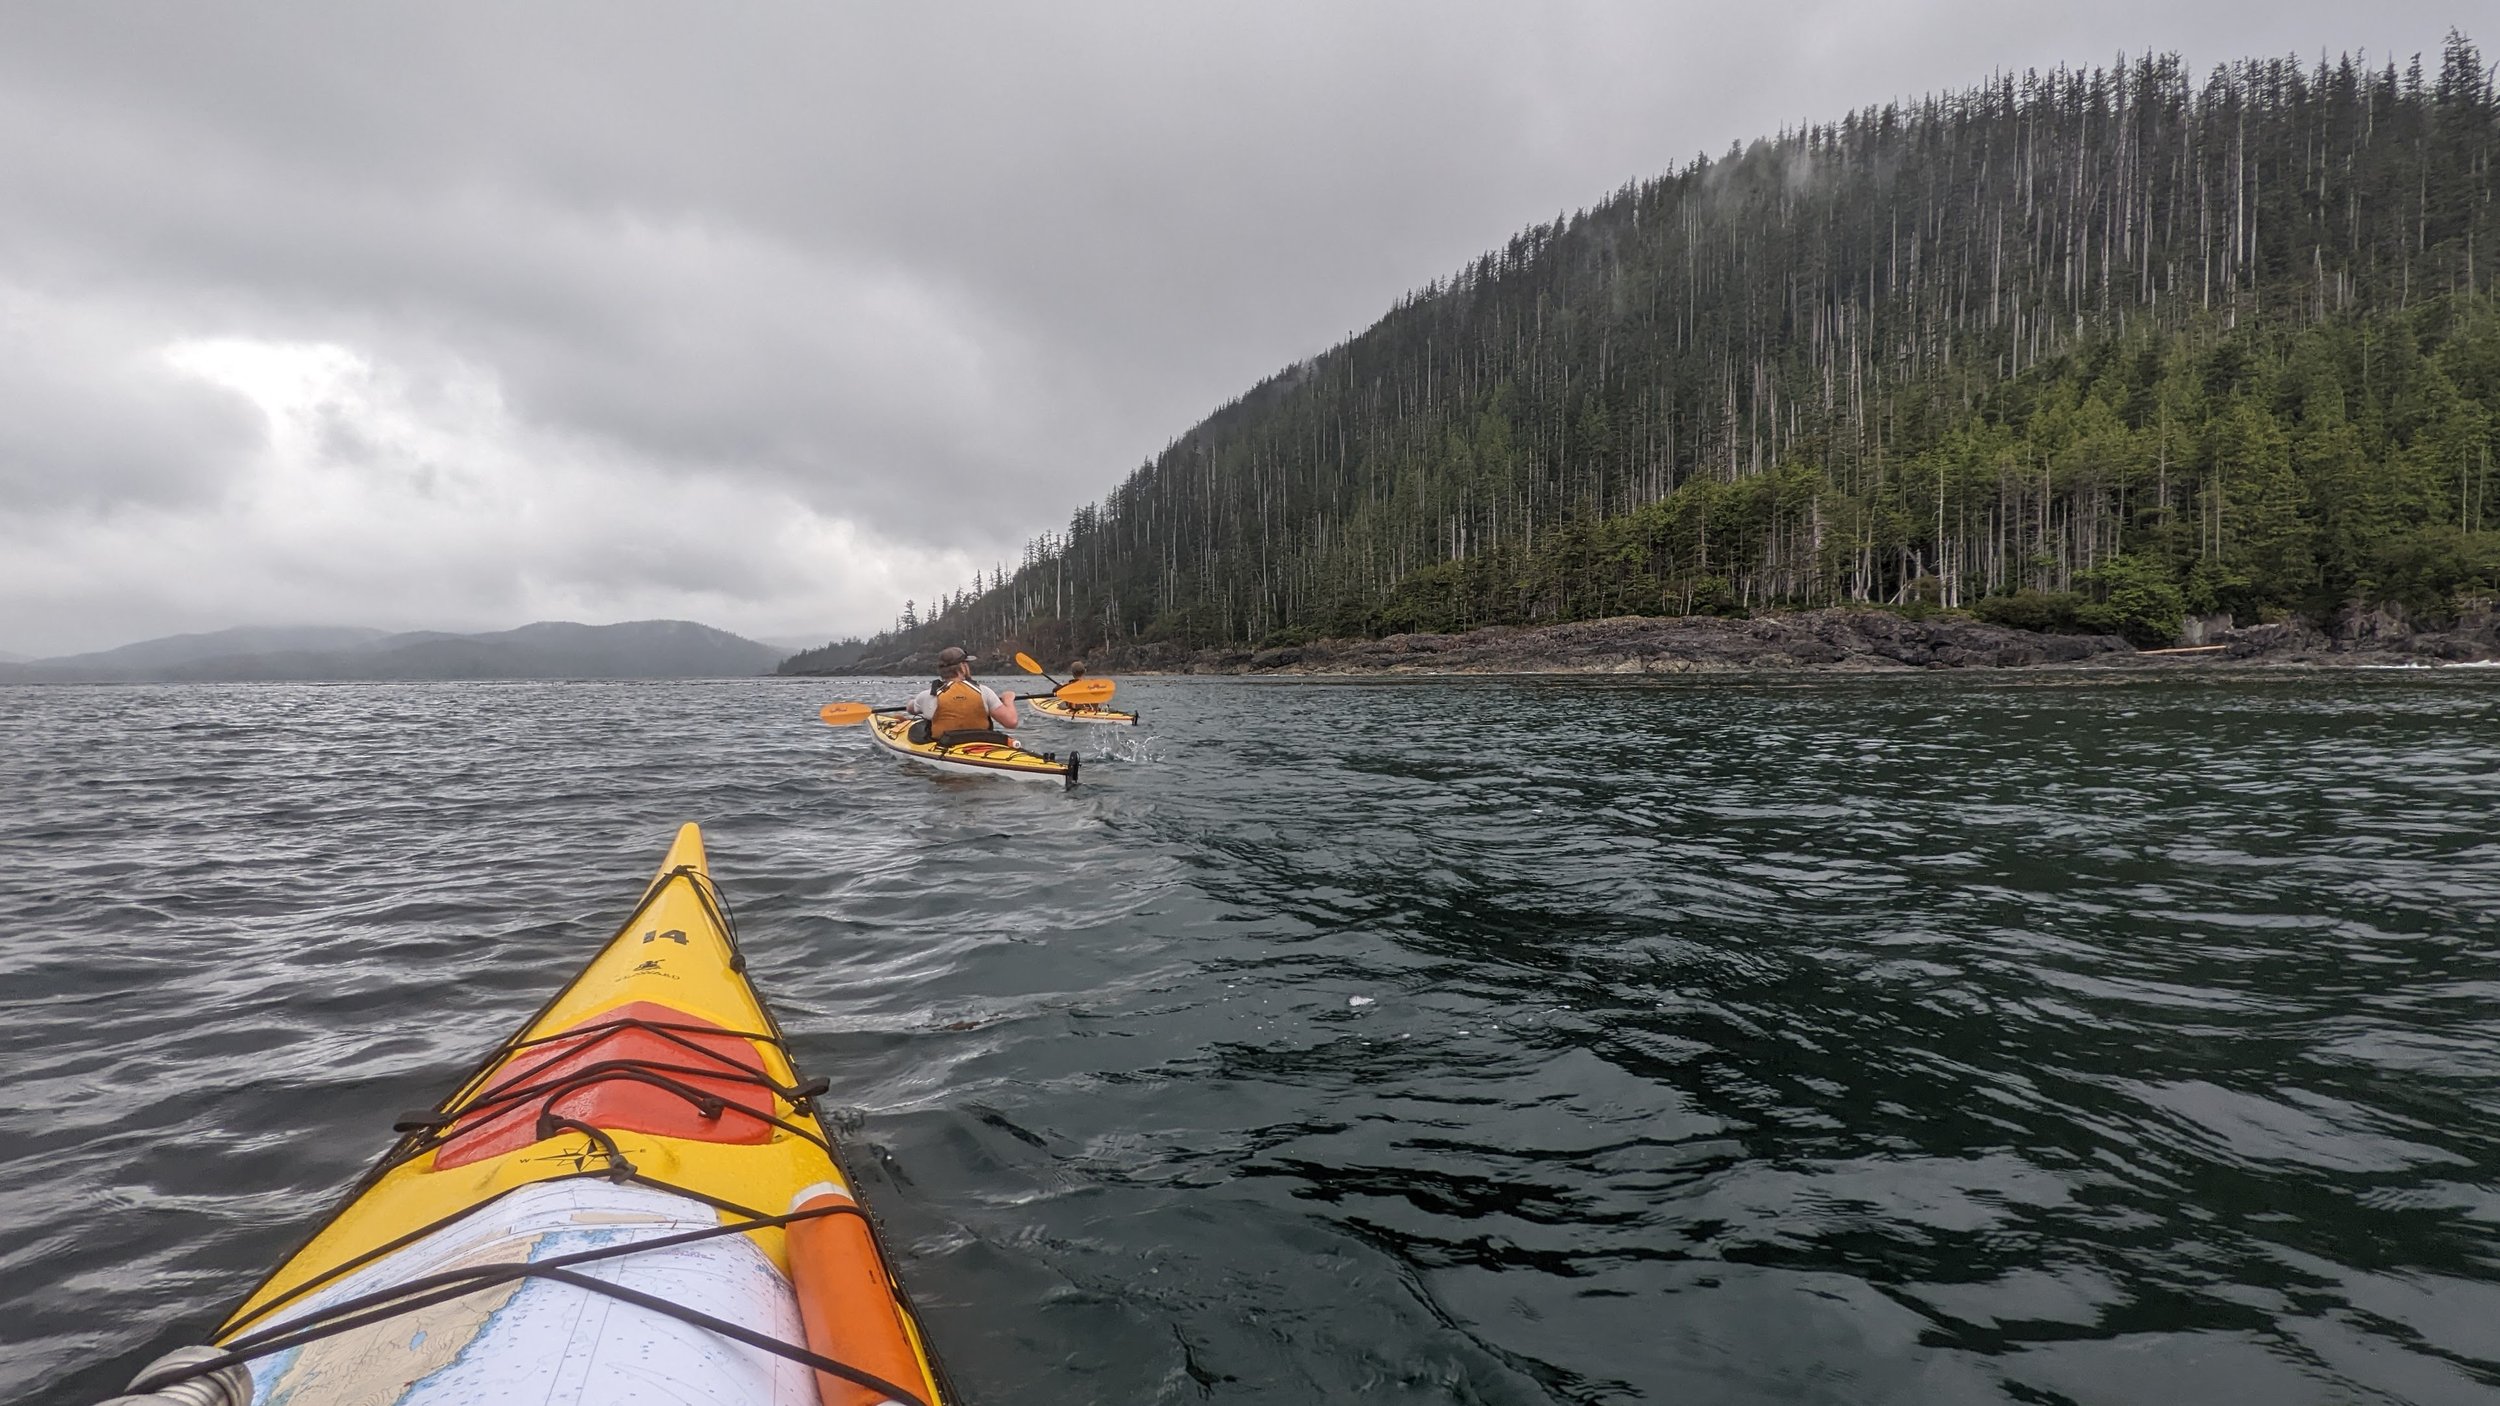
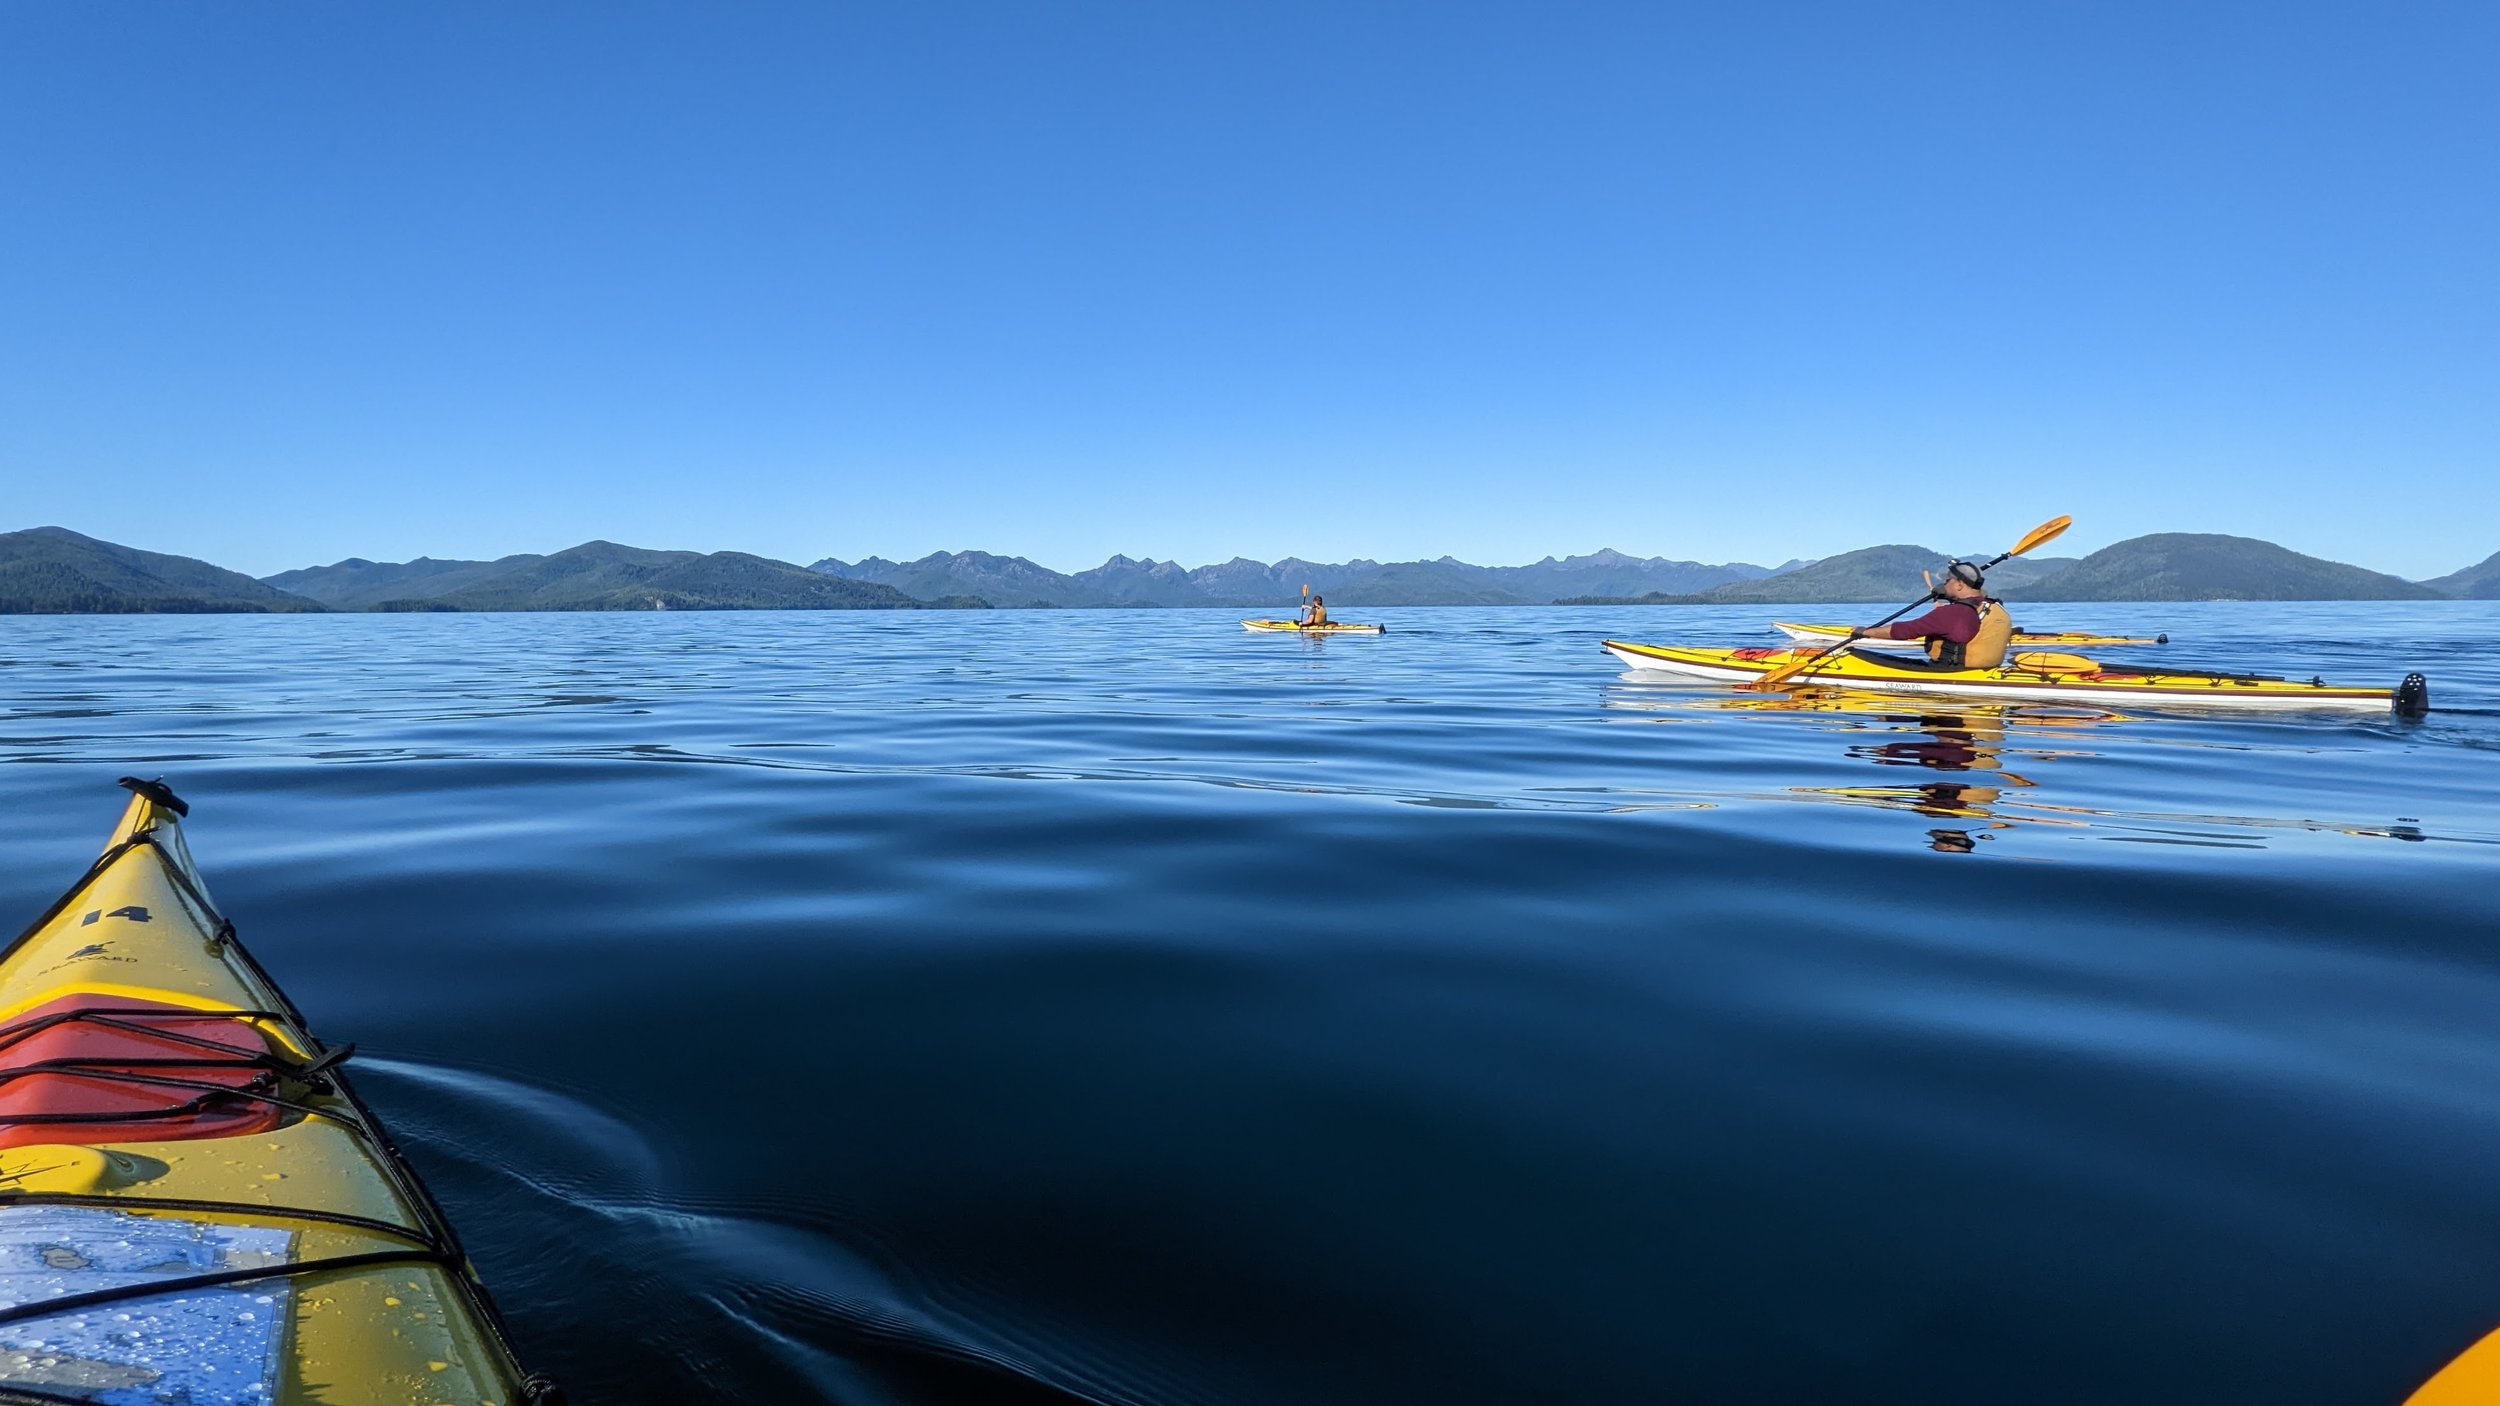
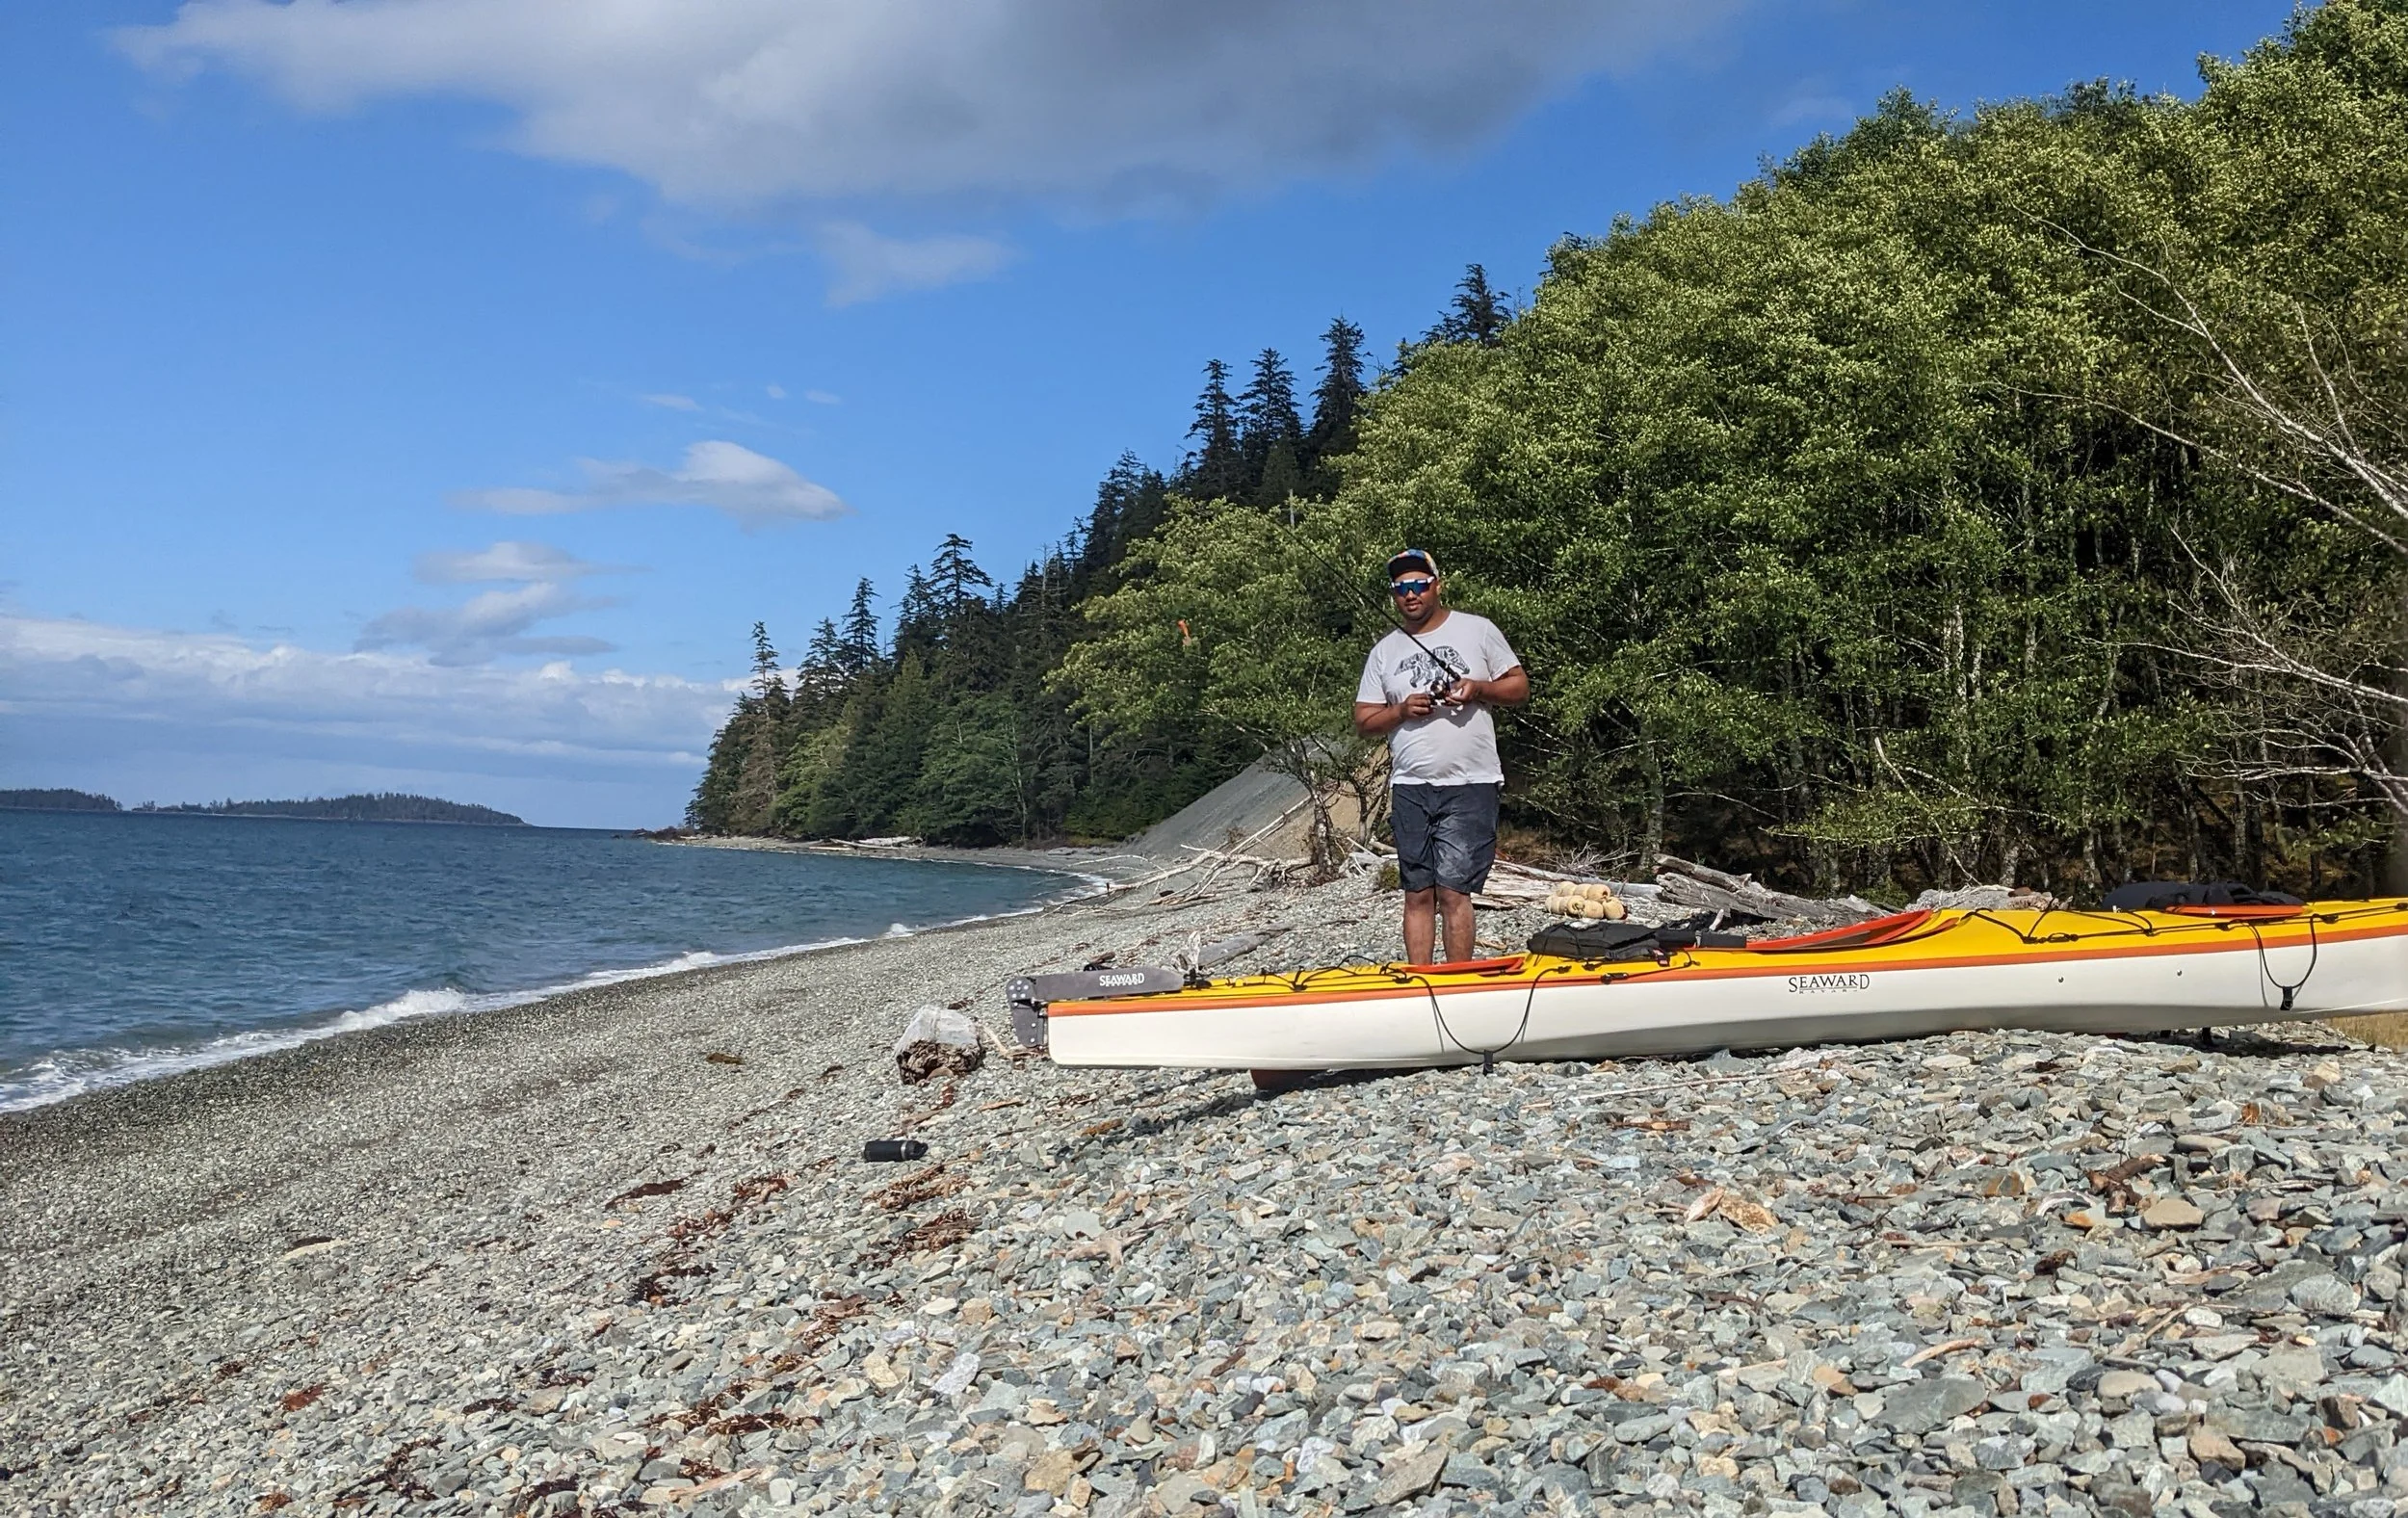
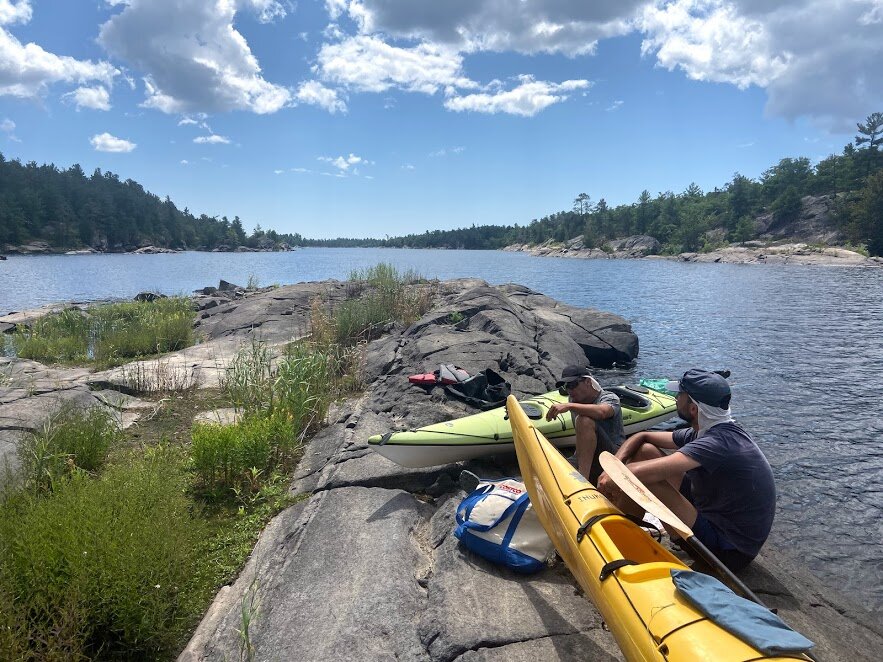
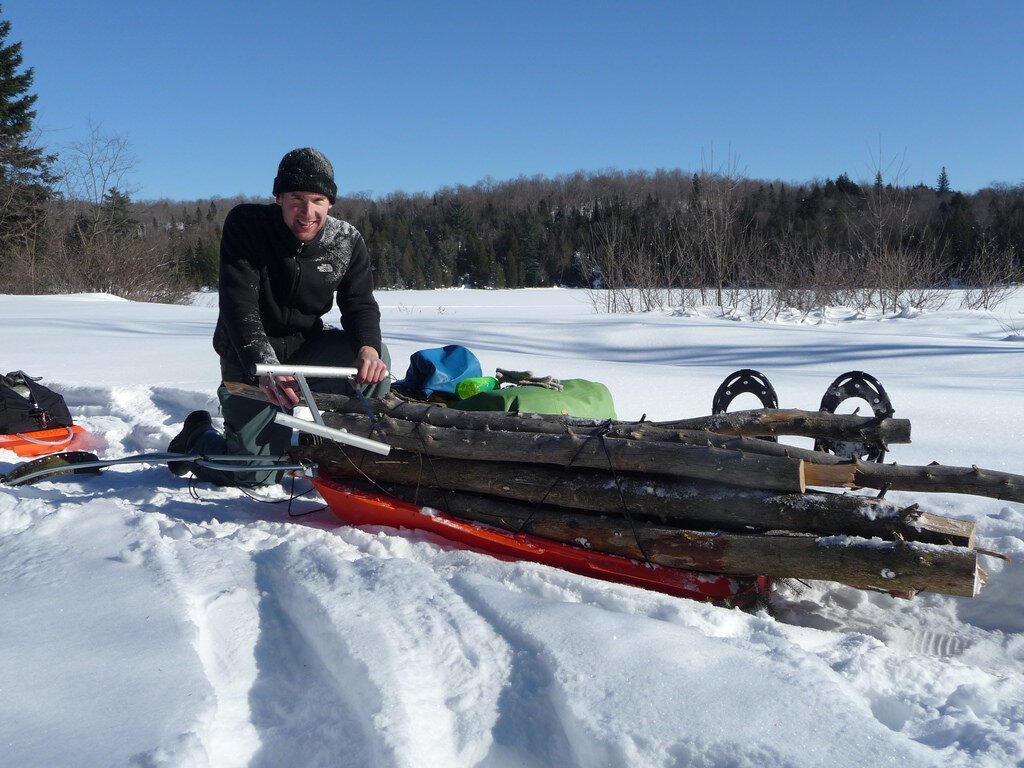
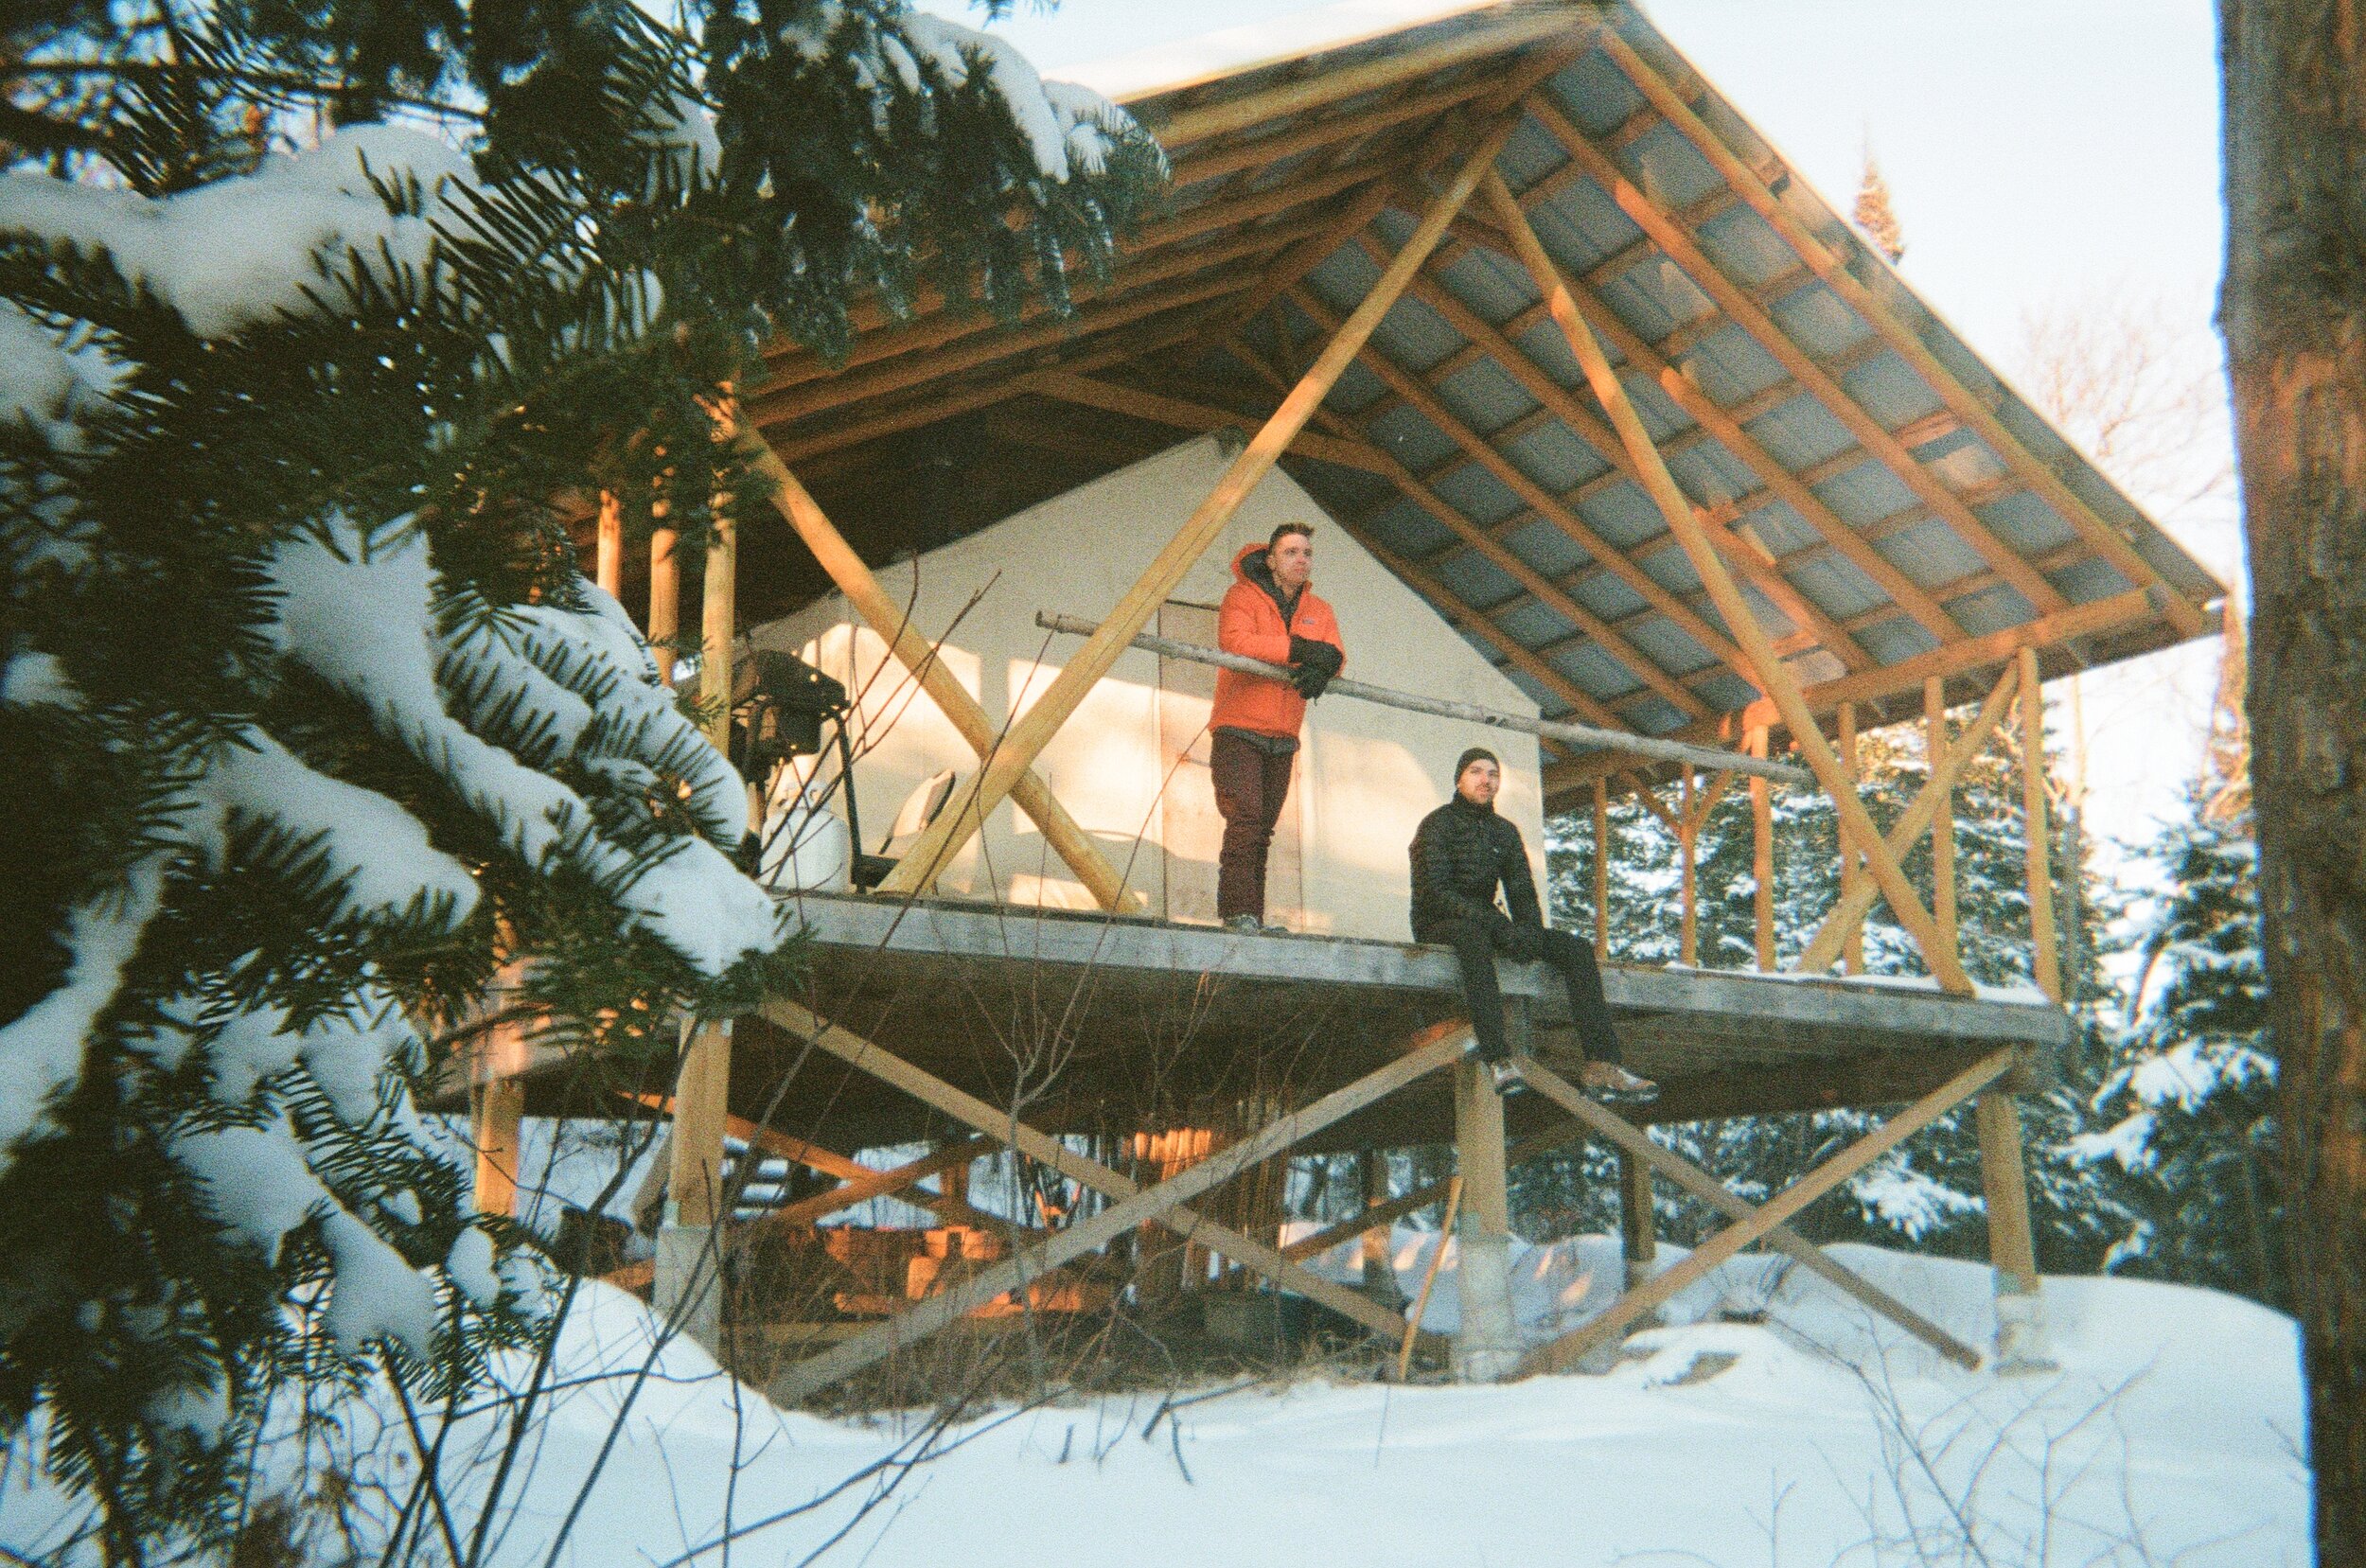
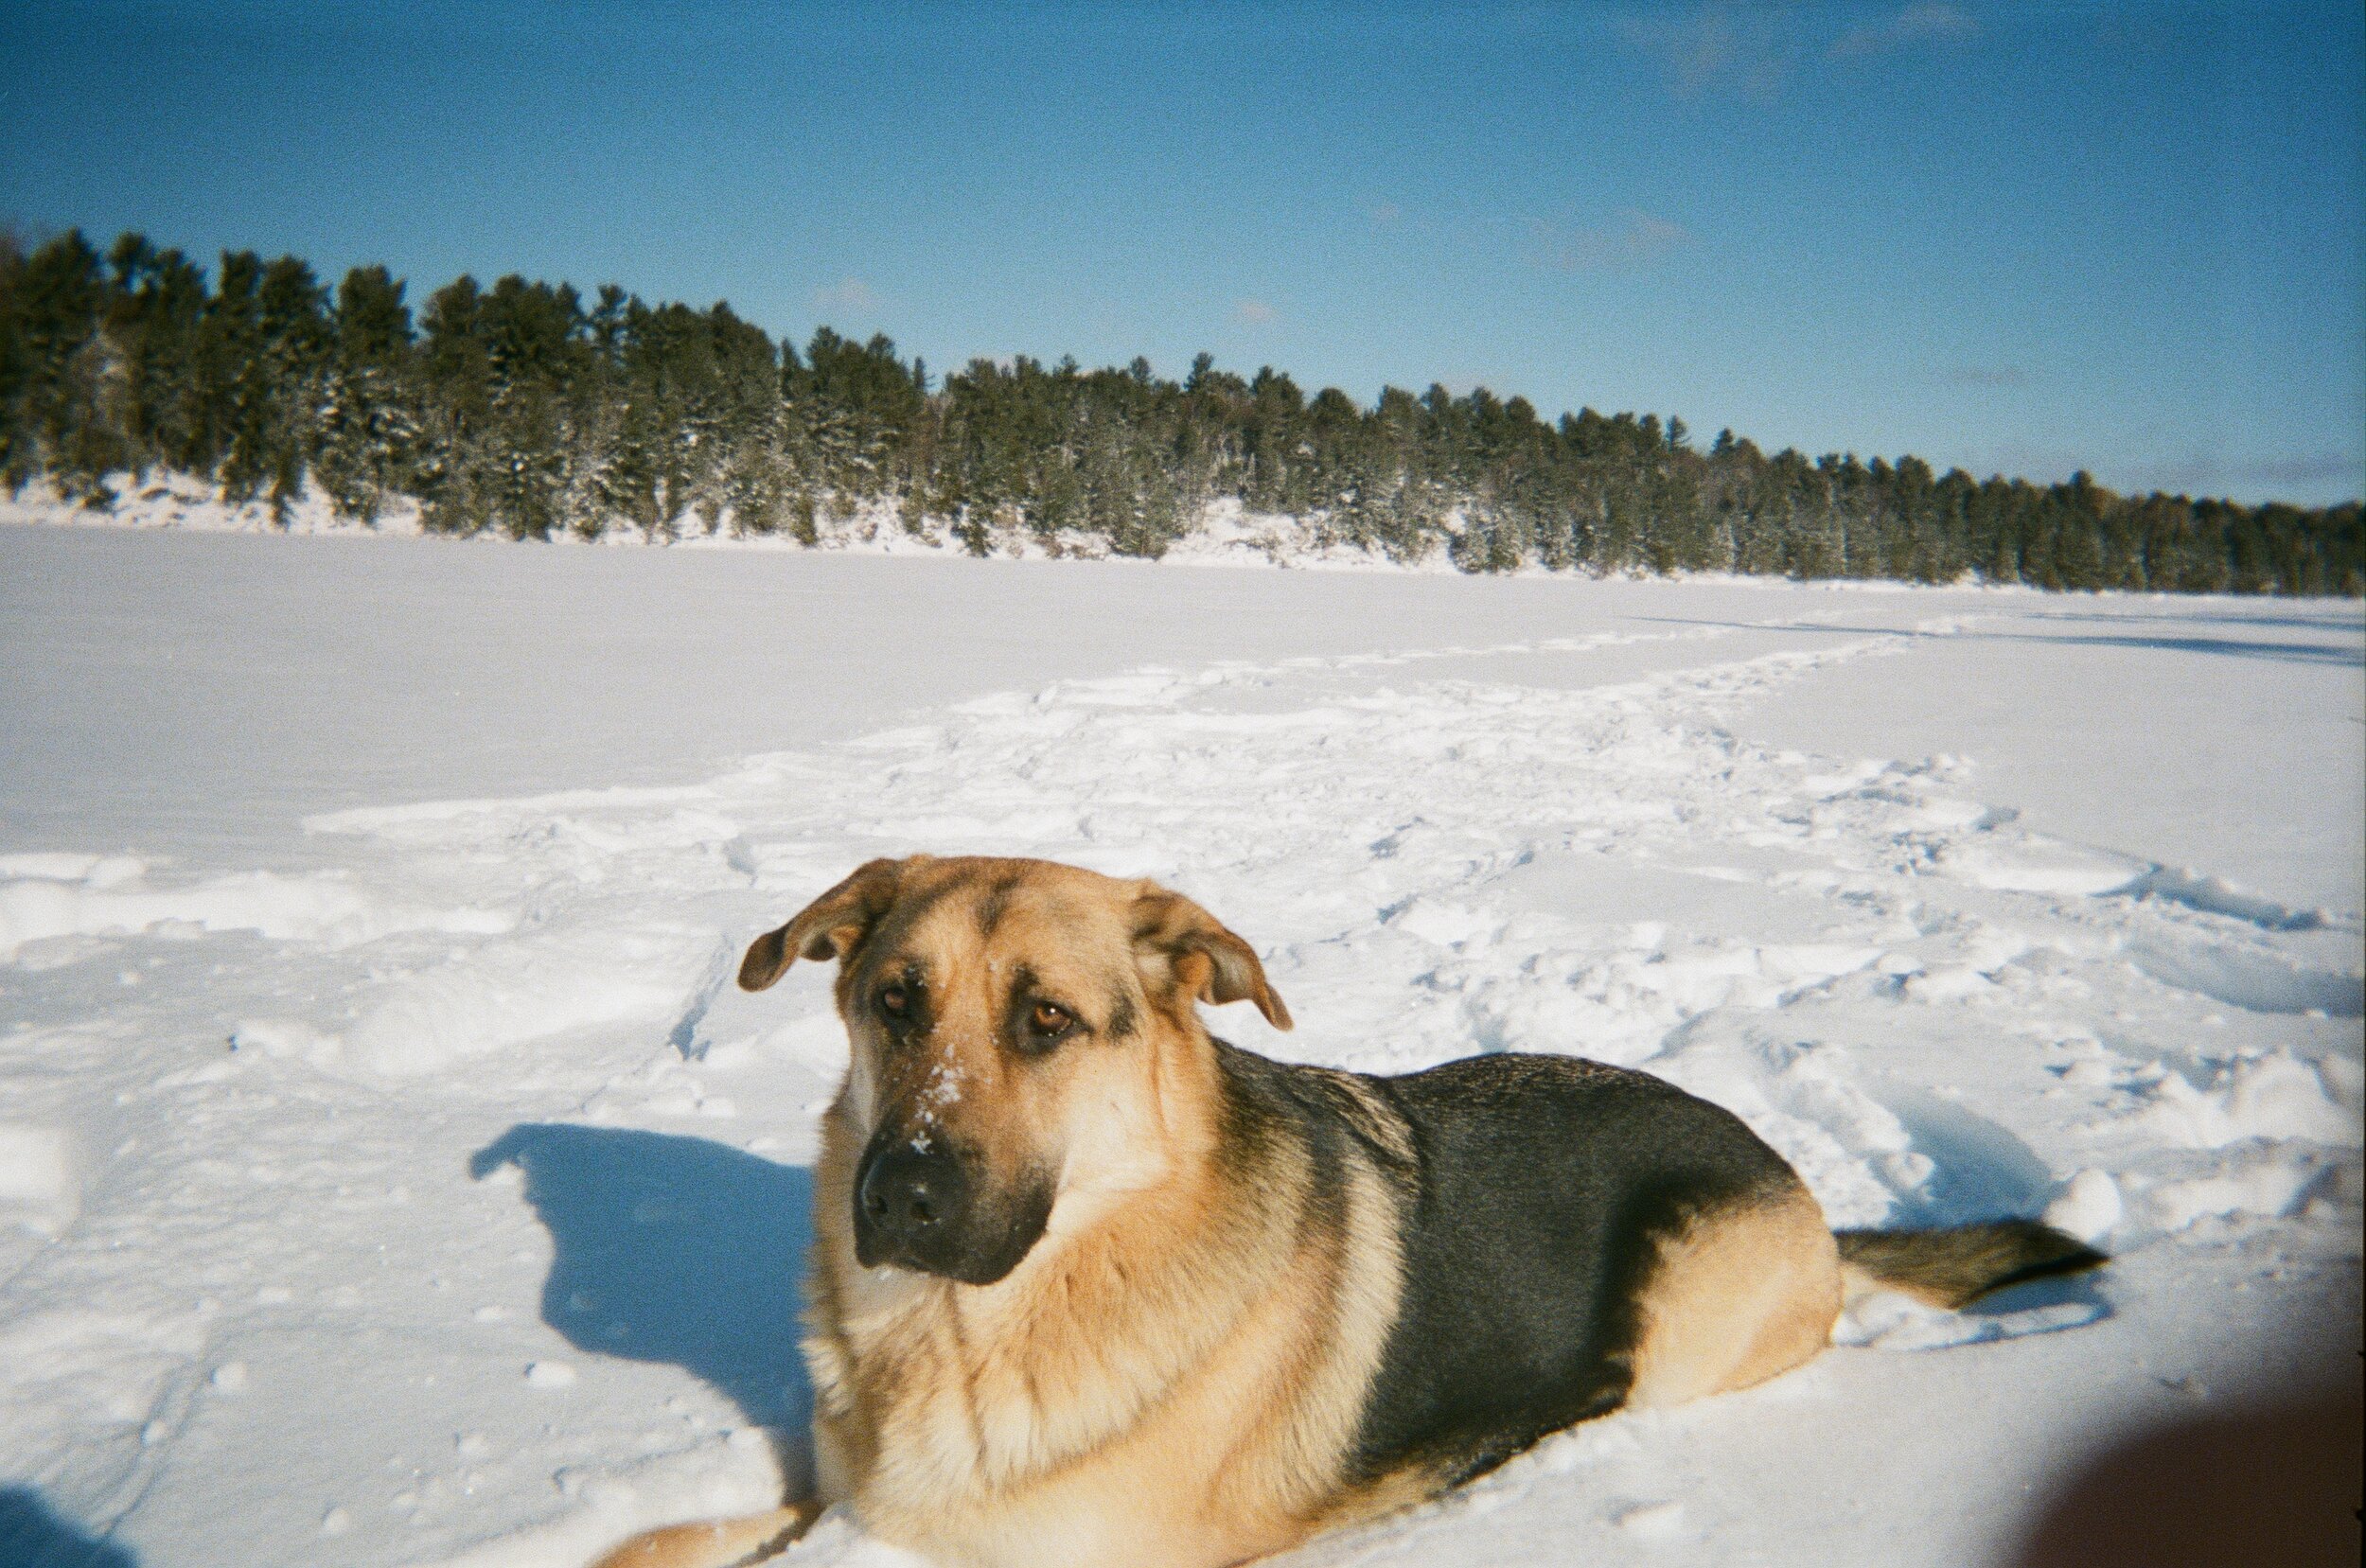
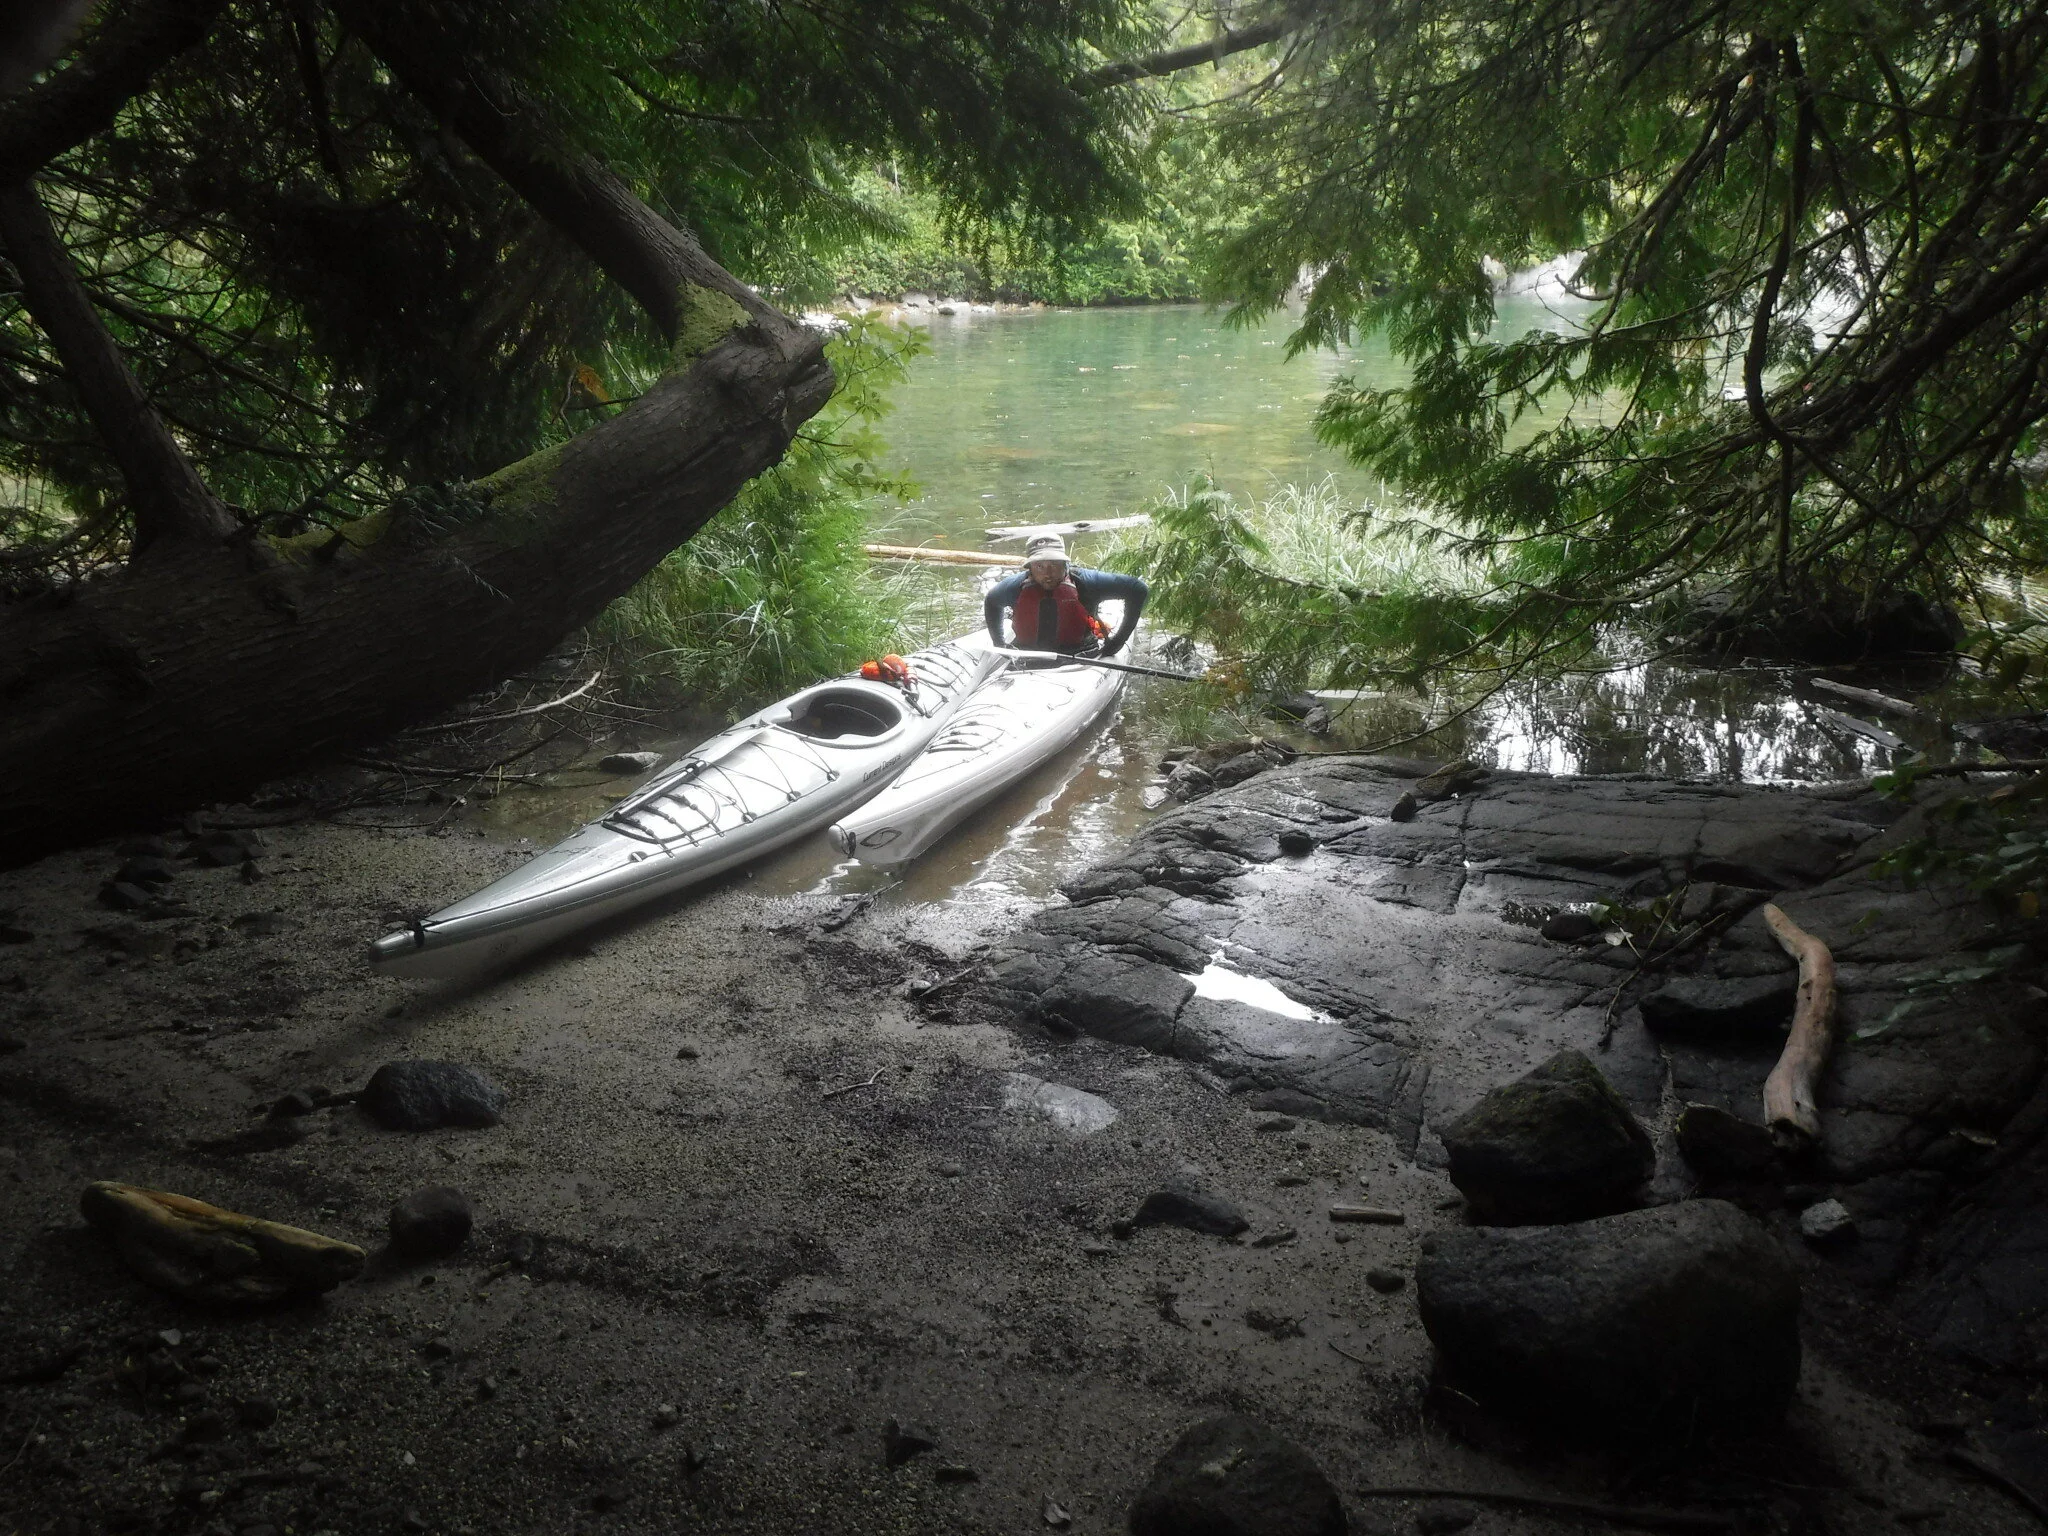
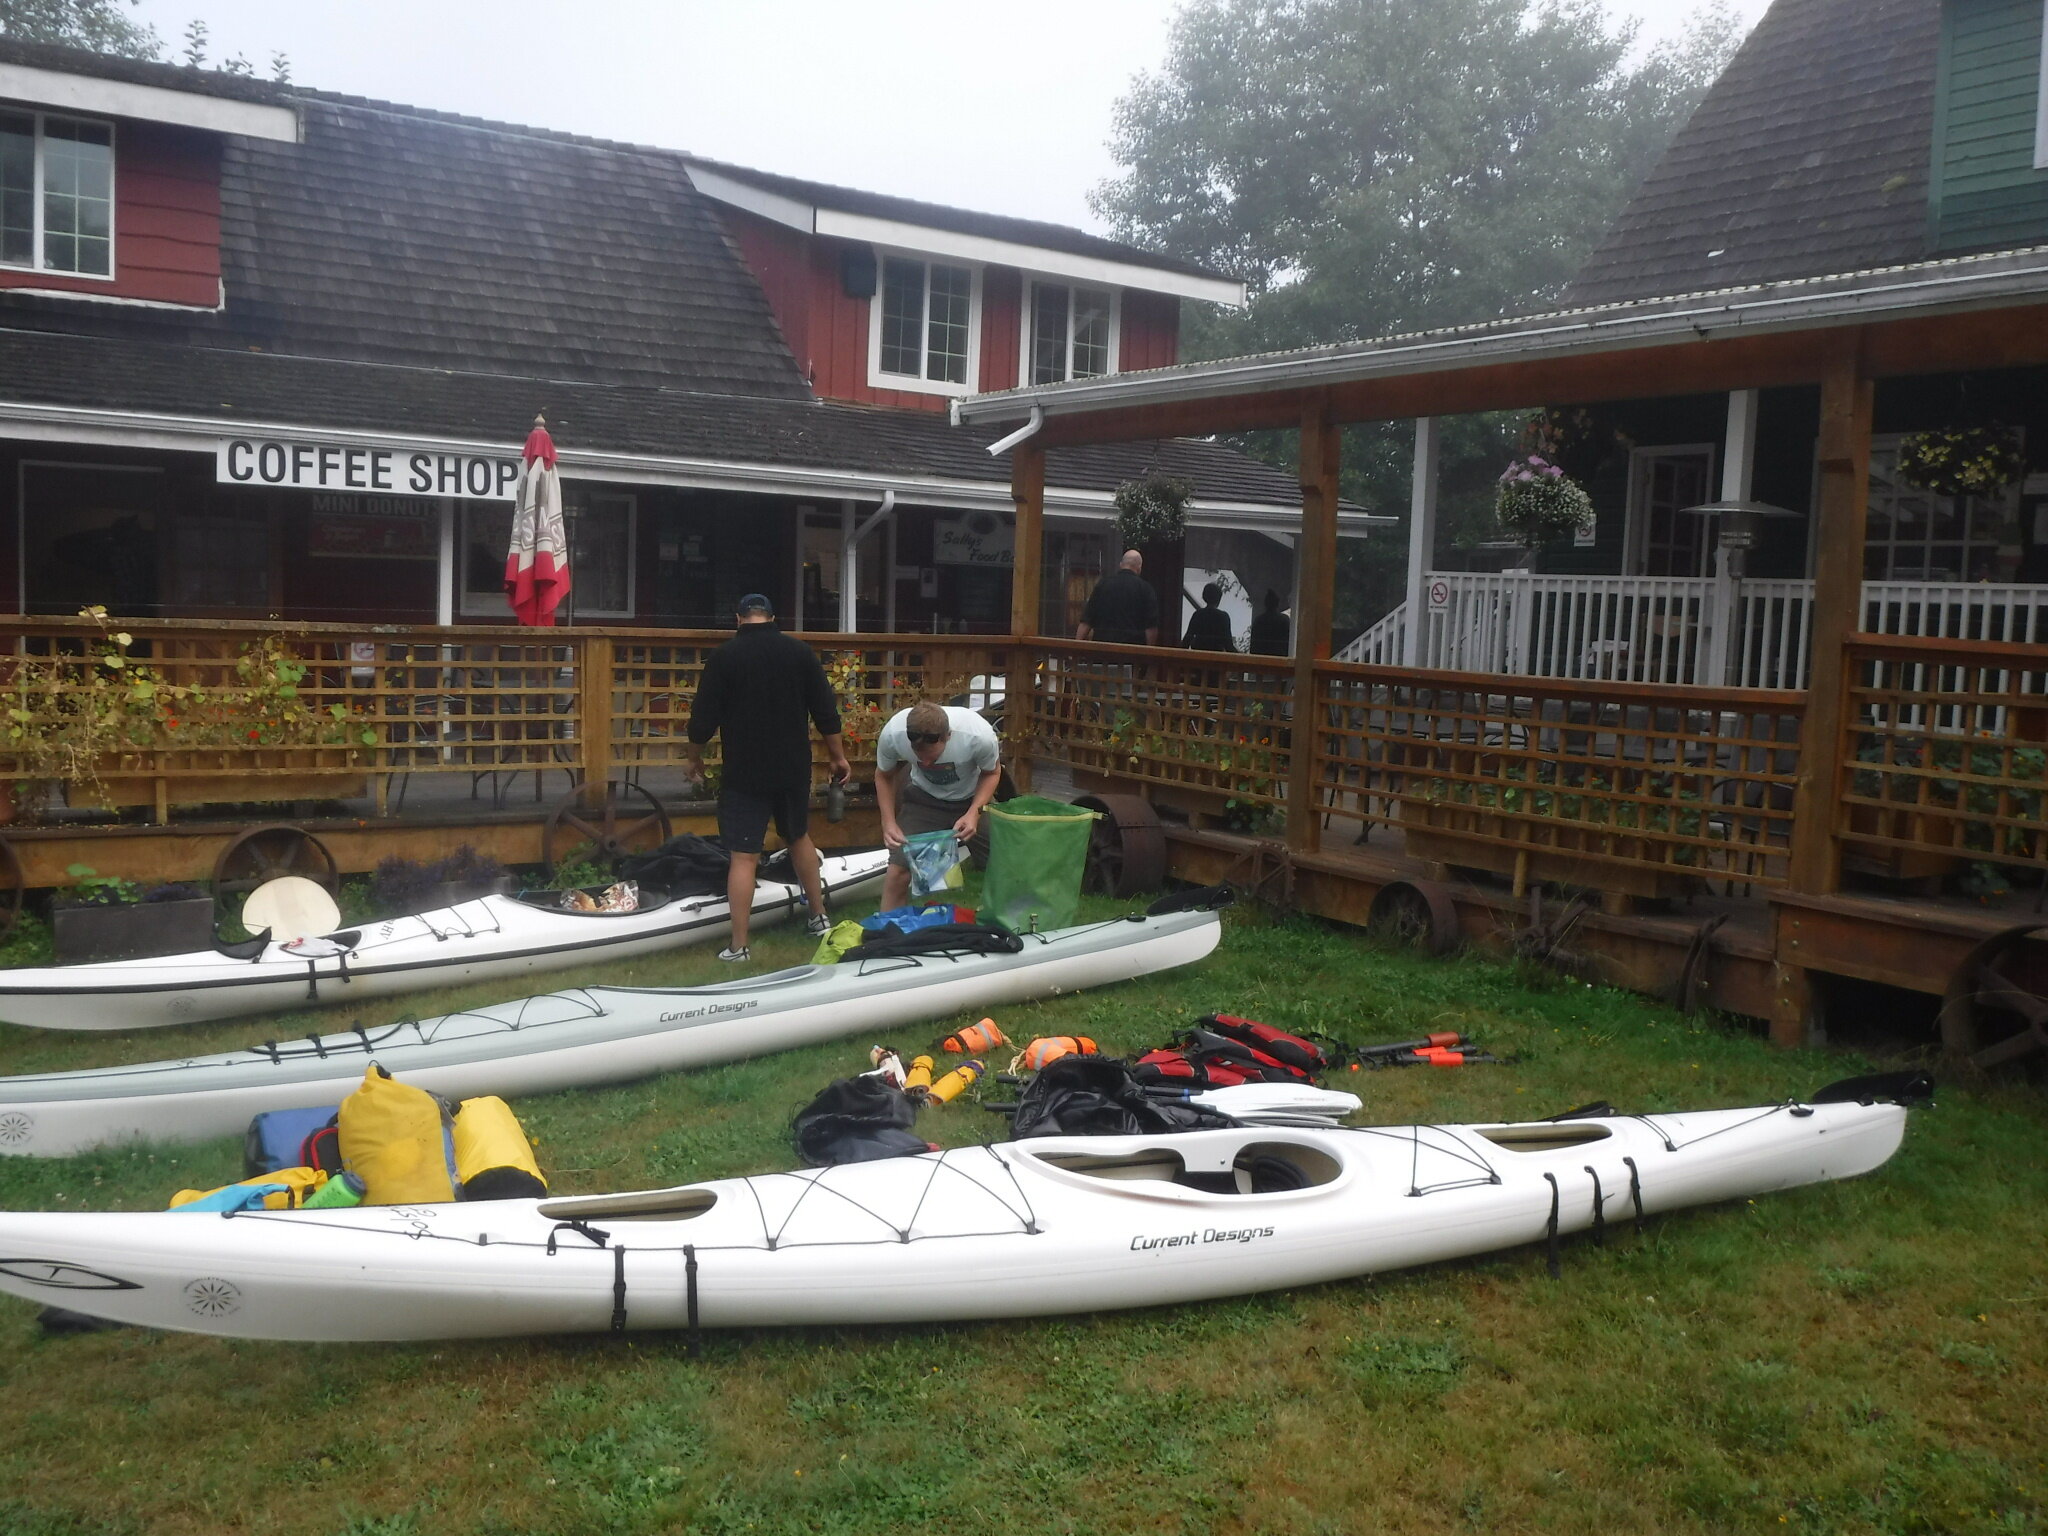
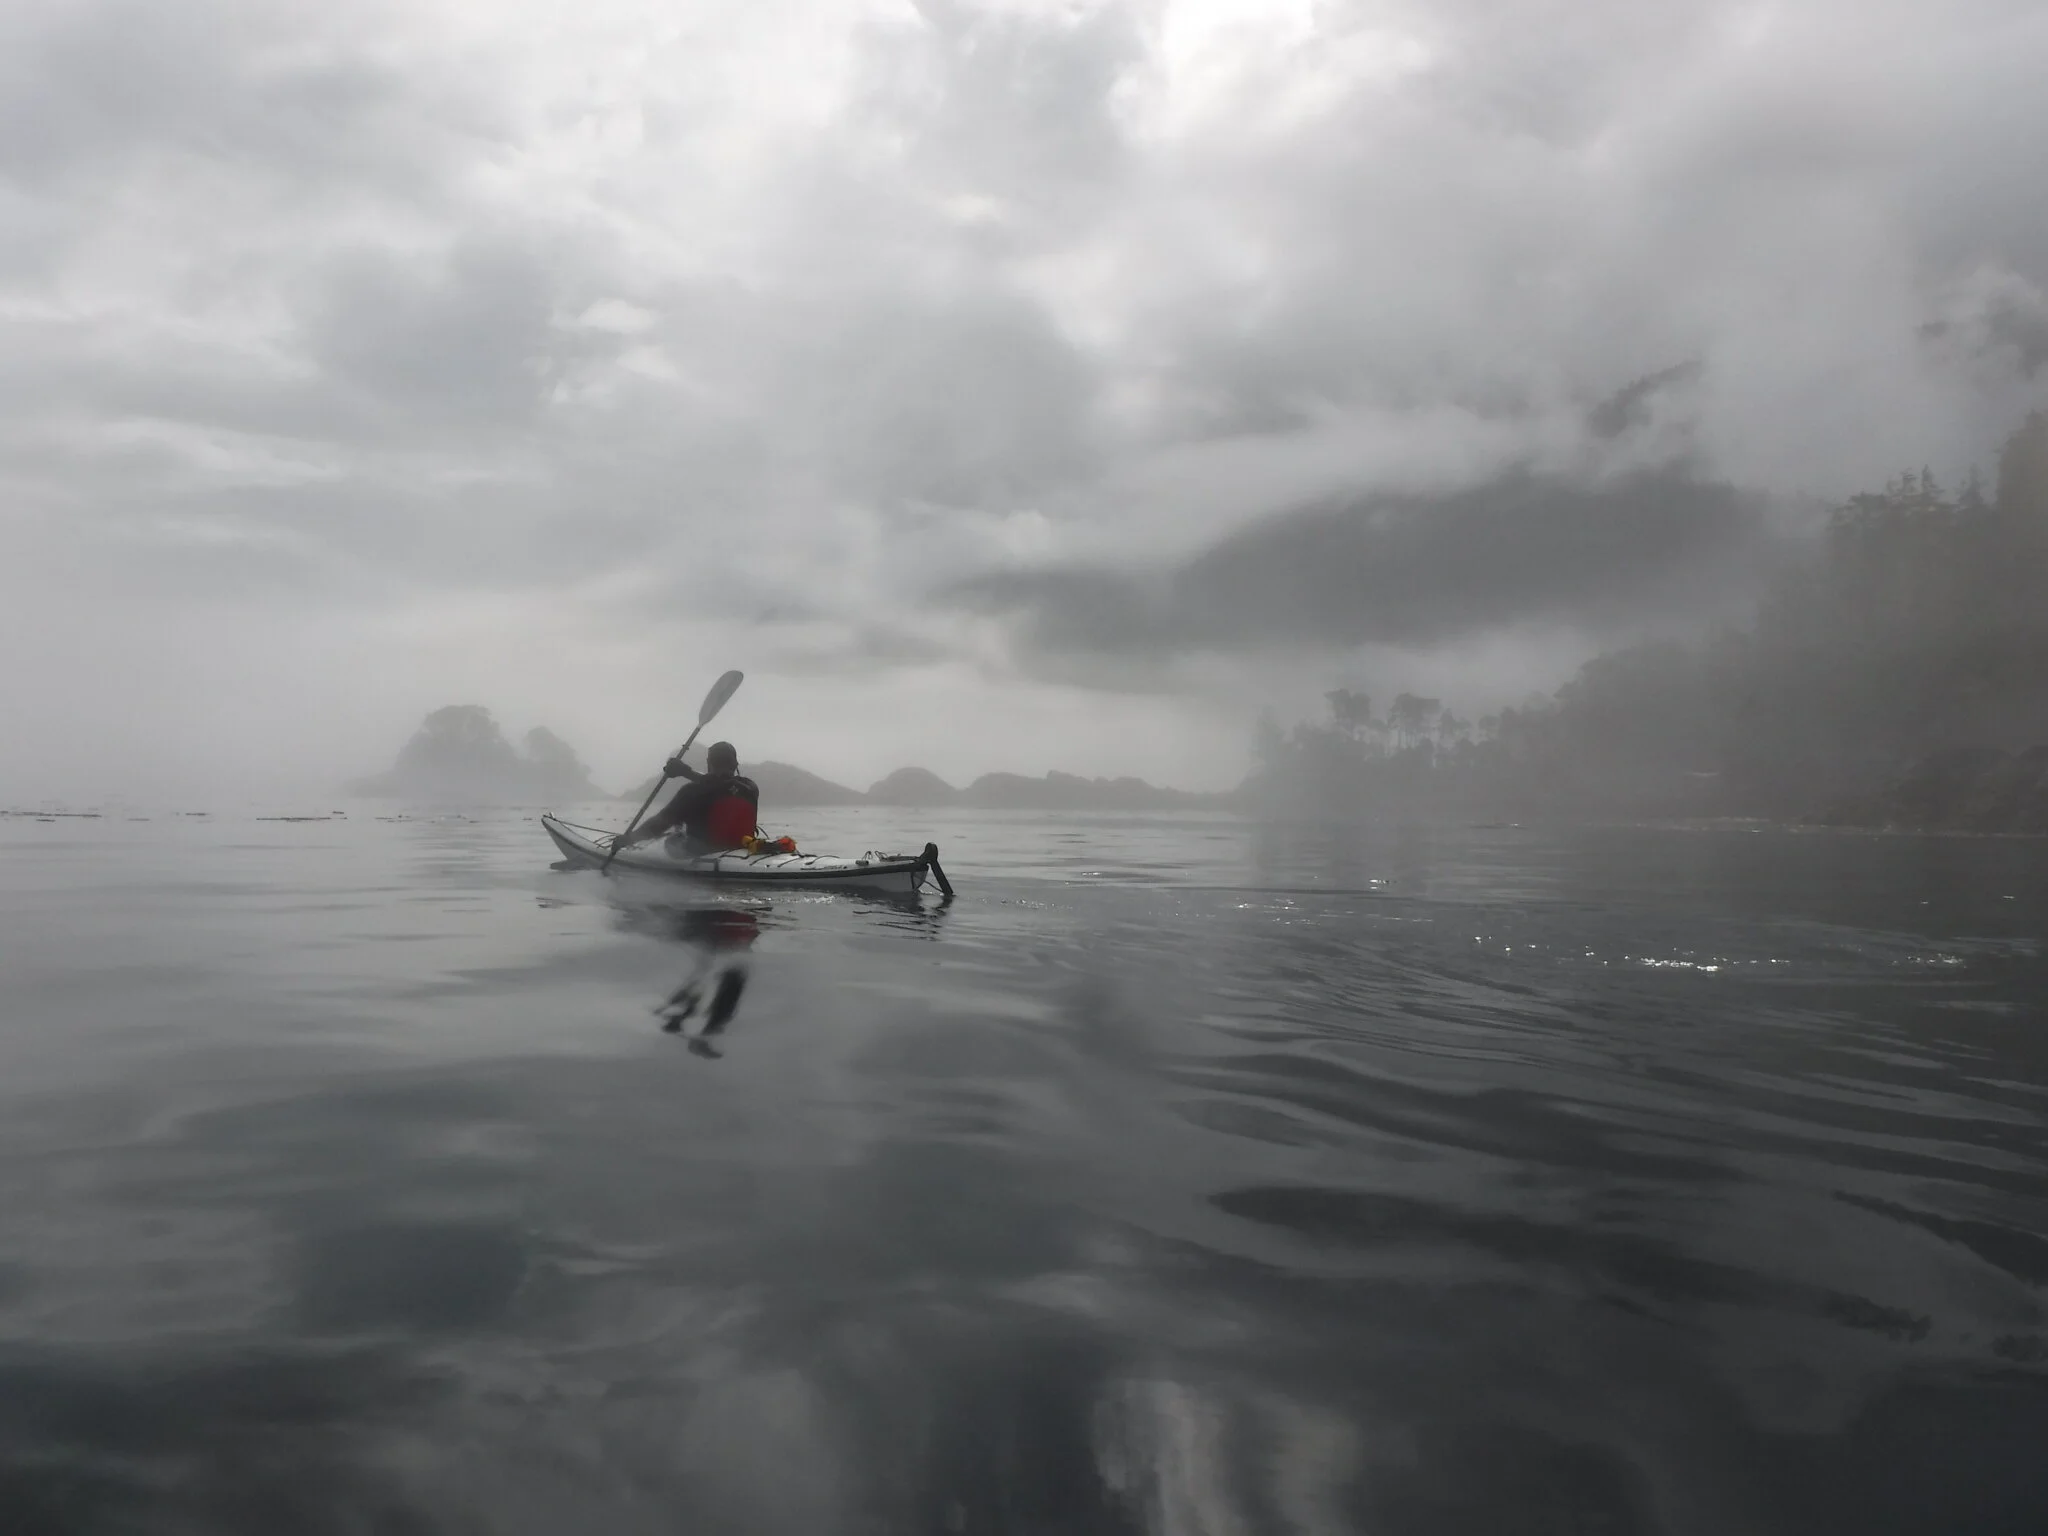
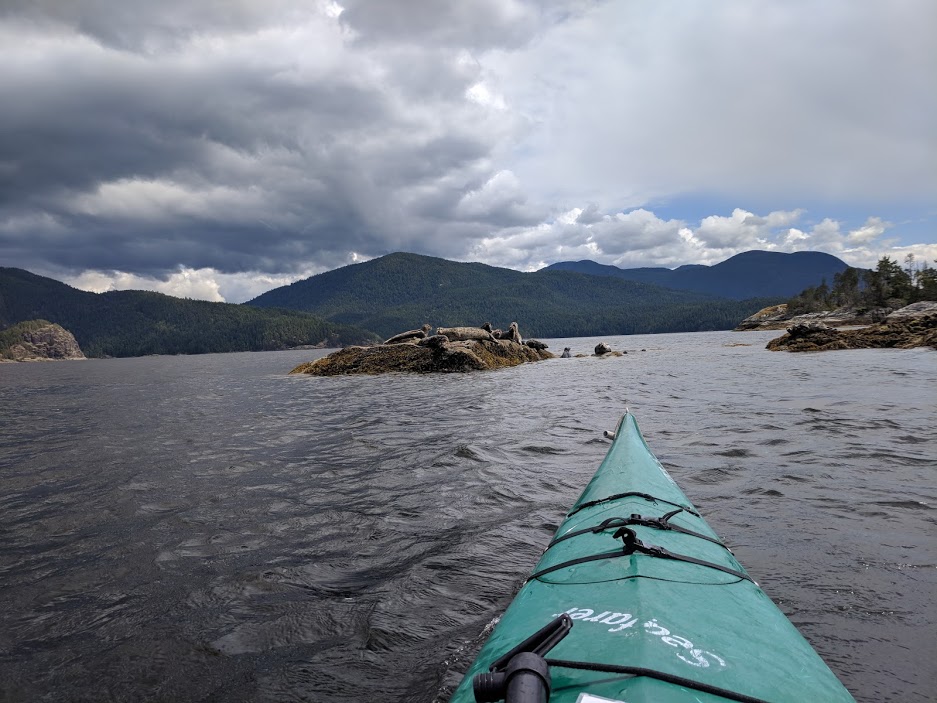
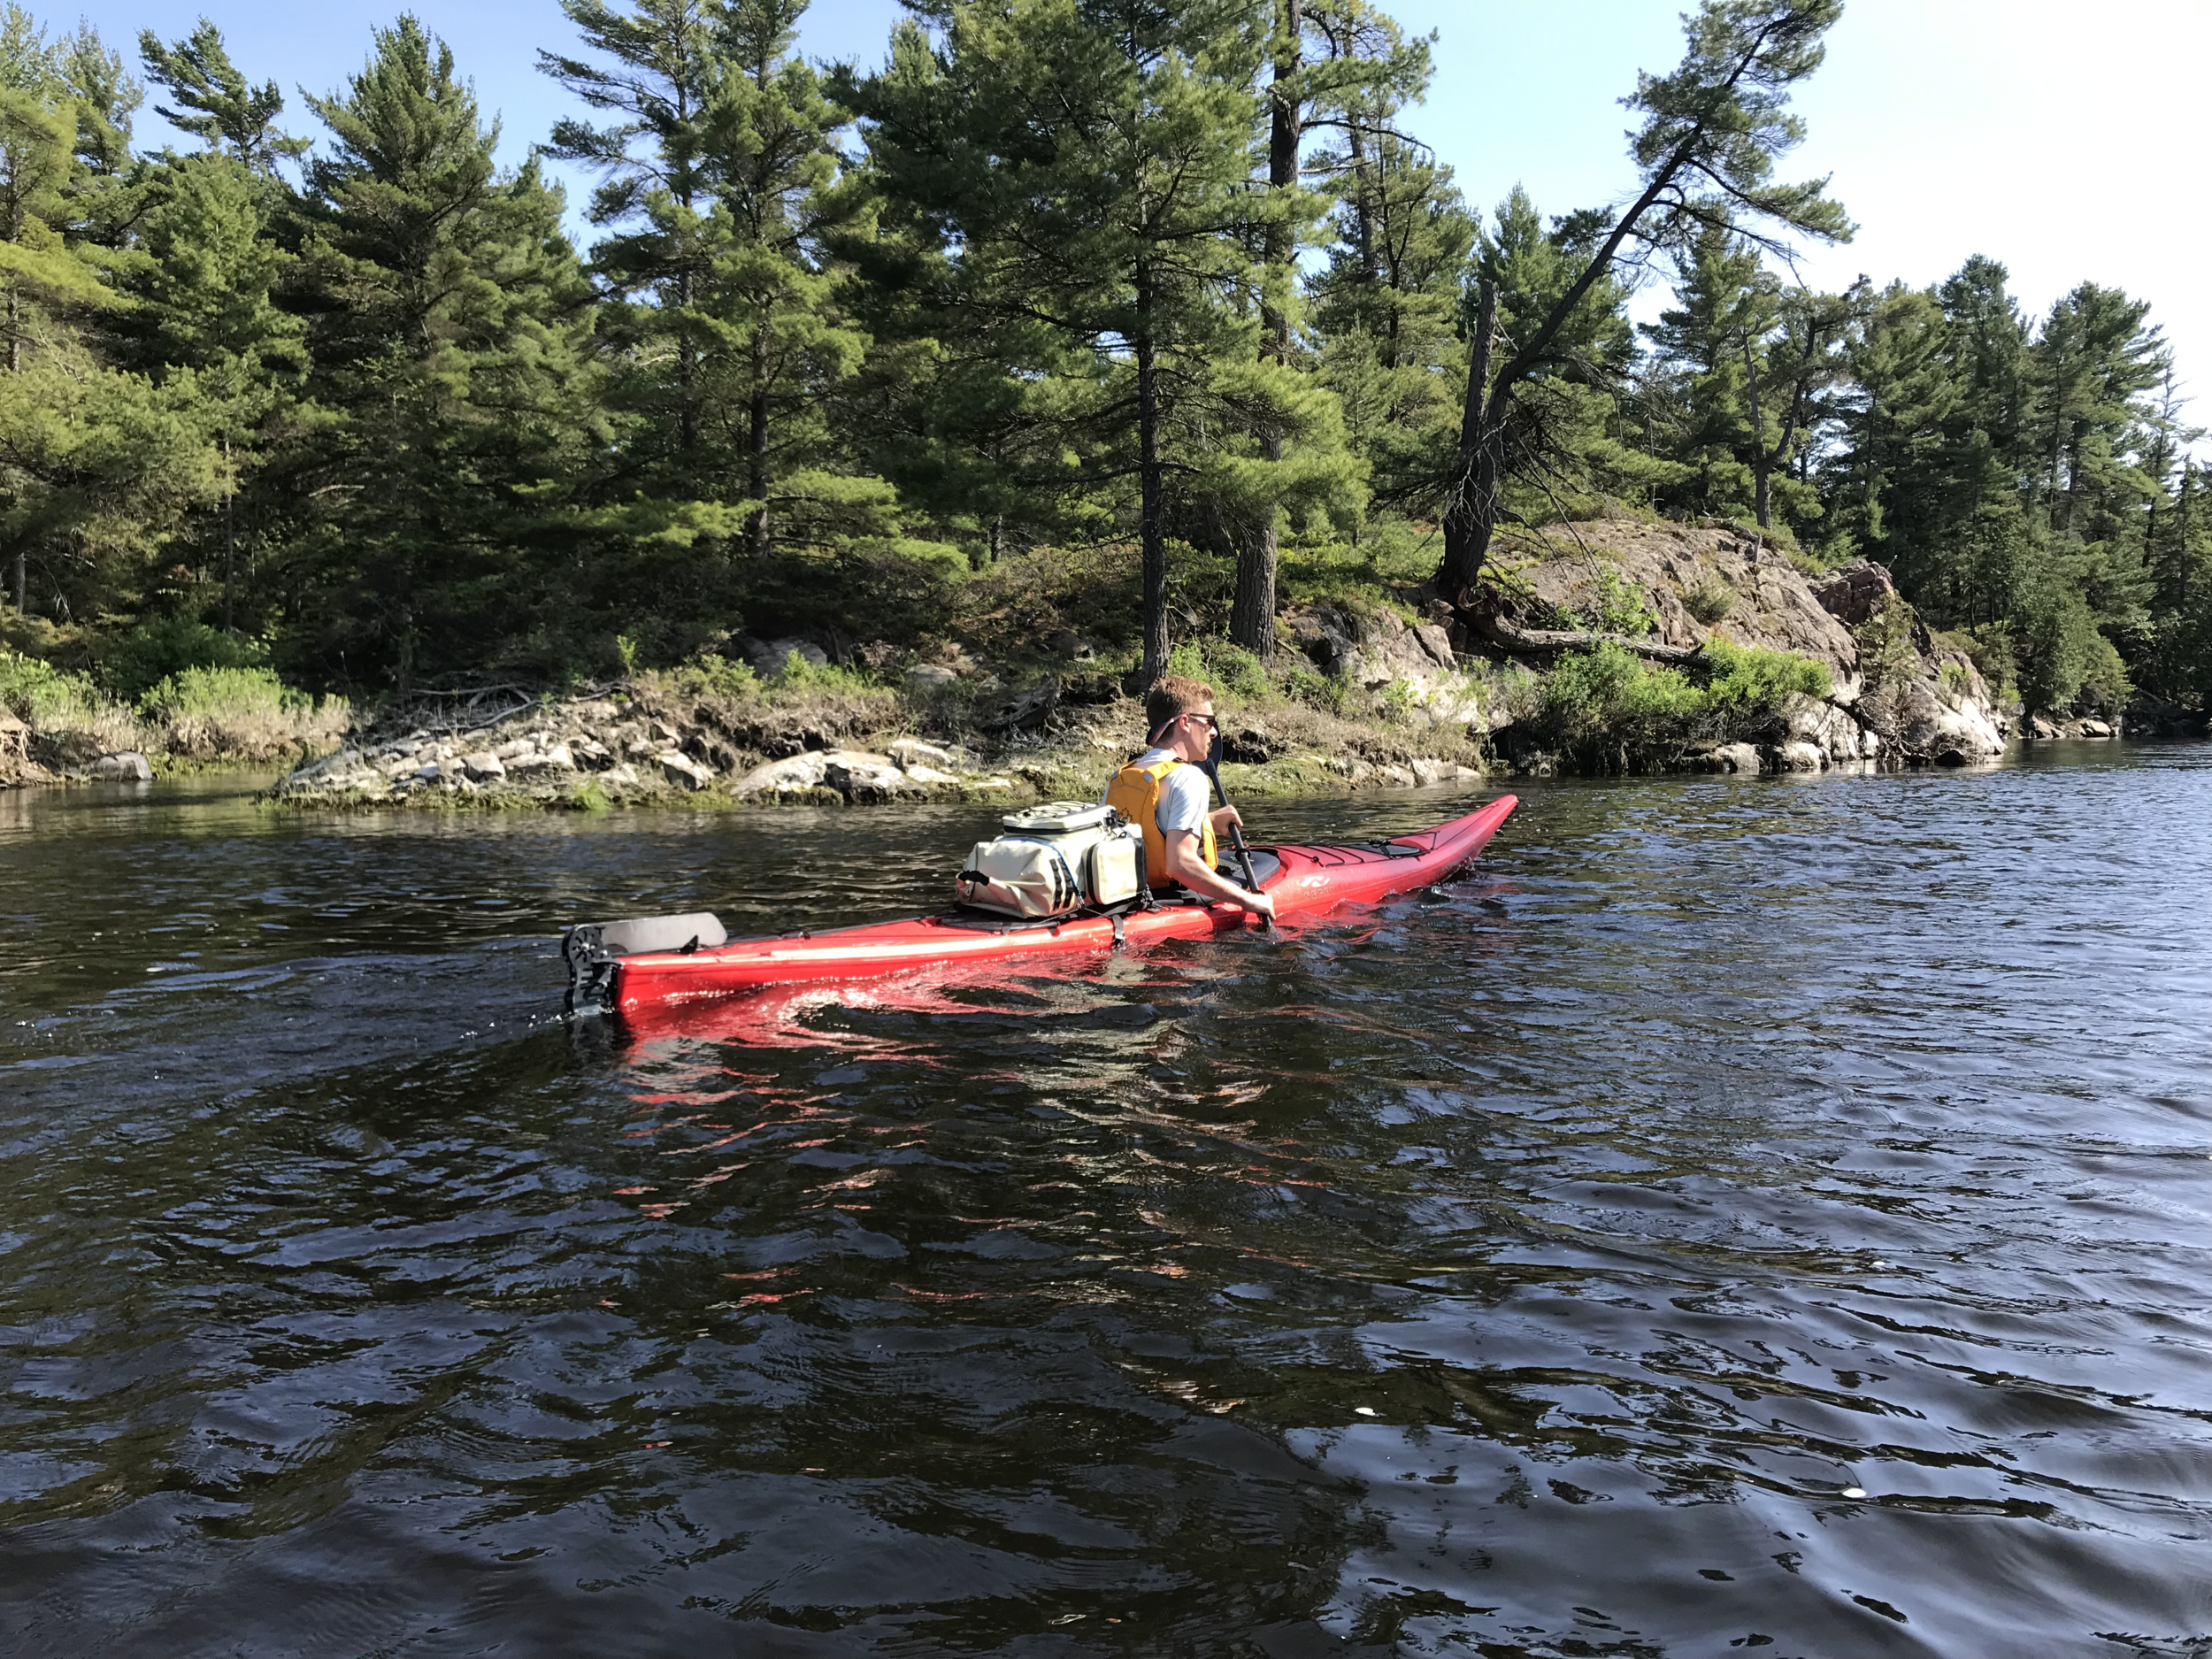
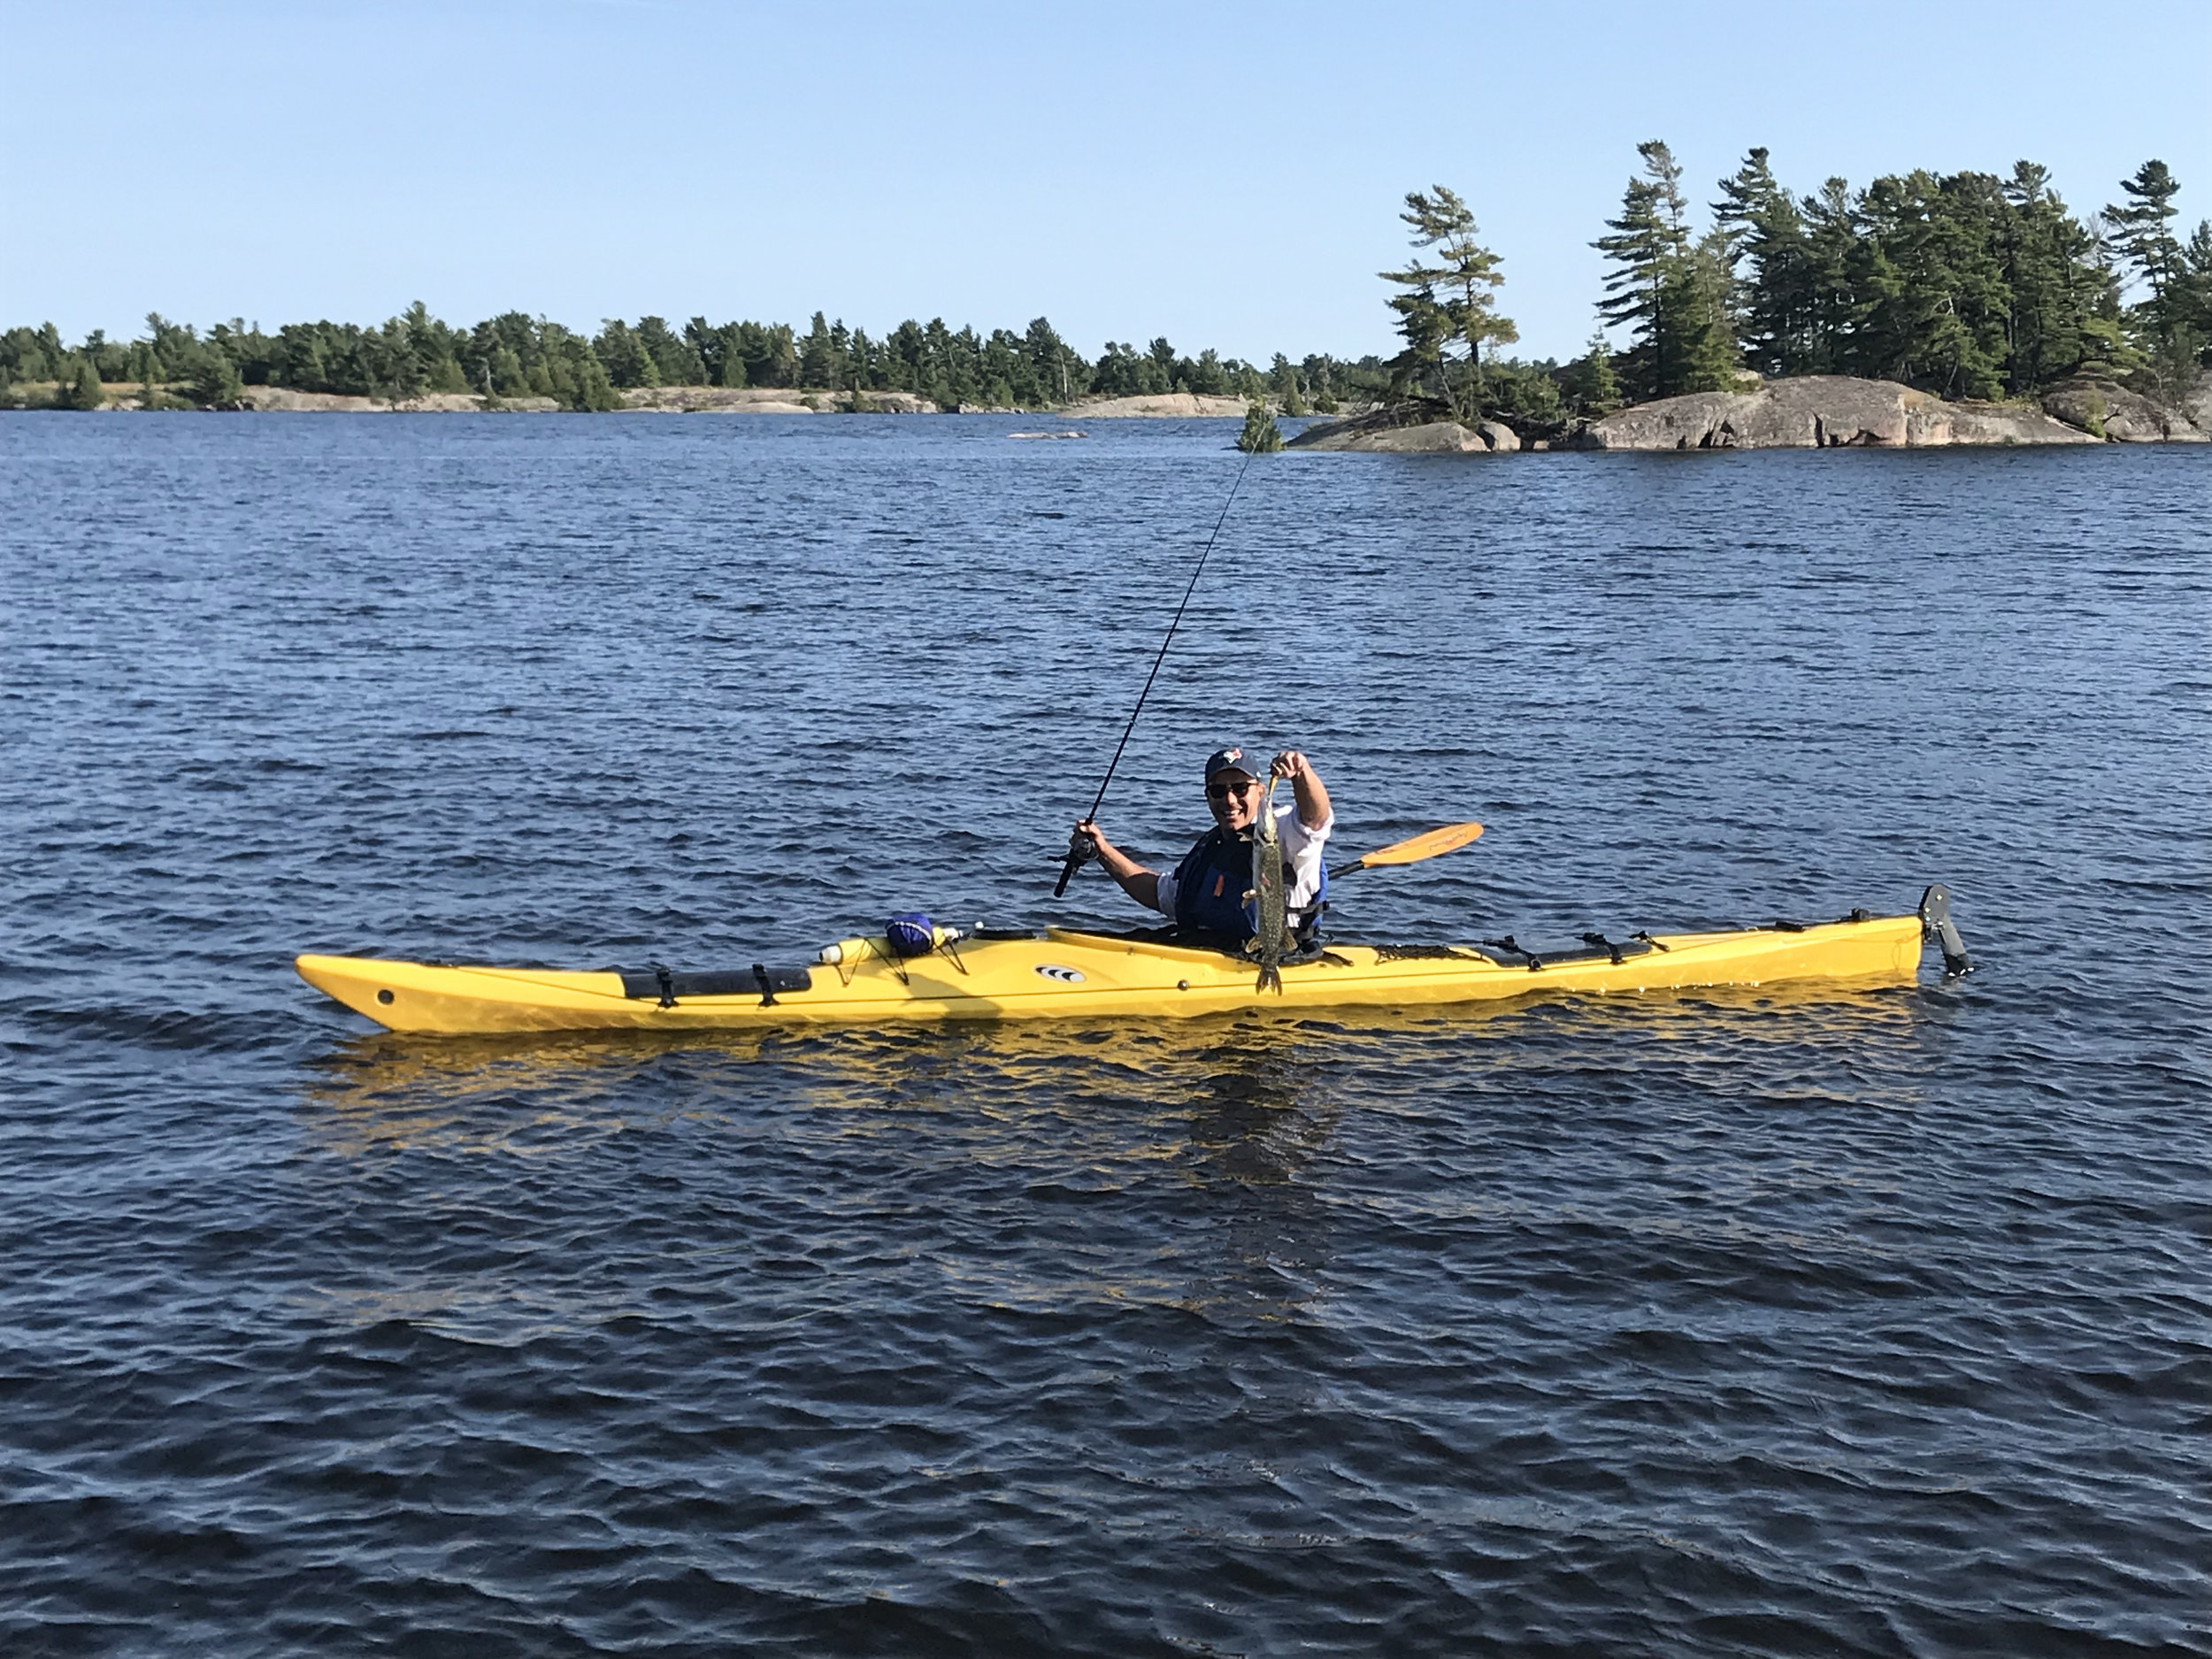
Wetsuits zipped, we packed up our gear and pushed off from the McBean Boat Launch. The launch was quiet, except for a few parked cars, but I imagine in the busy season there’s someone collecting cash for parking, and a bit of a wait at the small dock. Wrapping around the eastern tip of Fox Island, we fought wind and waves on the way to our first destination: the Benjamin Islands.

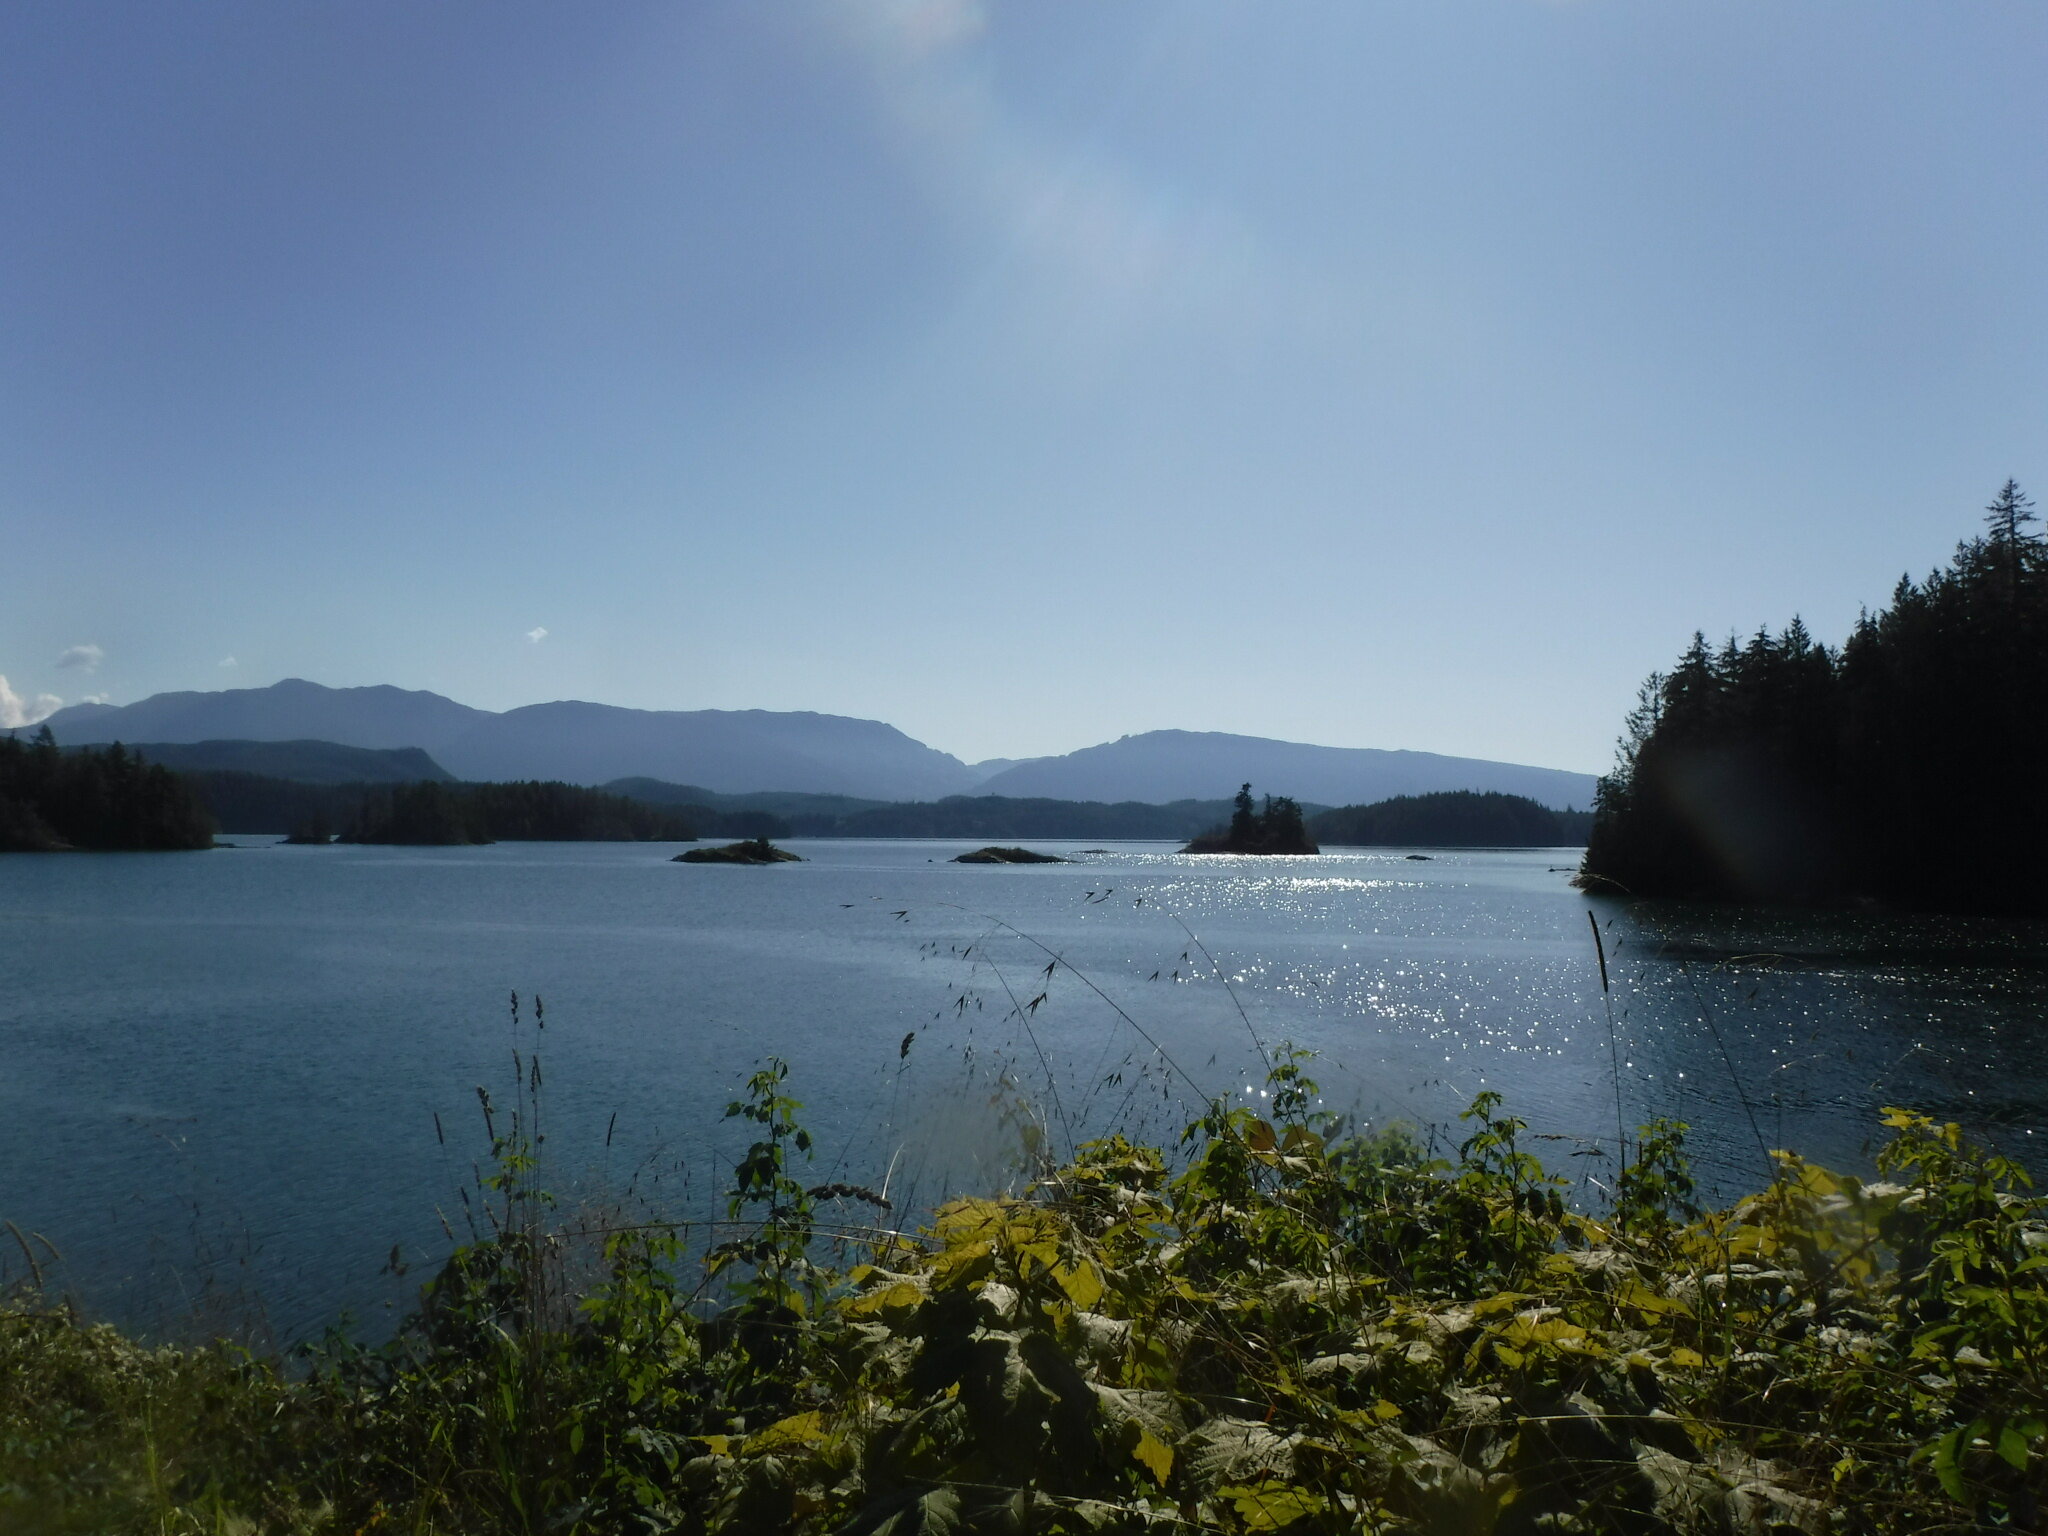
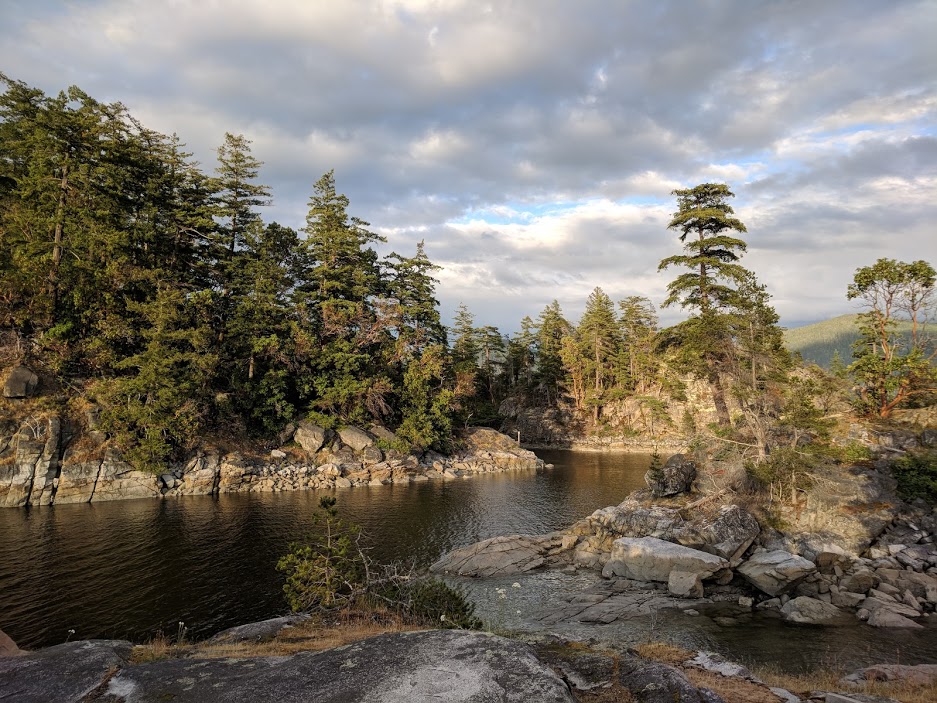
The Benjamin Islands stood out on satellite view as classic Georgian Bay shield-type islands with plenty of potential campsite options for us. Not to mention a protected cove to hide from the ceaseless western winds.

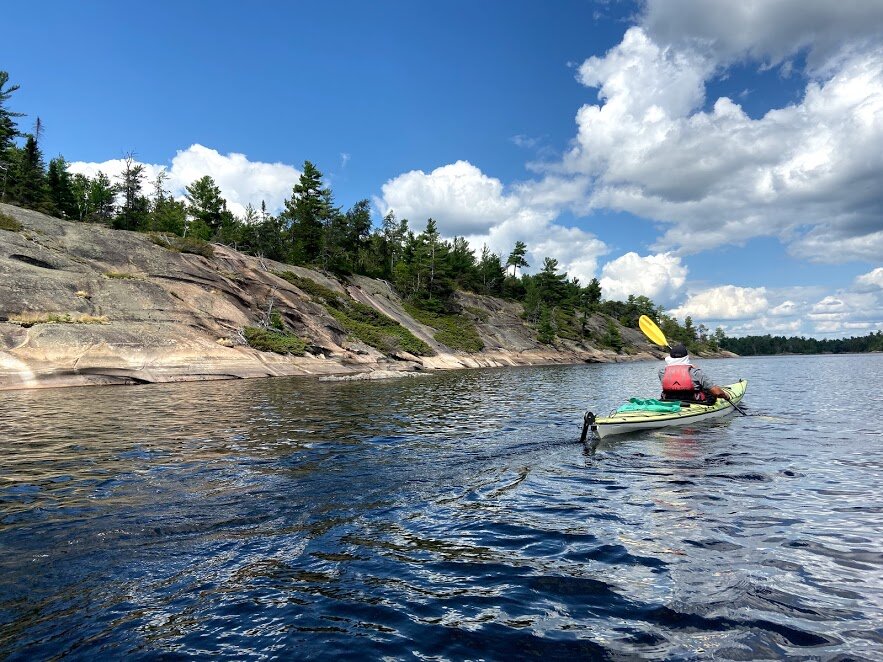
What I didn’t expect, though, was just how high some of these islands were off the water. This is Ontario! We don’t have altitude…

 Reading and predicting the winds atop North Benjamin Island.

Reading and predicting the winds atop North Benjamin Island.

 Bouldering the mountainous terrain of North Benjamin.

Bouldering the mountainous terrain of North Benjamin.

 Looking north from South Benjamin.

Looking north from South Benjamin.

 Reading and predicting the winds atop North Benjamin Island.  Bouldering the mountainous terrain of North Benjamin.  Looking north from South Benjamin.

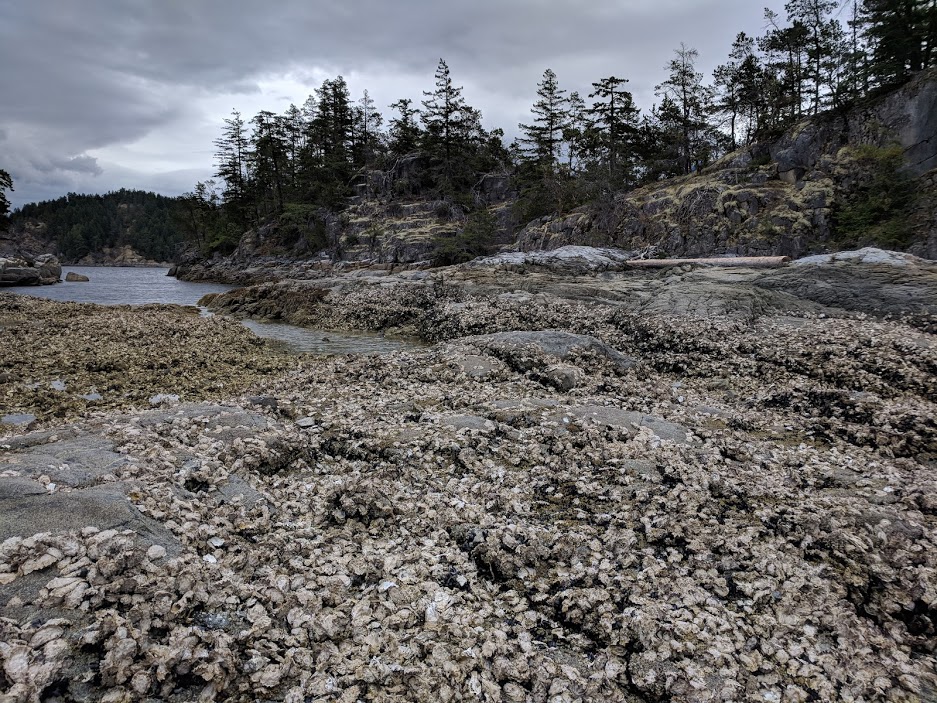
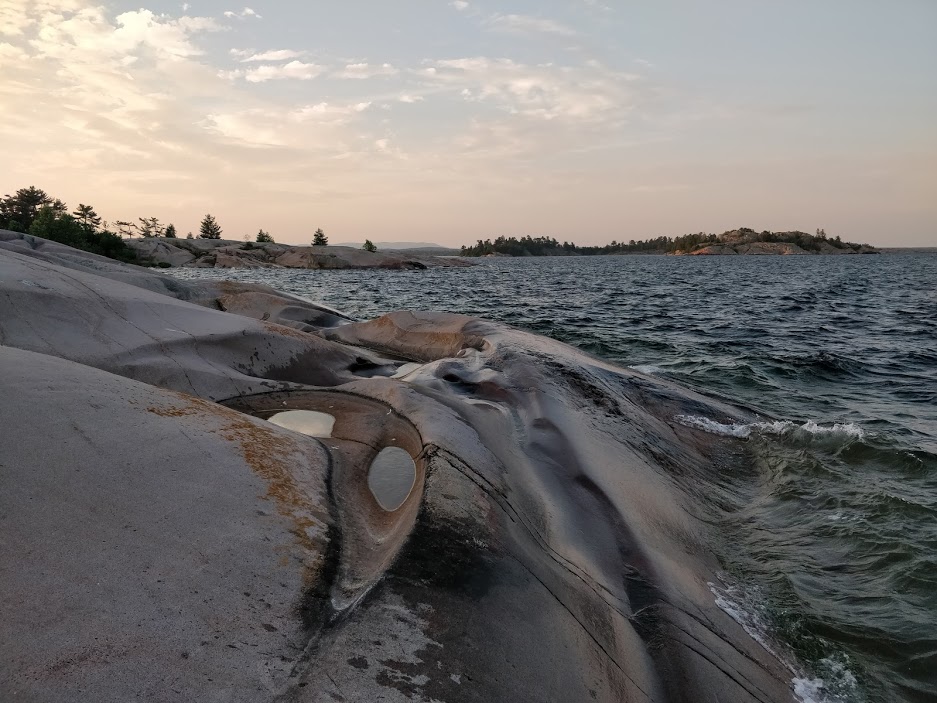
An extension of the LaCloche range, many of the surrounding islands and shoals had cliffs and hills that were over 100ft high. This made for beautiful views, but tricky landings.

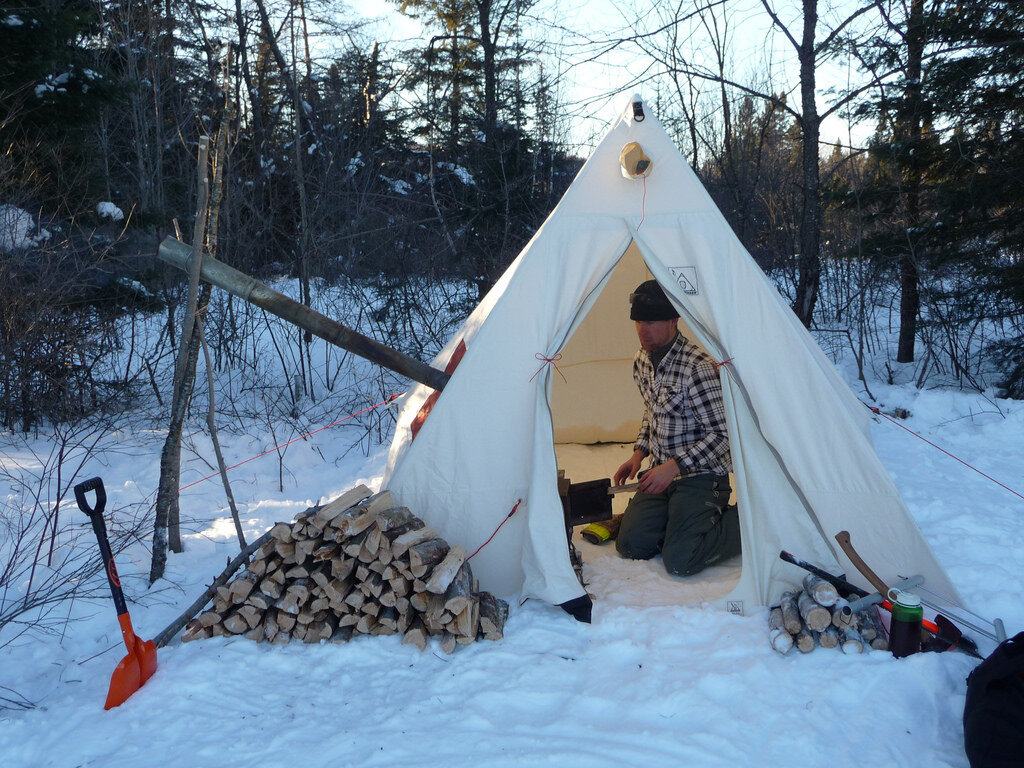
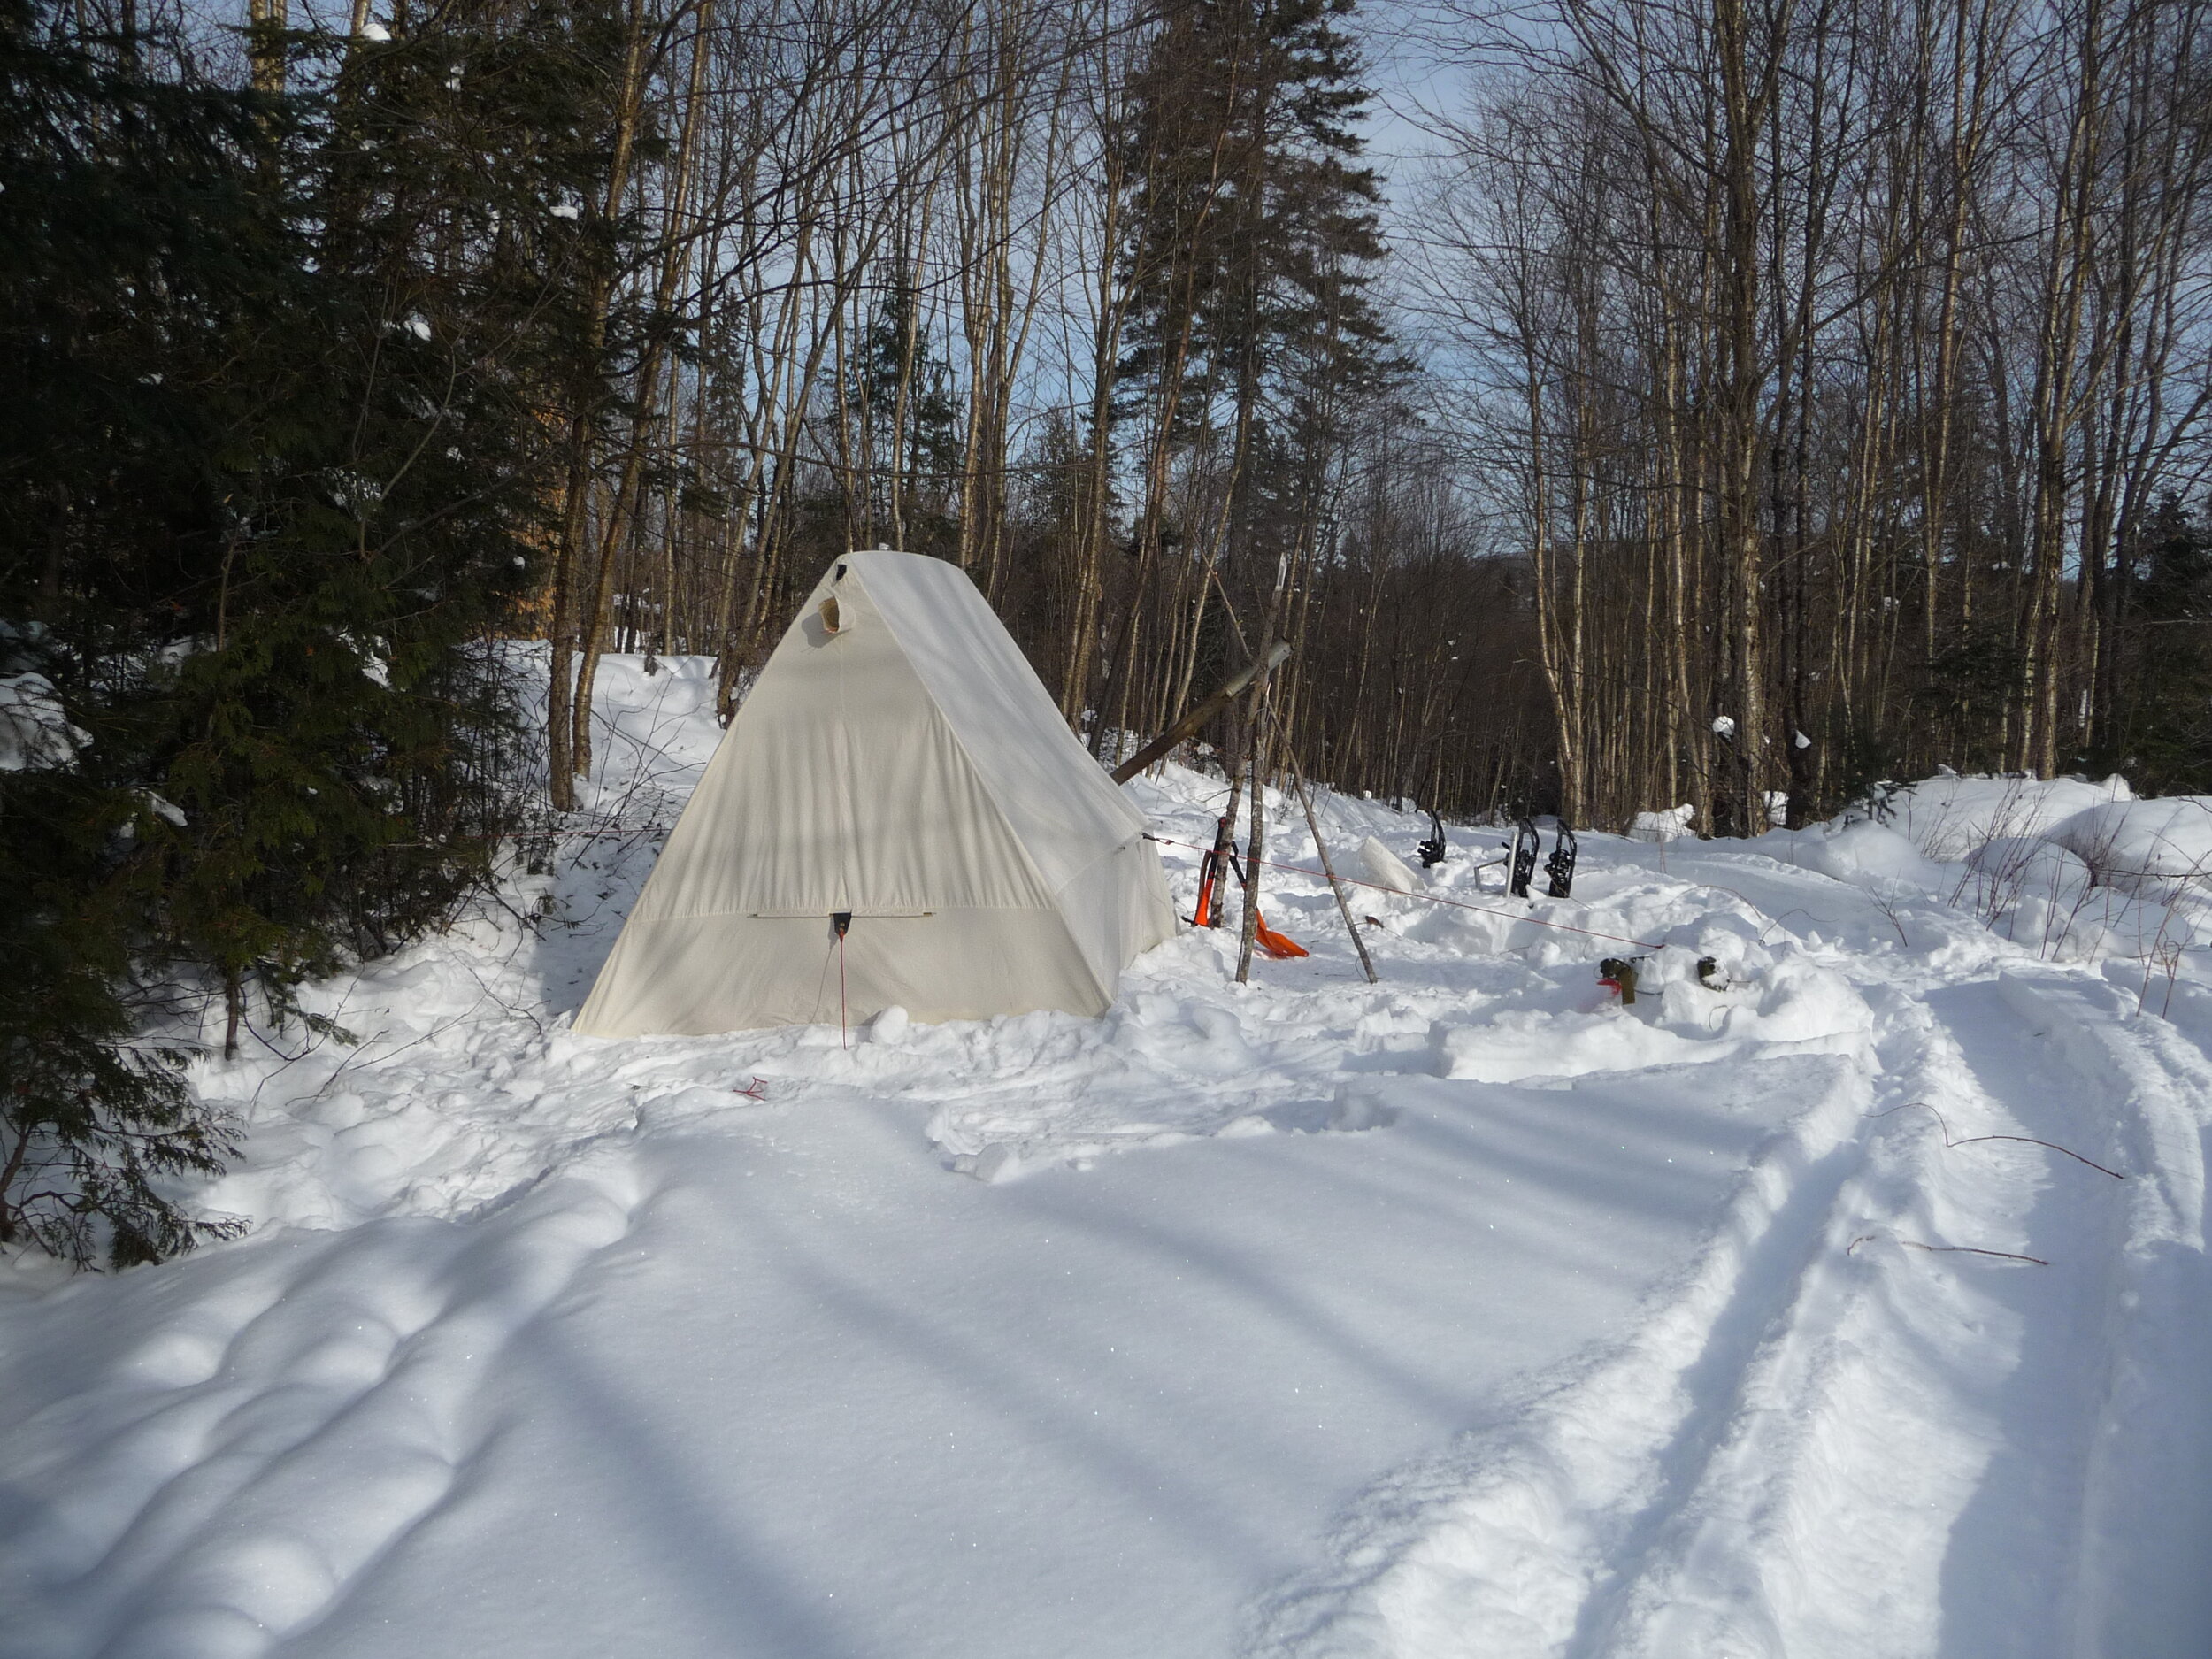
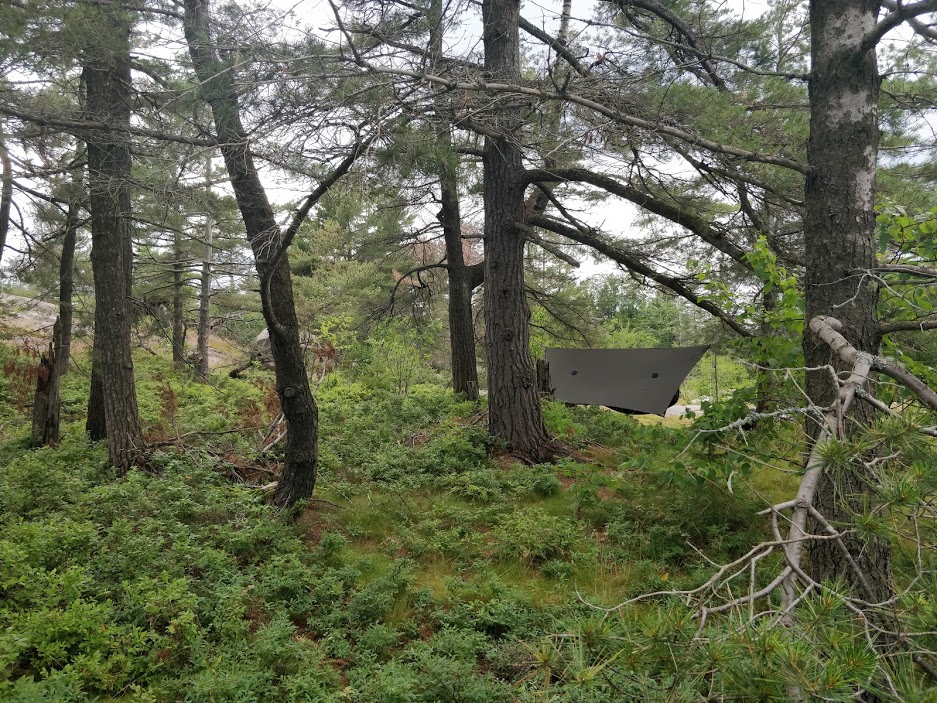
We settled on the Benjamins as a basecamp to explore the area over the weekend. We’d identify sites, hike shorelines, and explore as far as we could within the boundaries of safety.

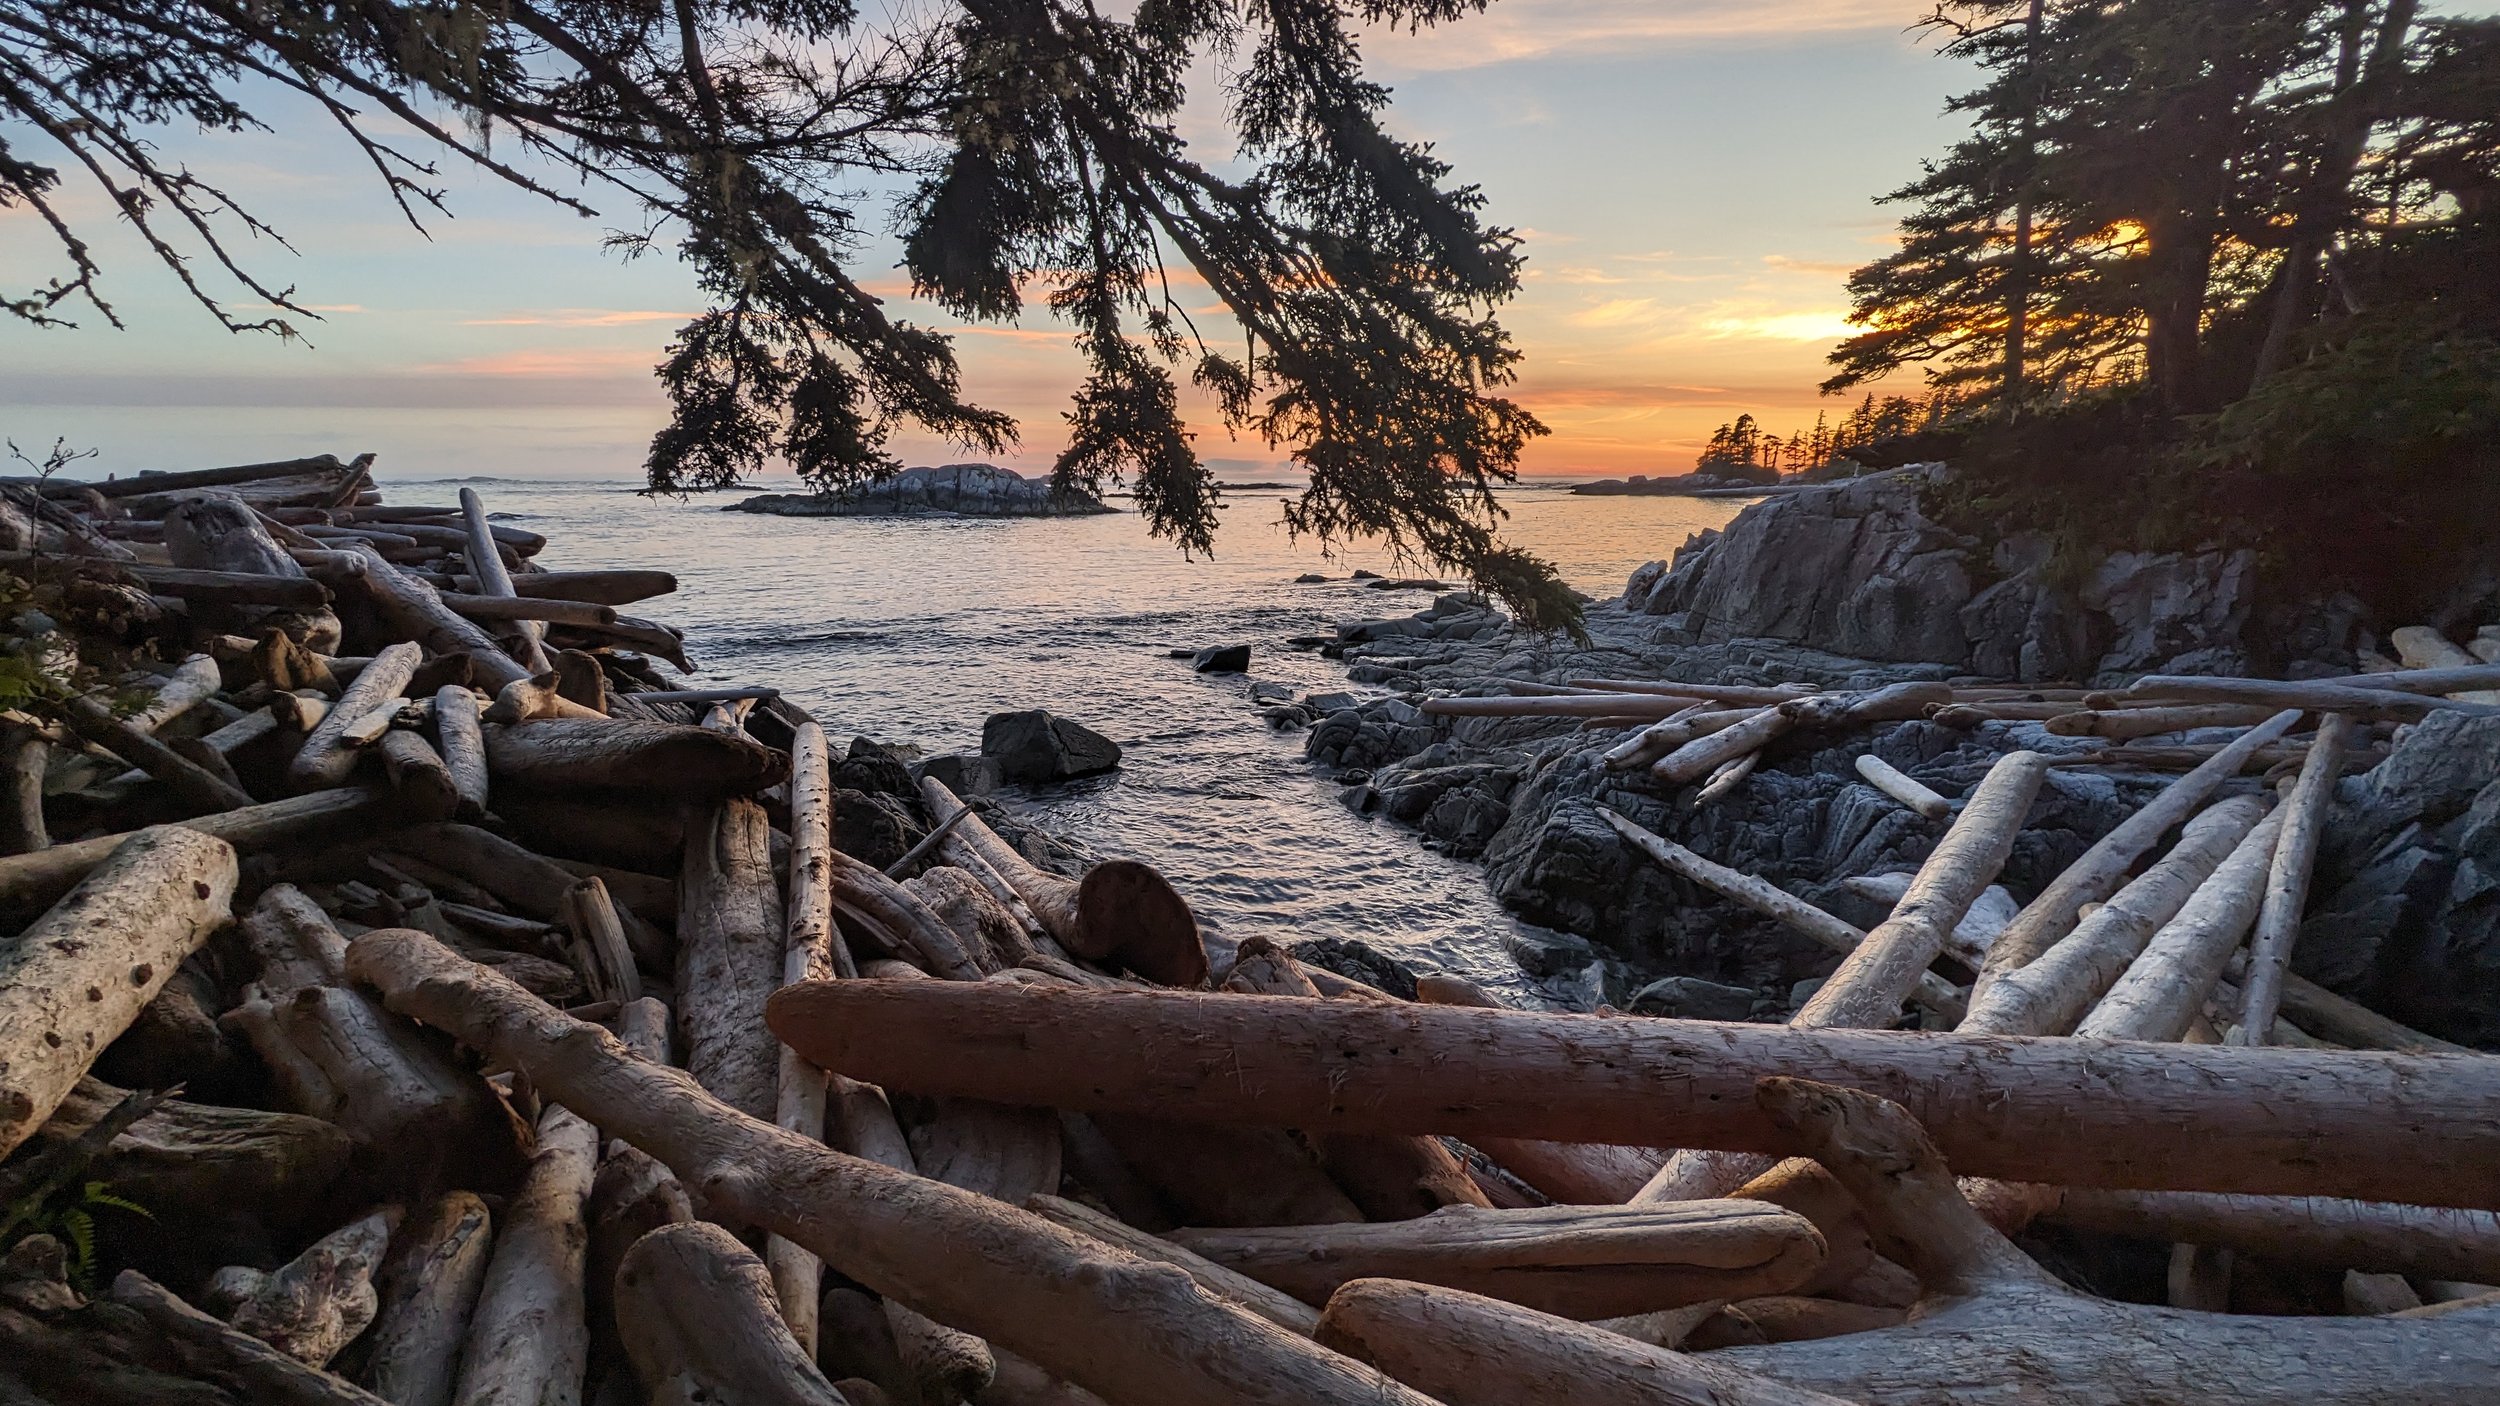
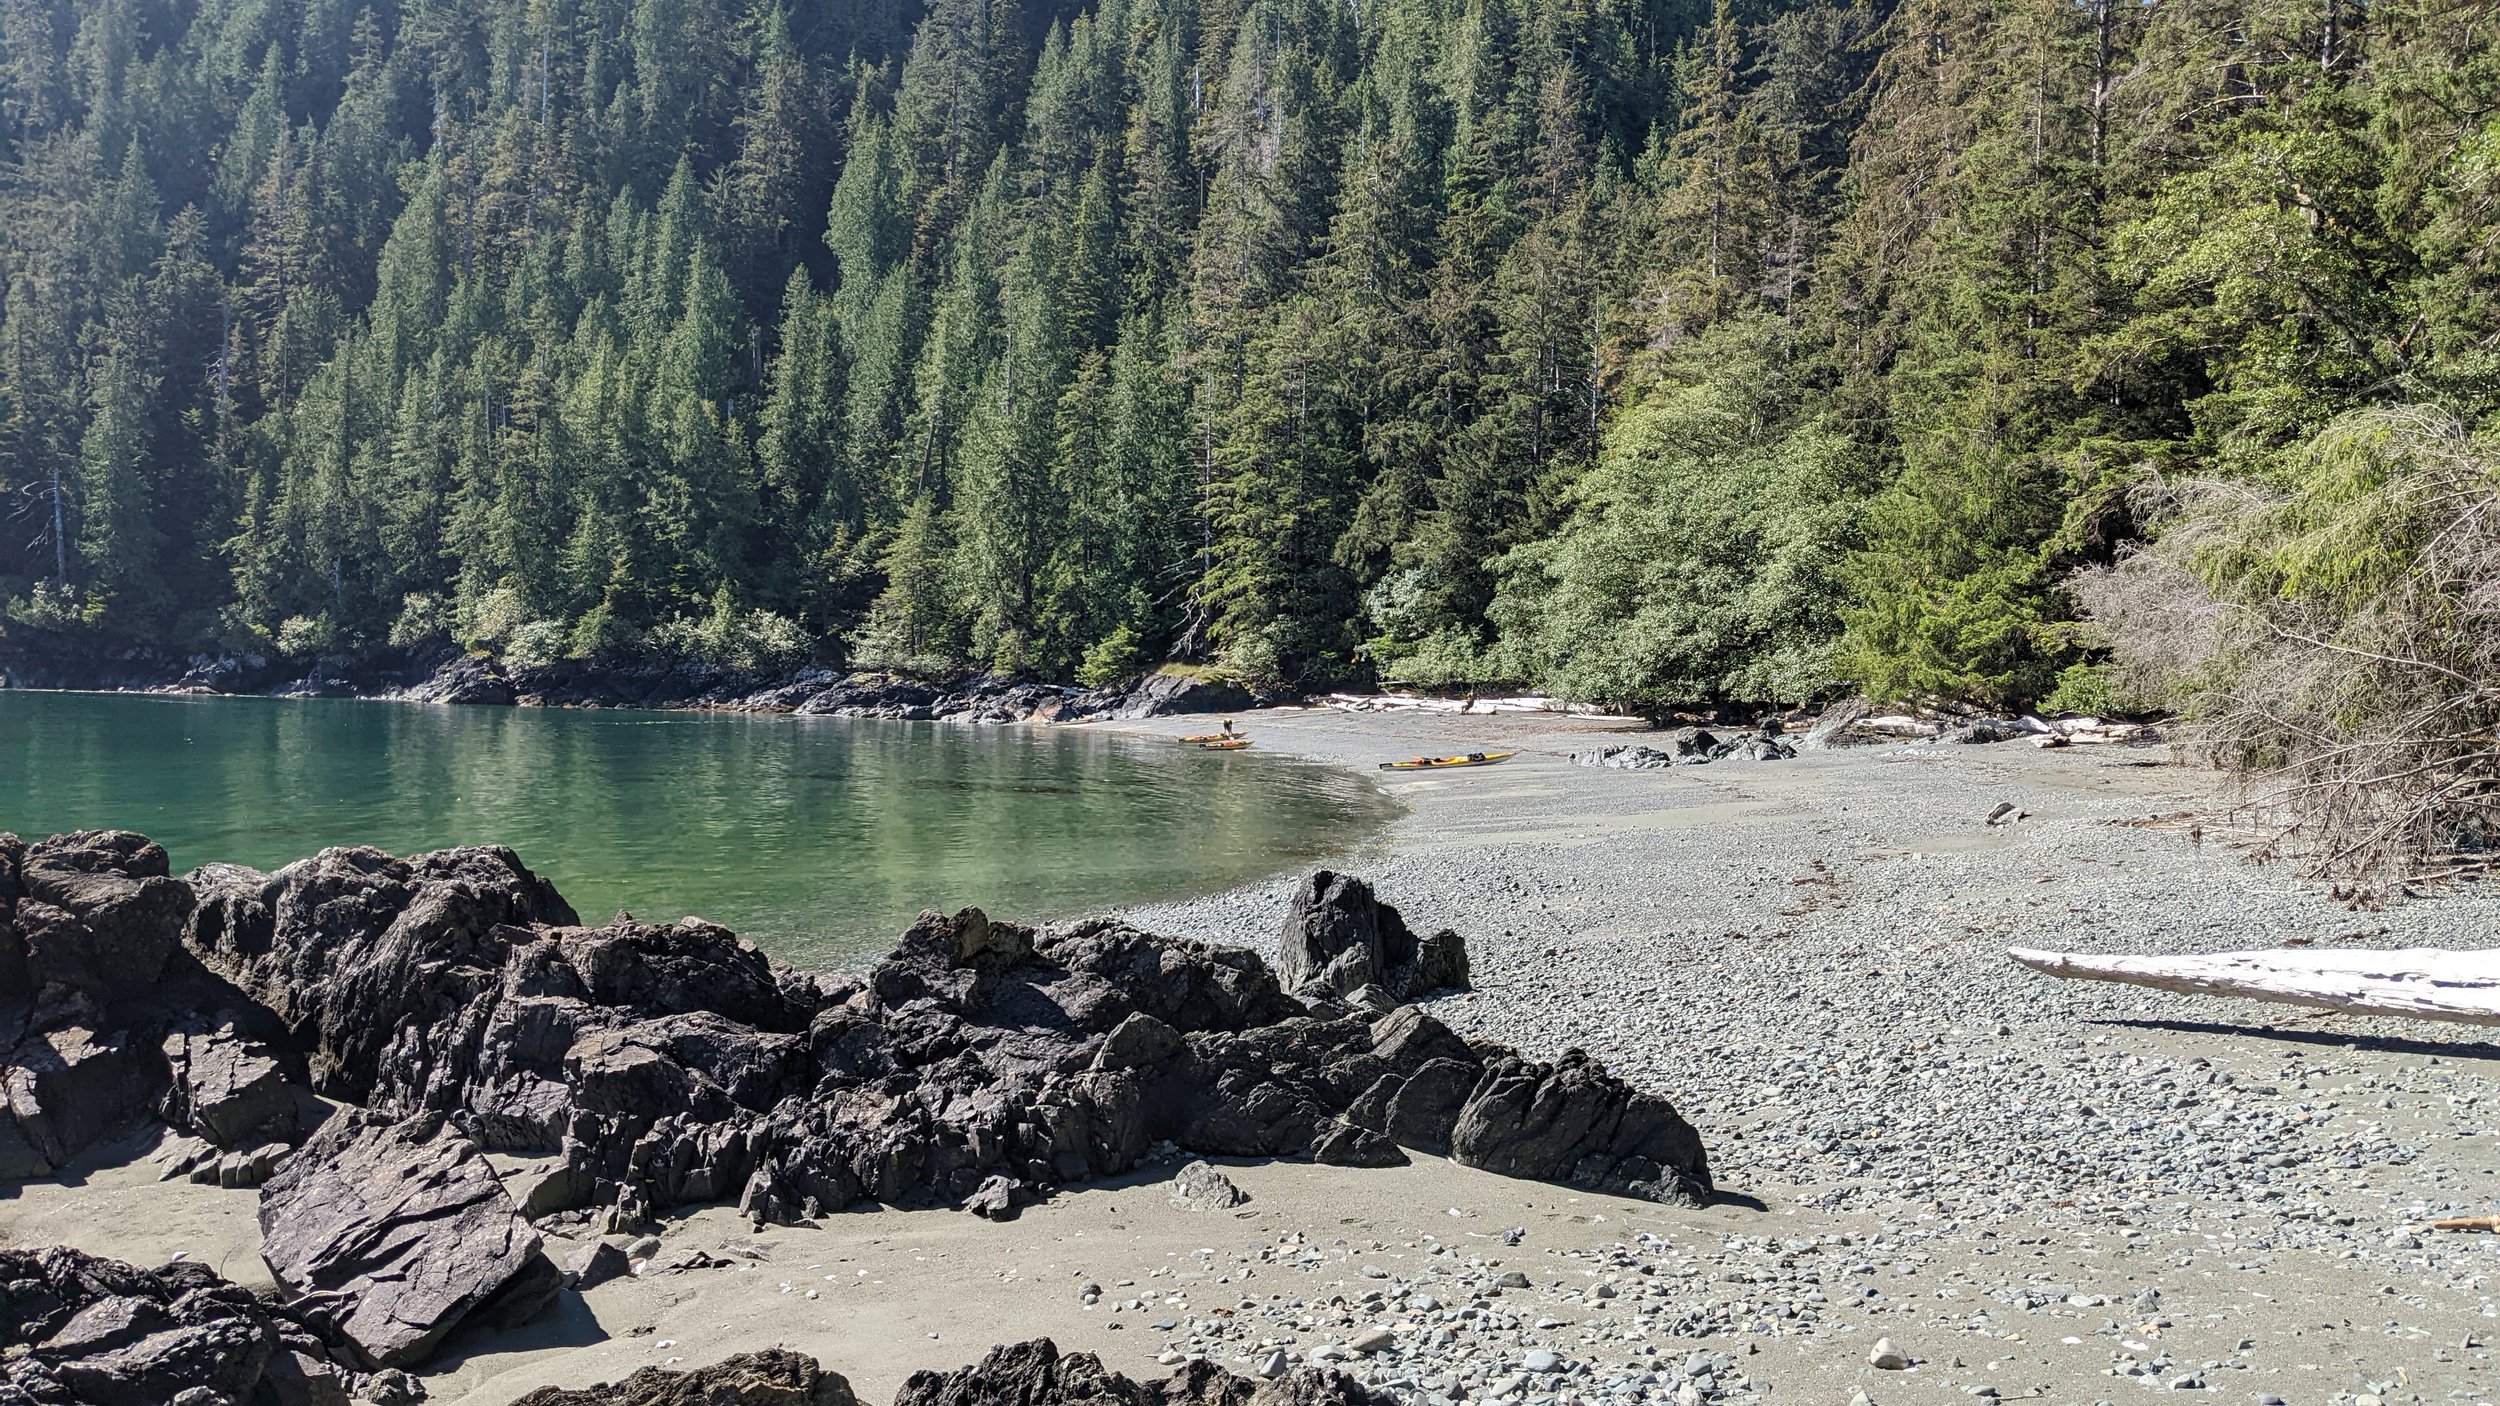
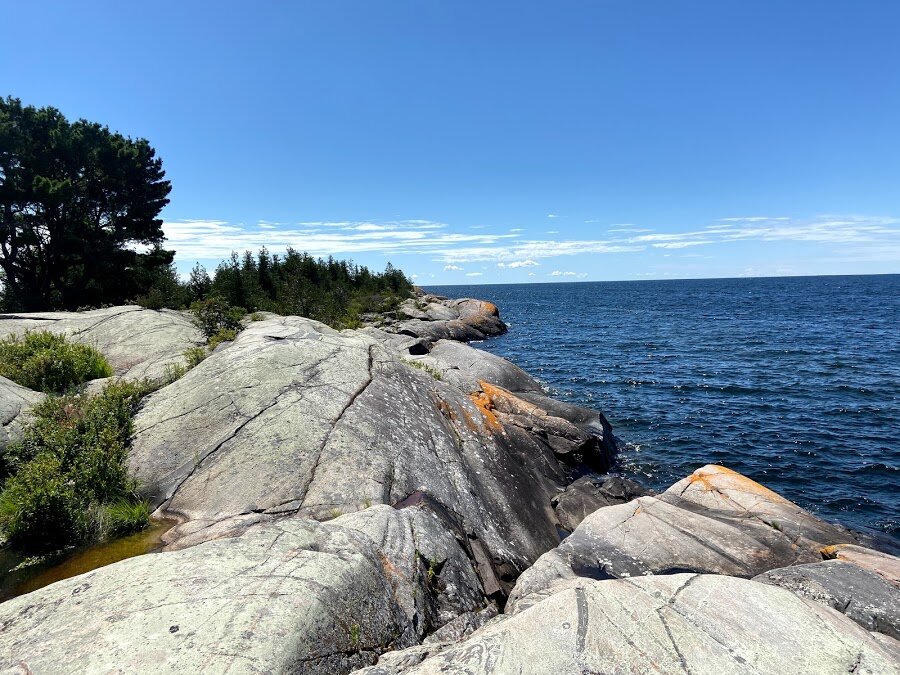
One of the many beautiful beaches on South Benjamin island.

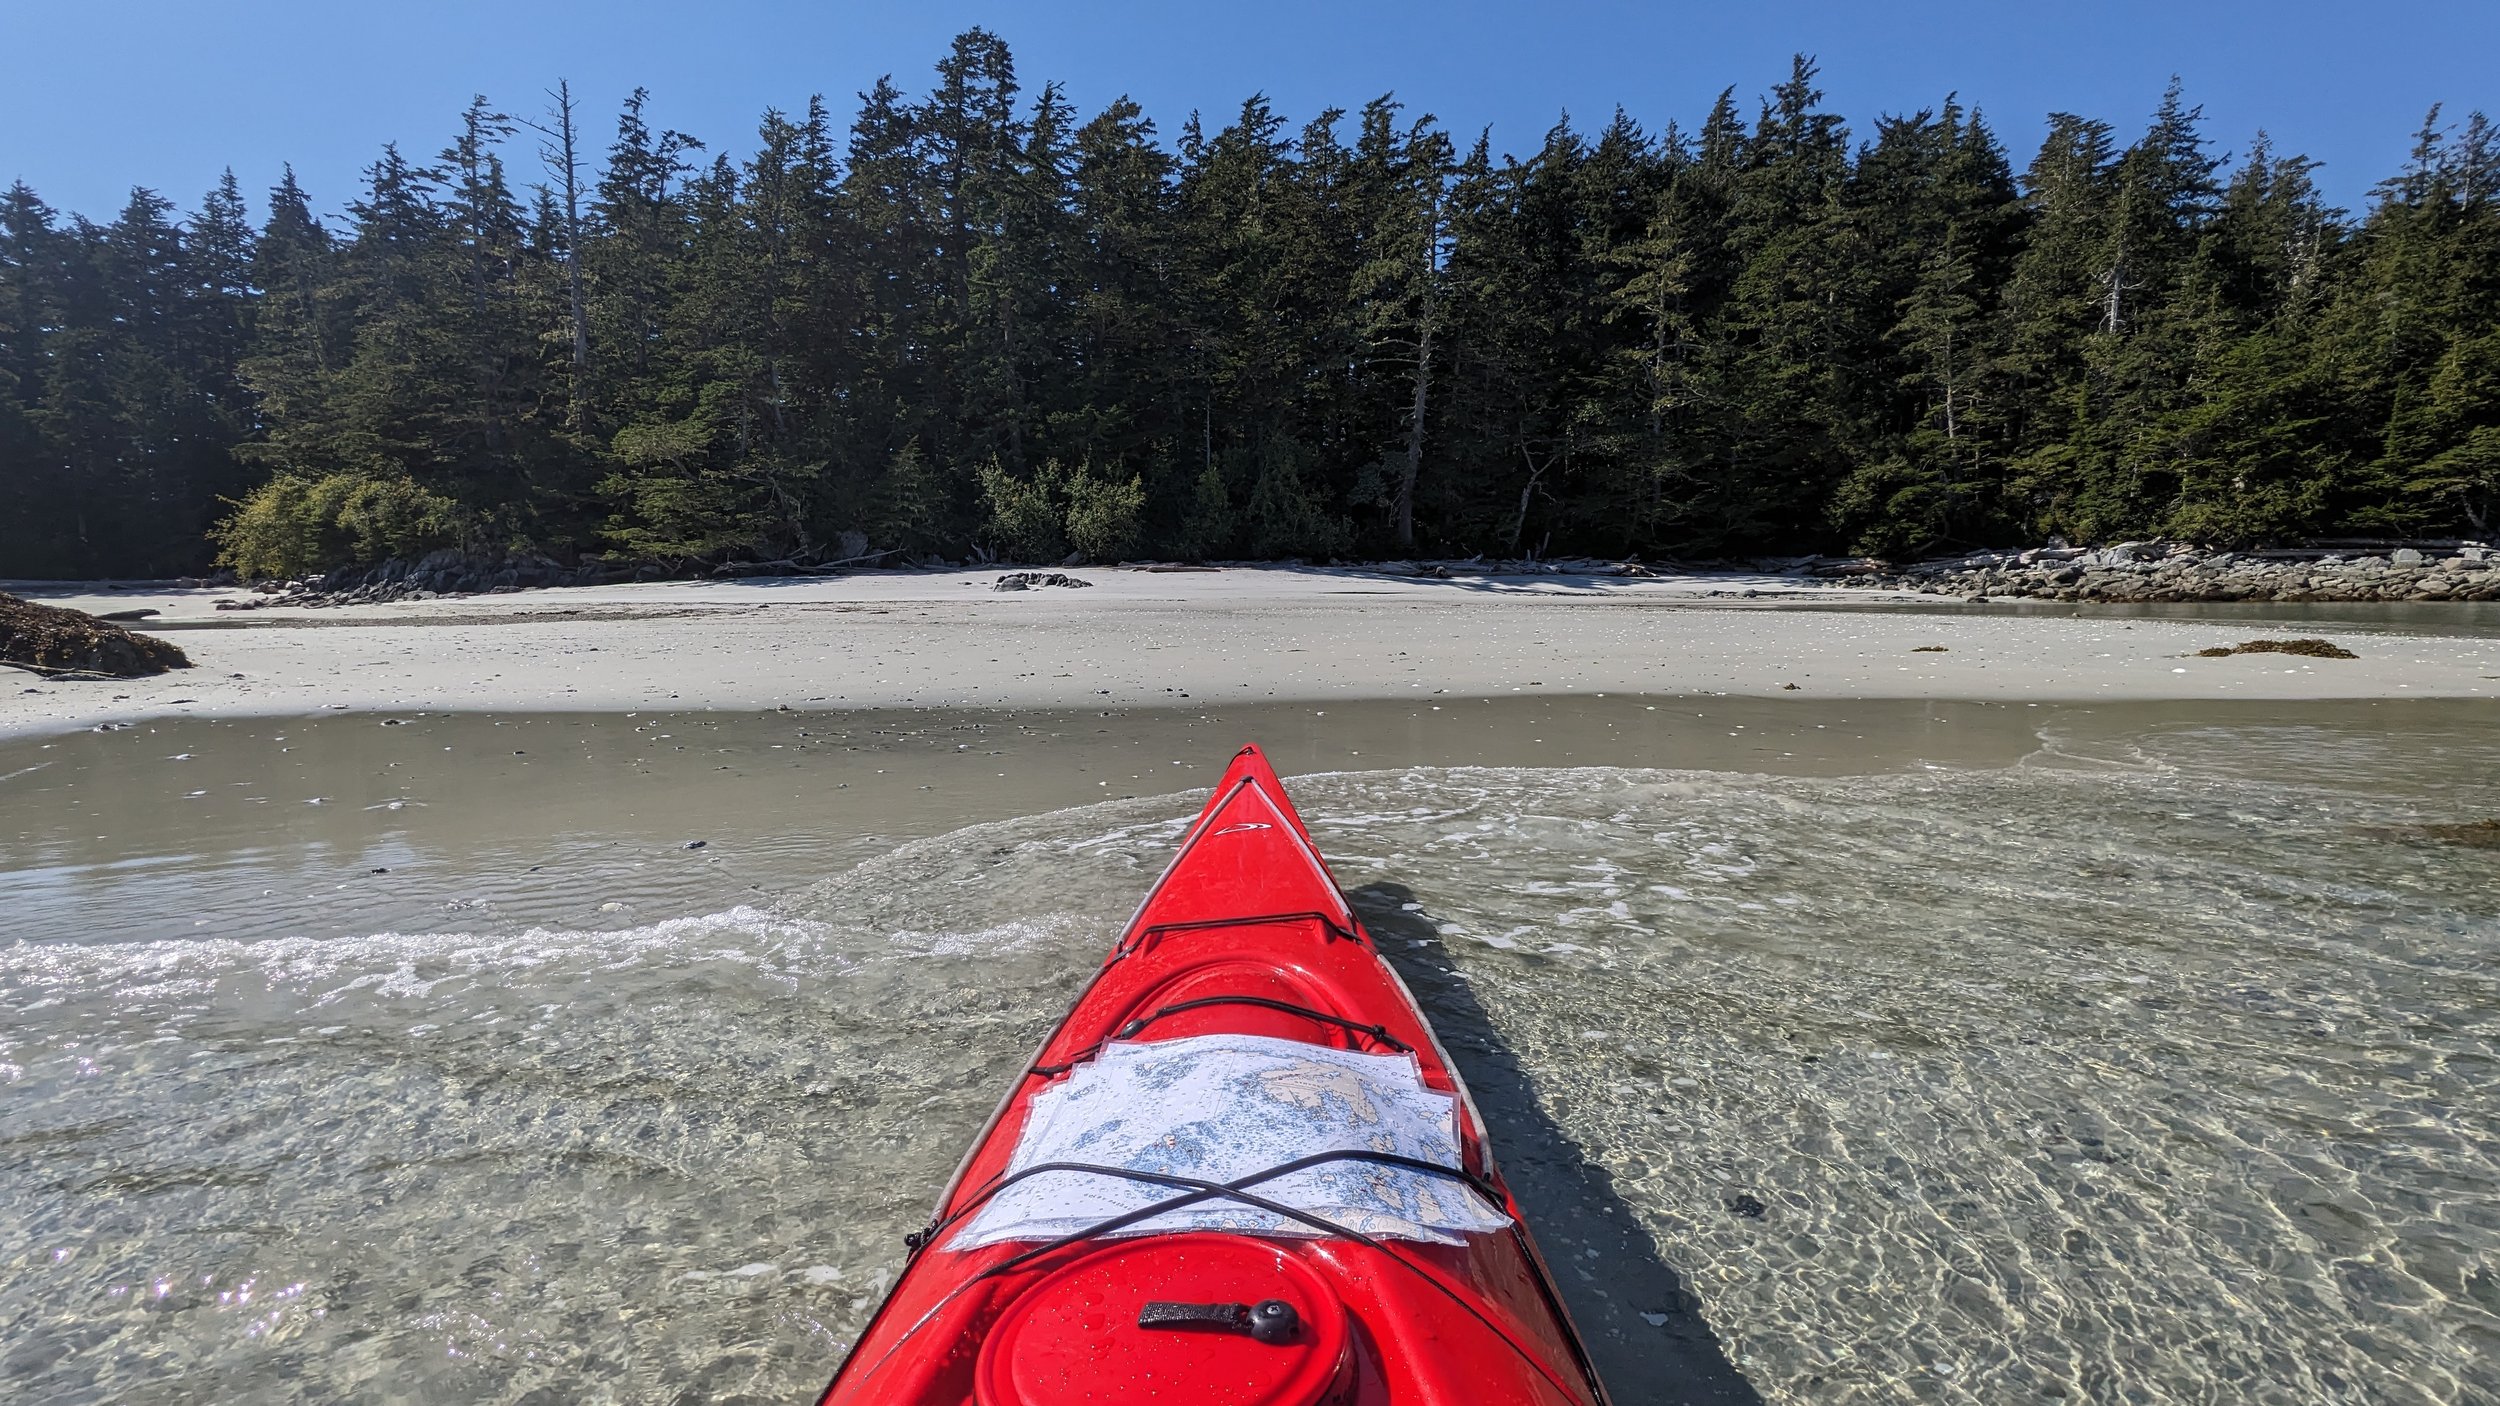
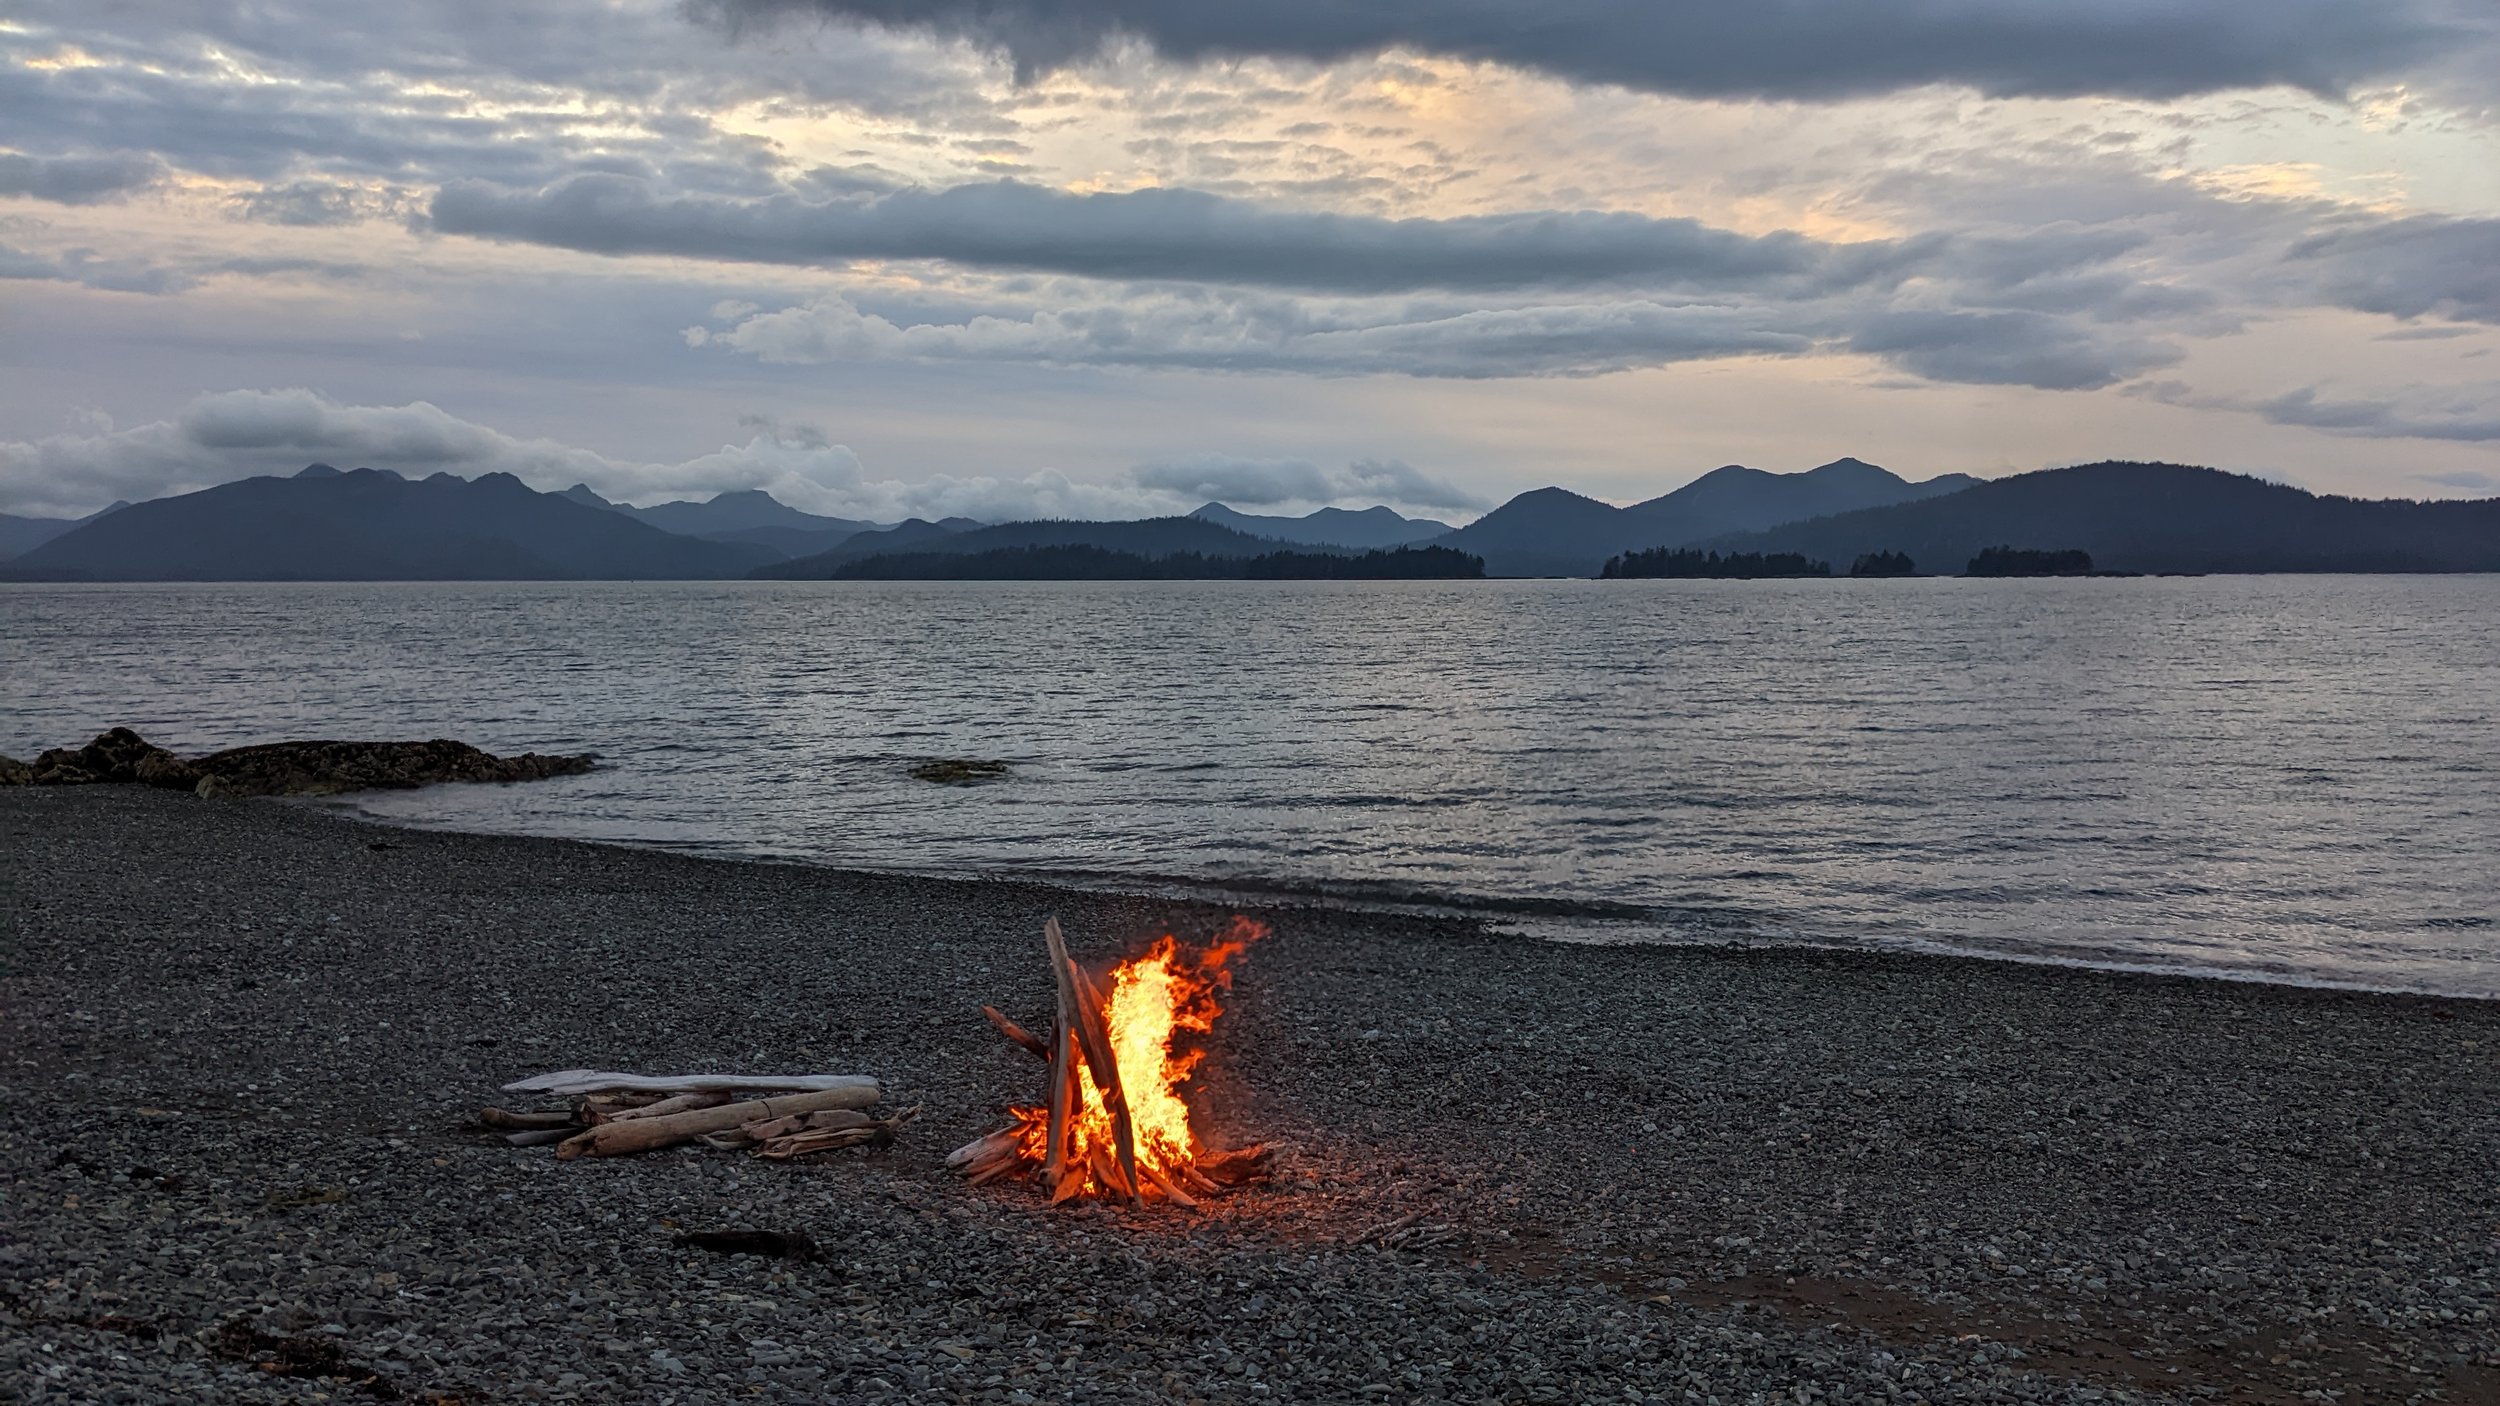
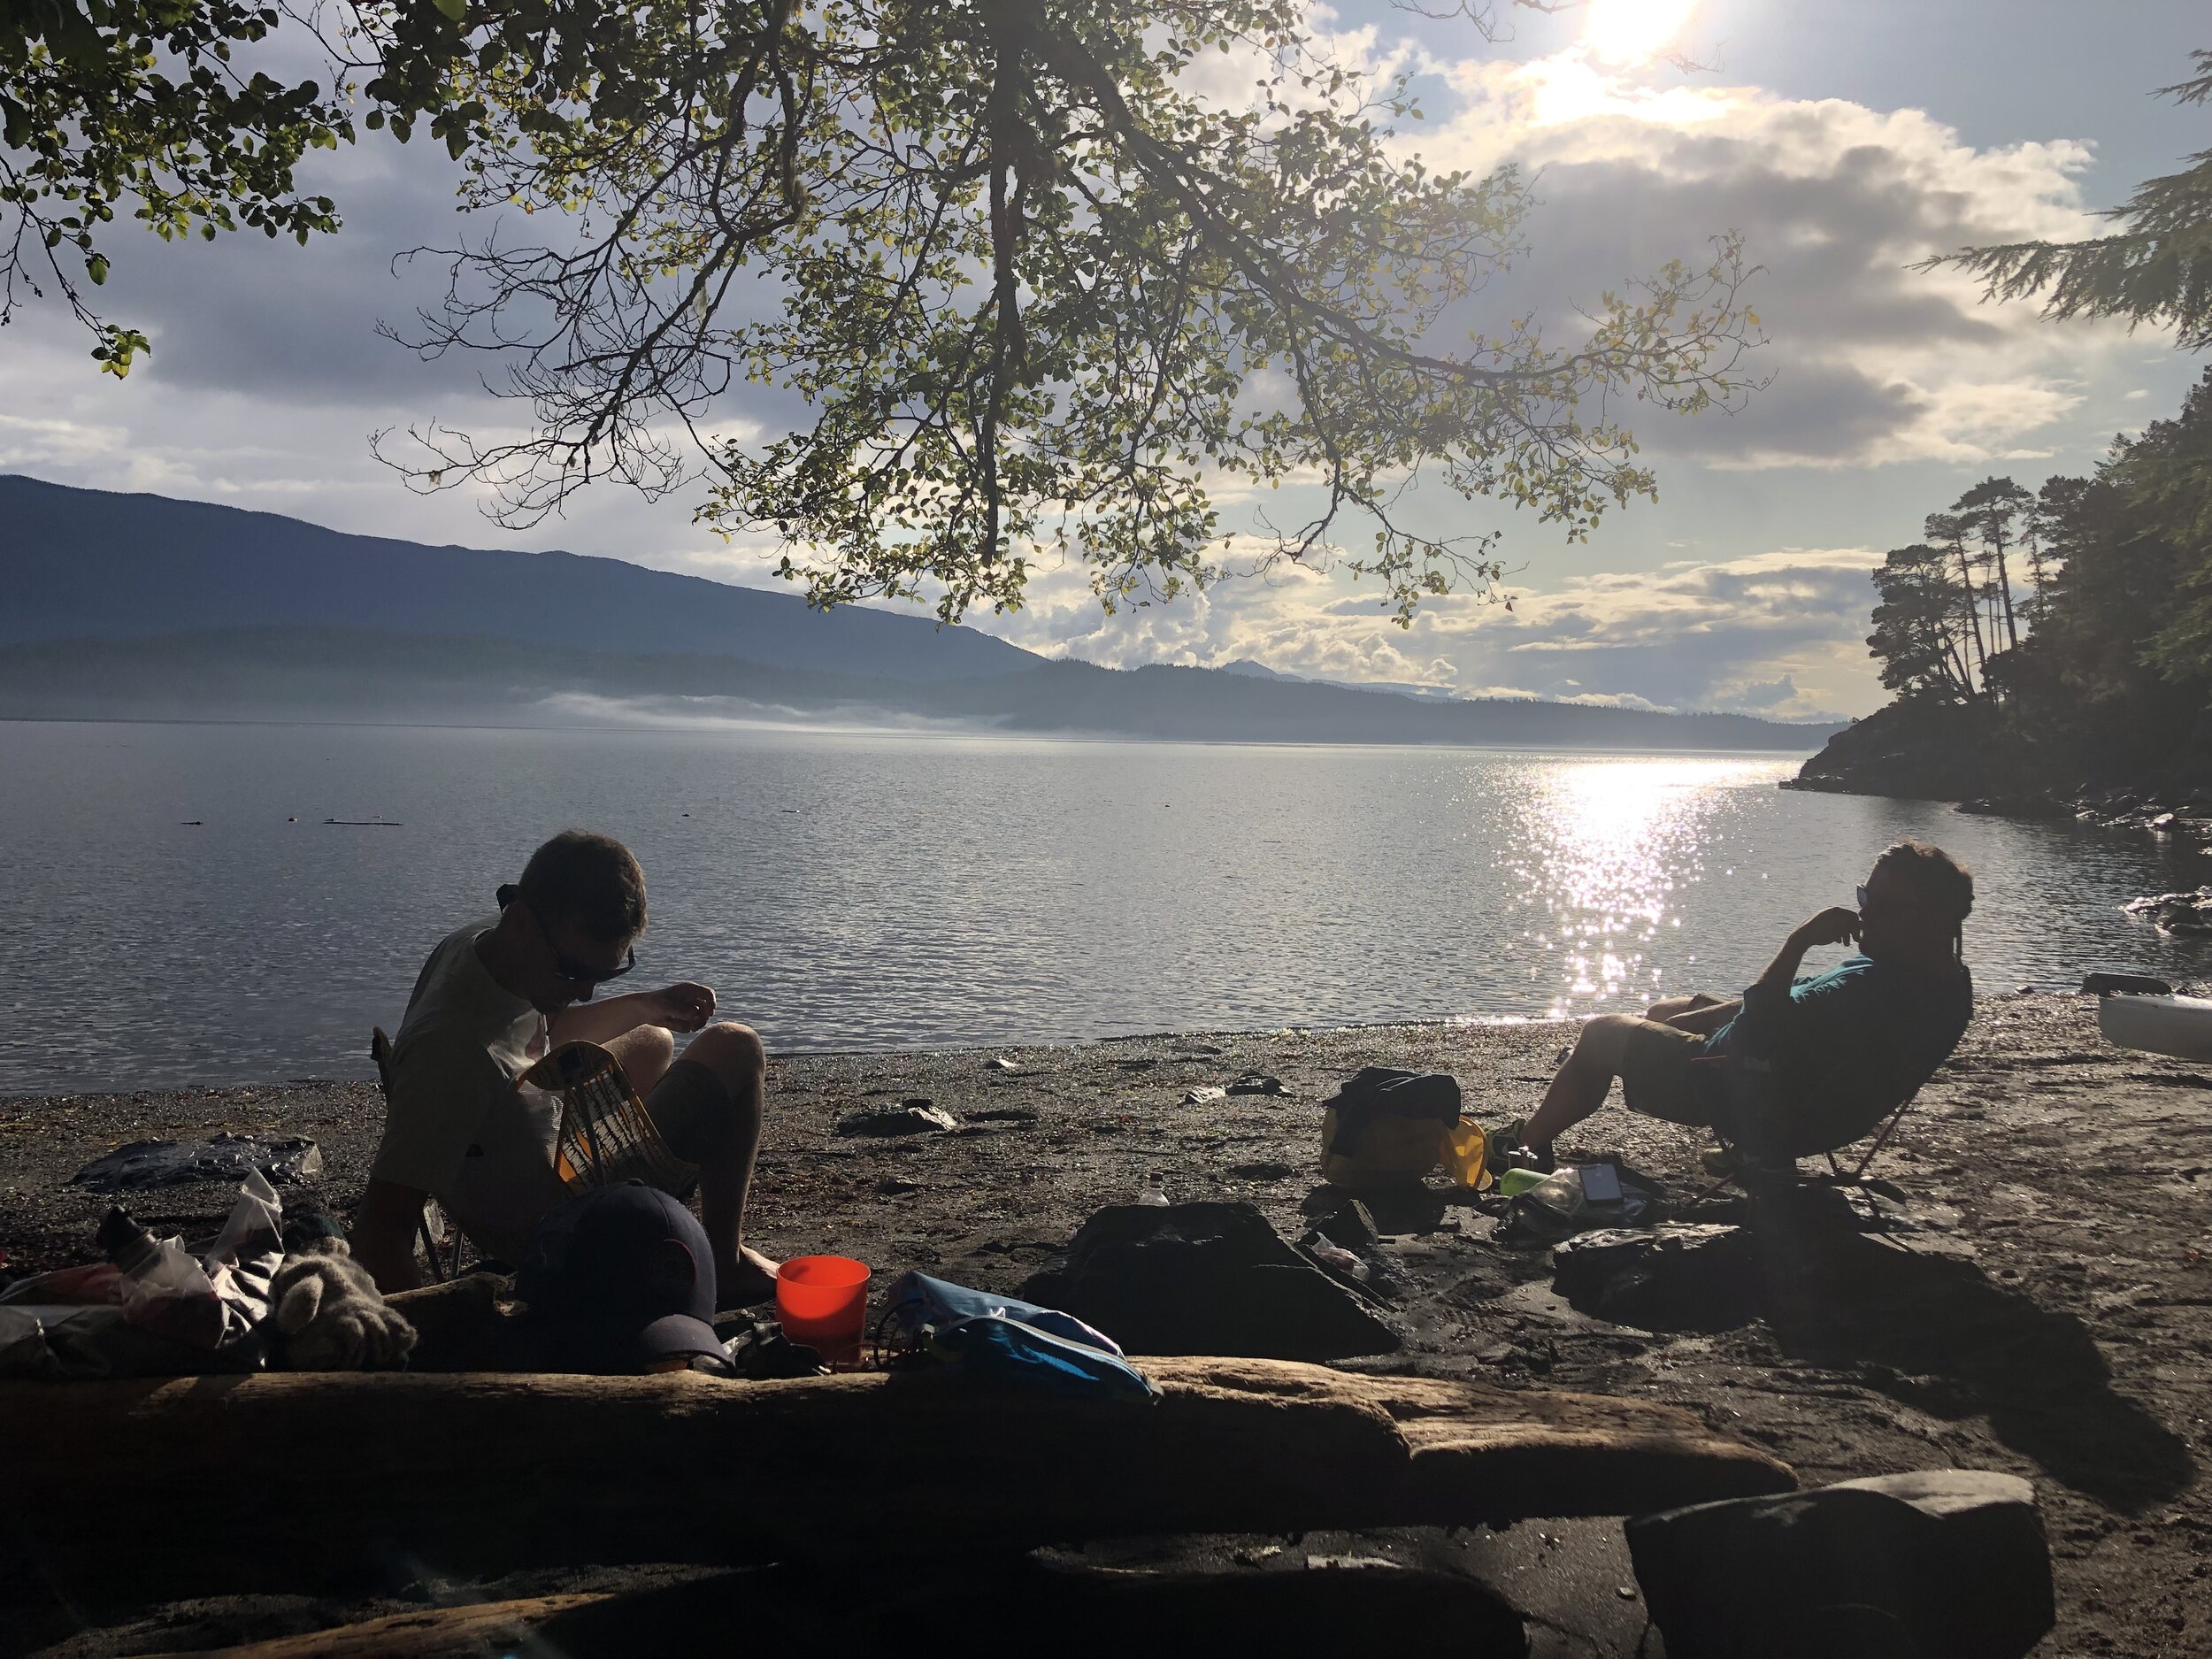
On our second day, the winds calmed down and let us explore all the bays and inlets of South Benjamin Island at a leisurely pace. Centuries of pounding waves and mineral erosion from Manitoulin have formed beautiful sandy beaches between the cliffs. These little inlets offer protection from storms and almost all have a cozy site to tuck into, depending on the wind direction.

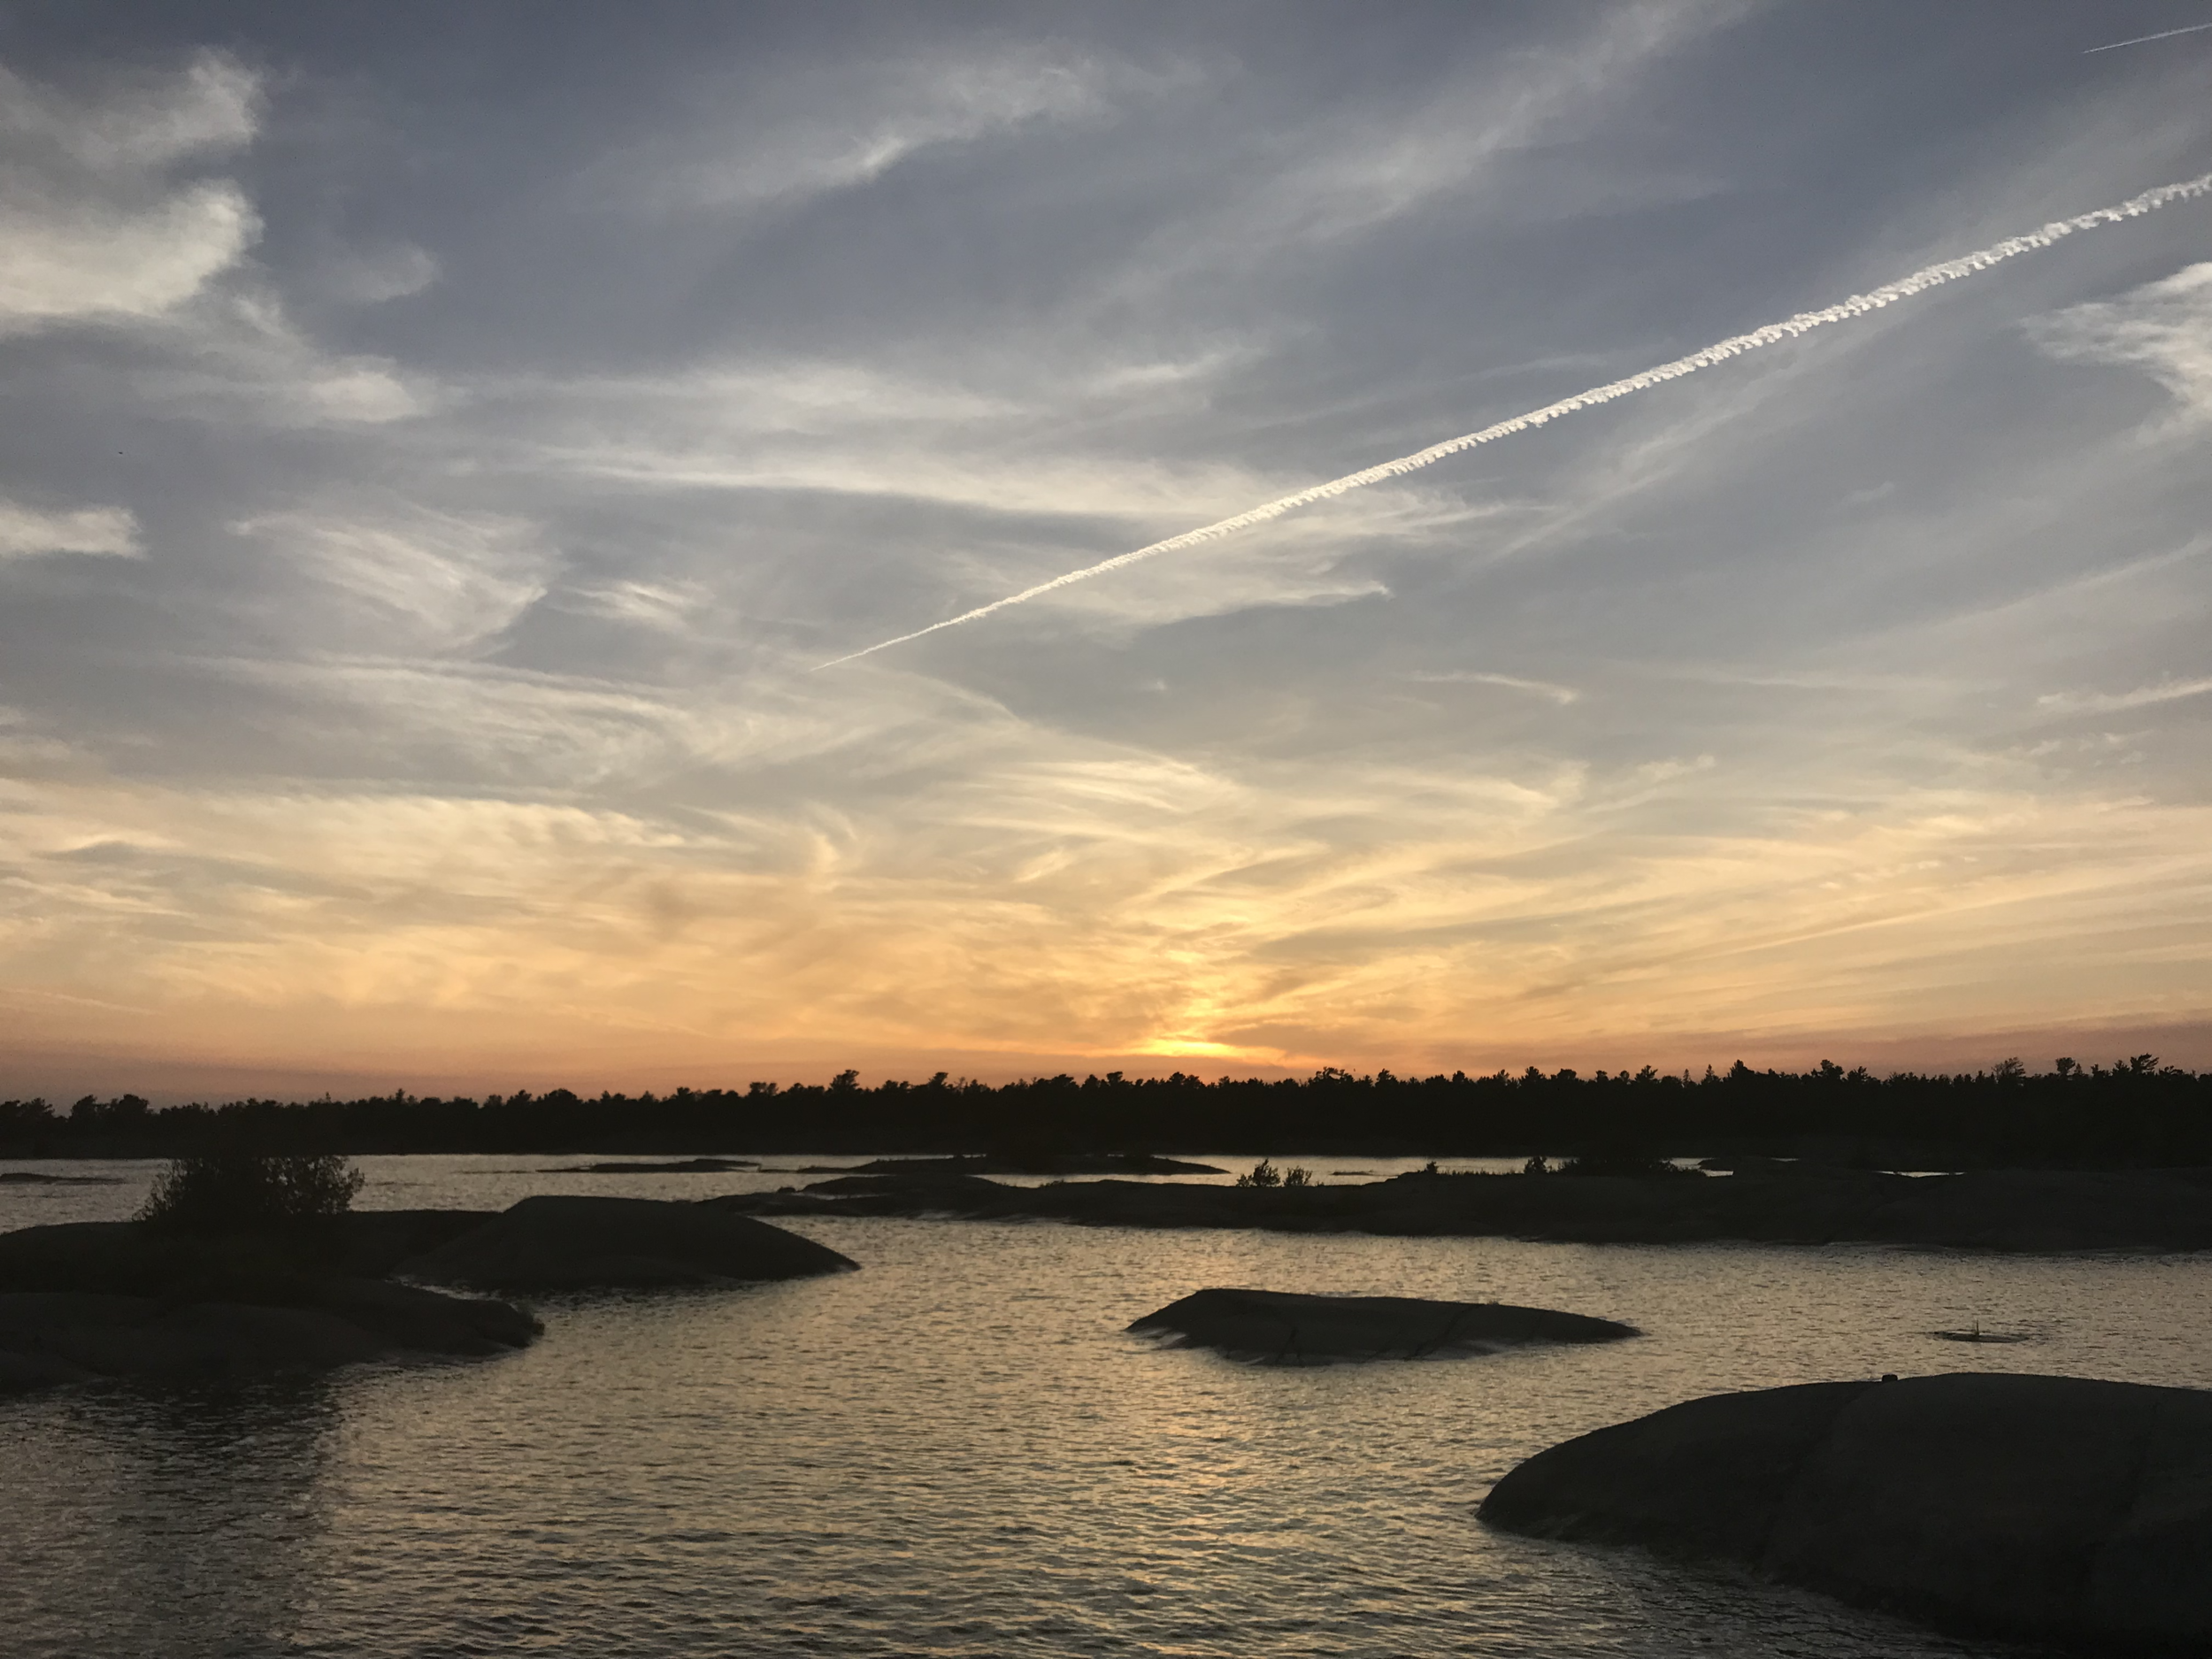
Tuning into our radio for regular weather reports, we planned a little excursion around Croker Island the following day, after a big storm had finished blowing through overnight.

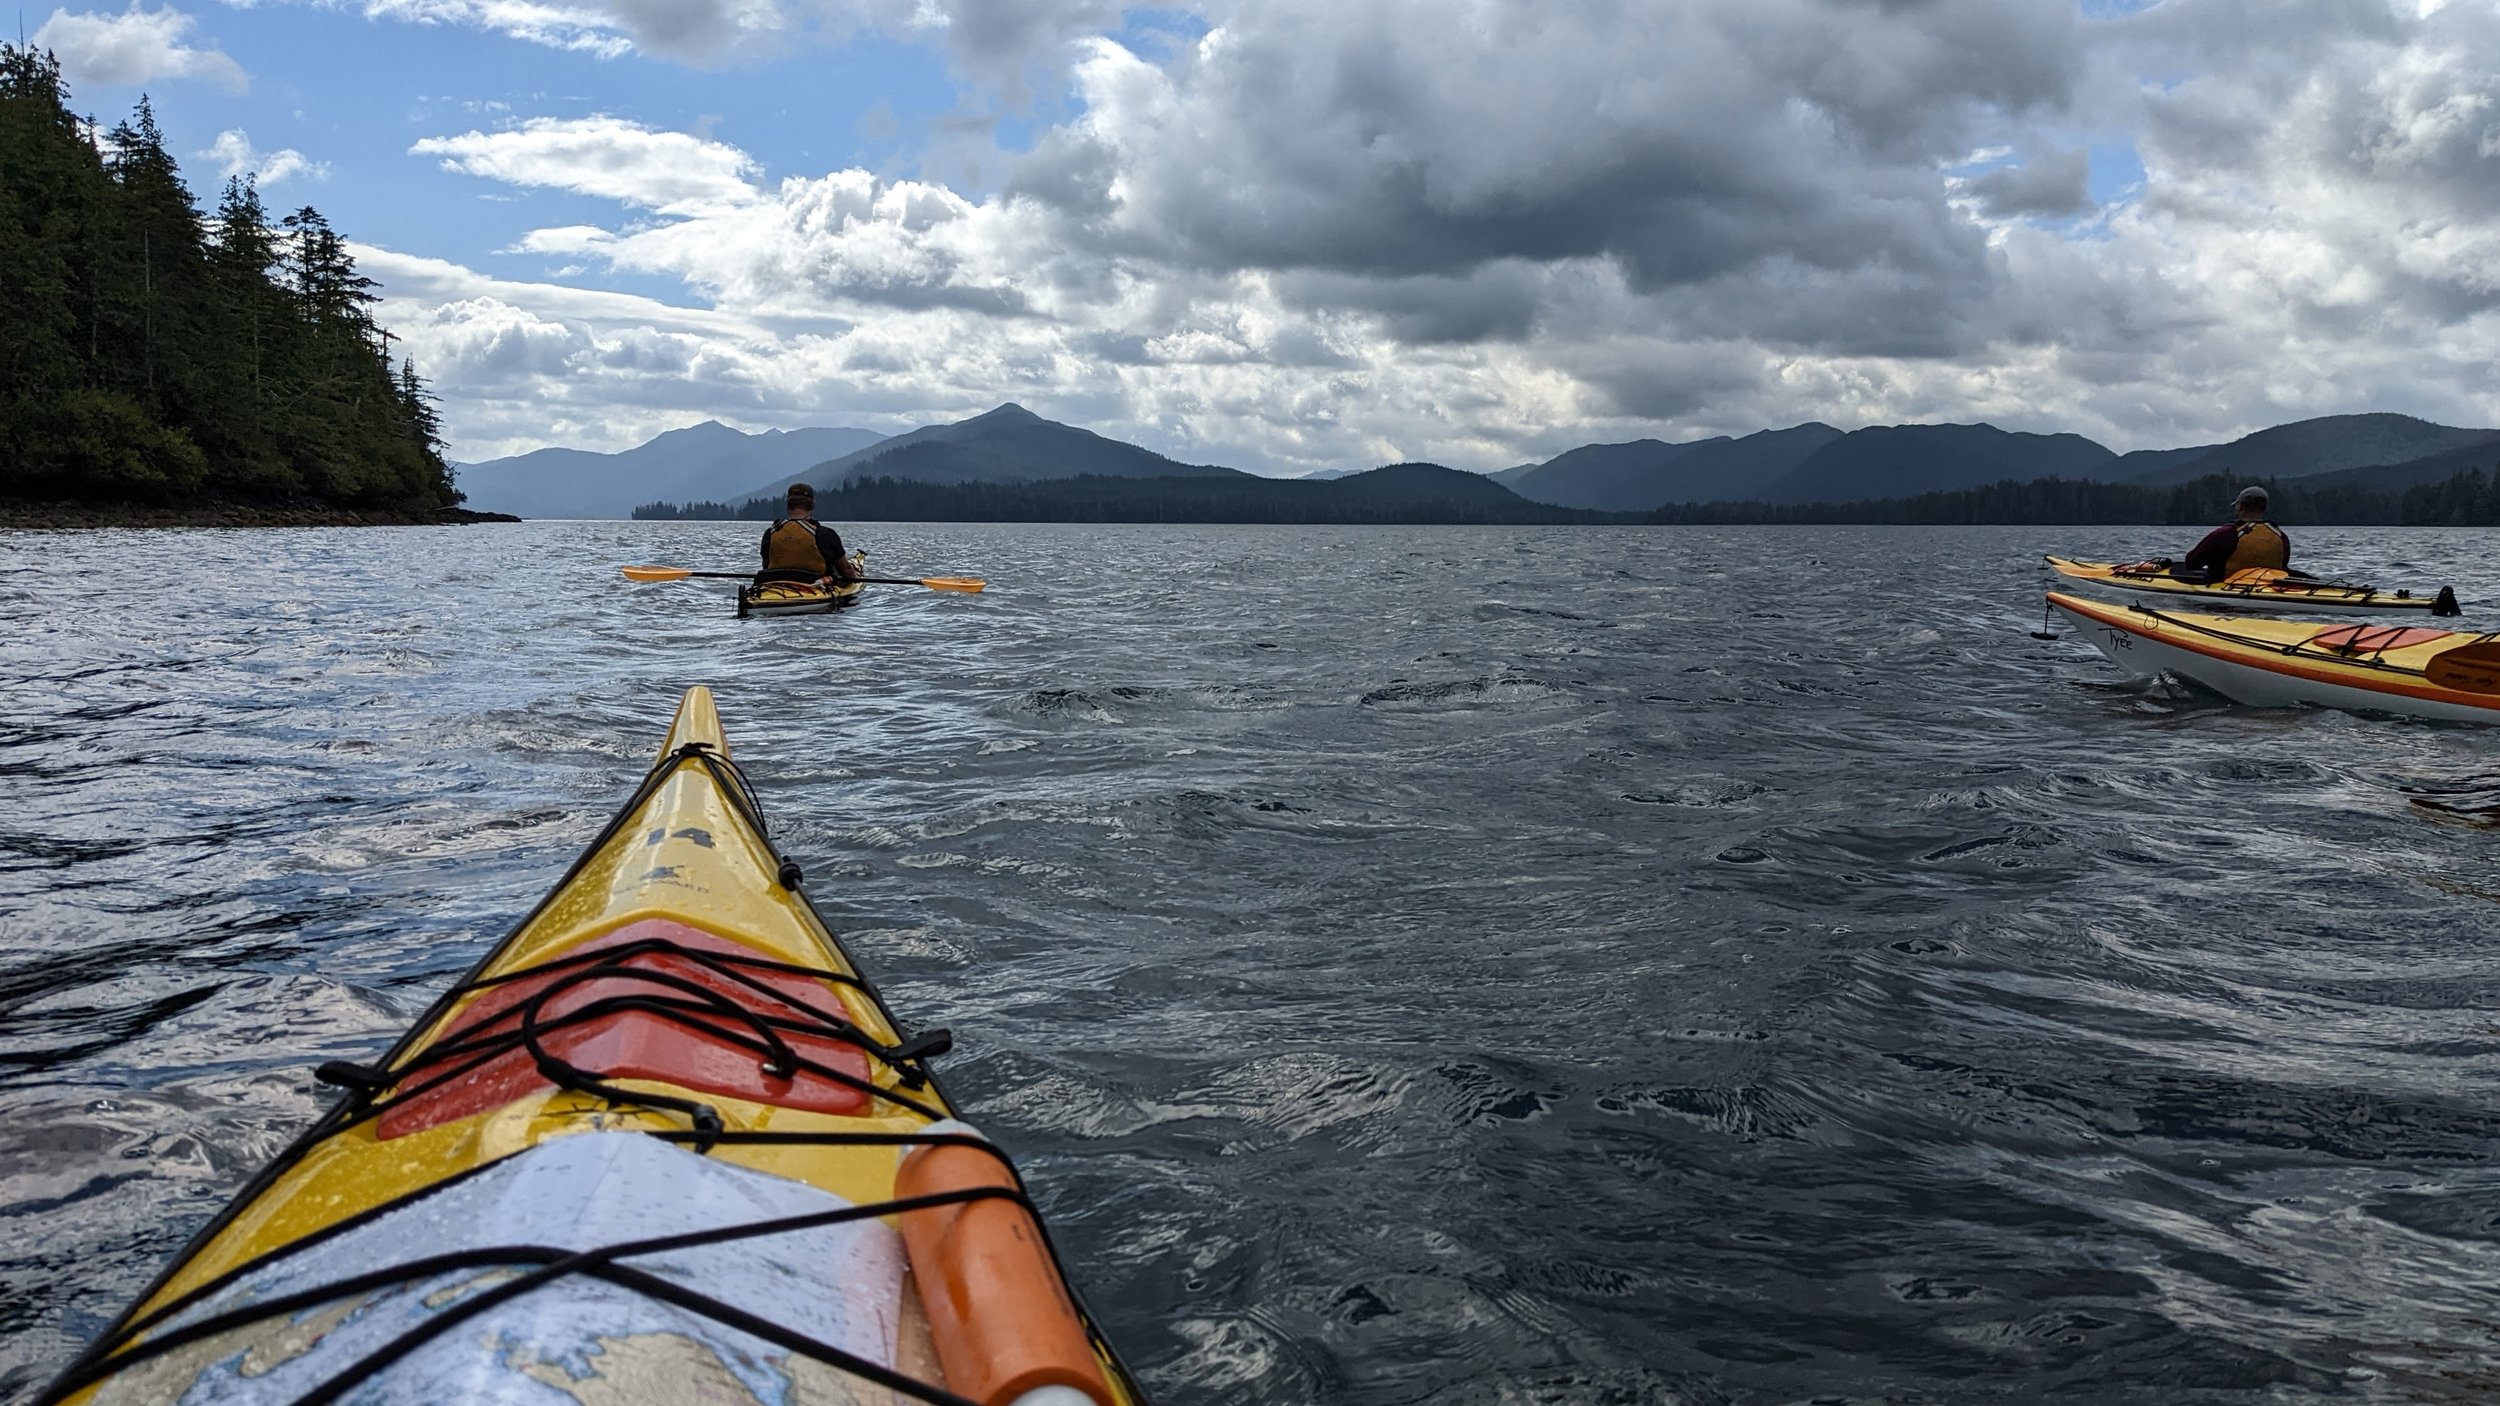
Winds picking up on the trip back from Croker Island.

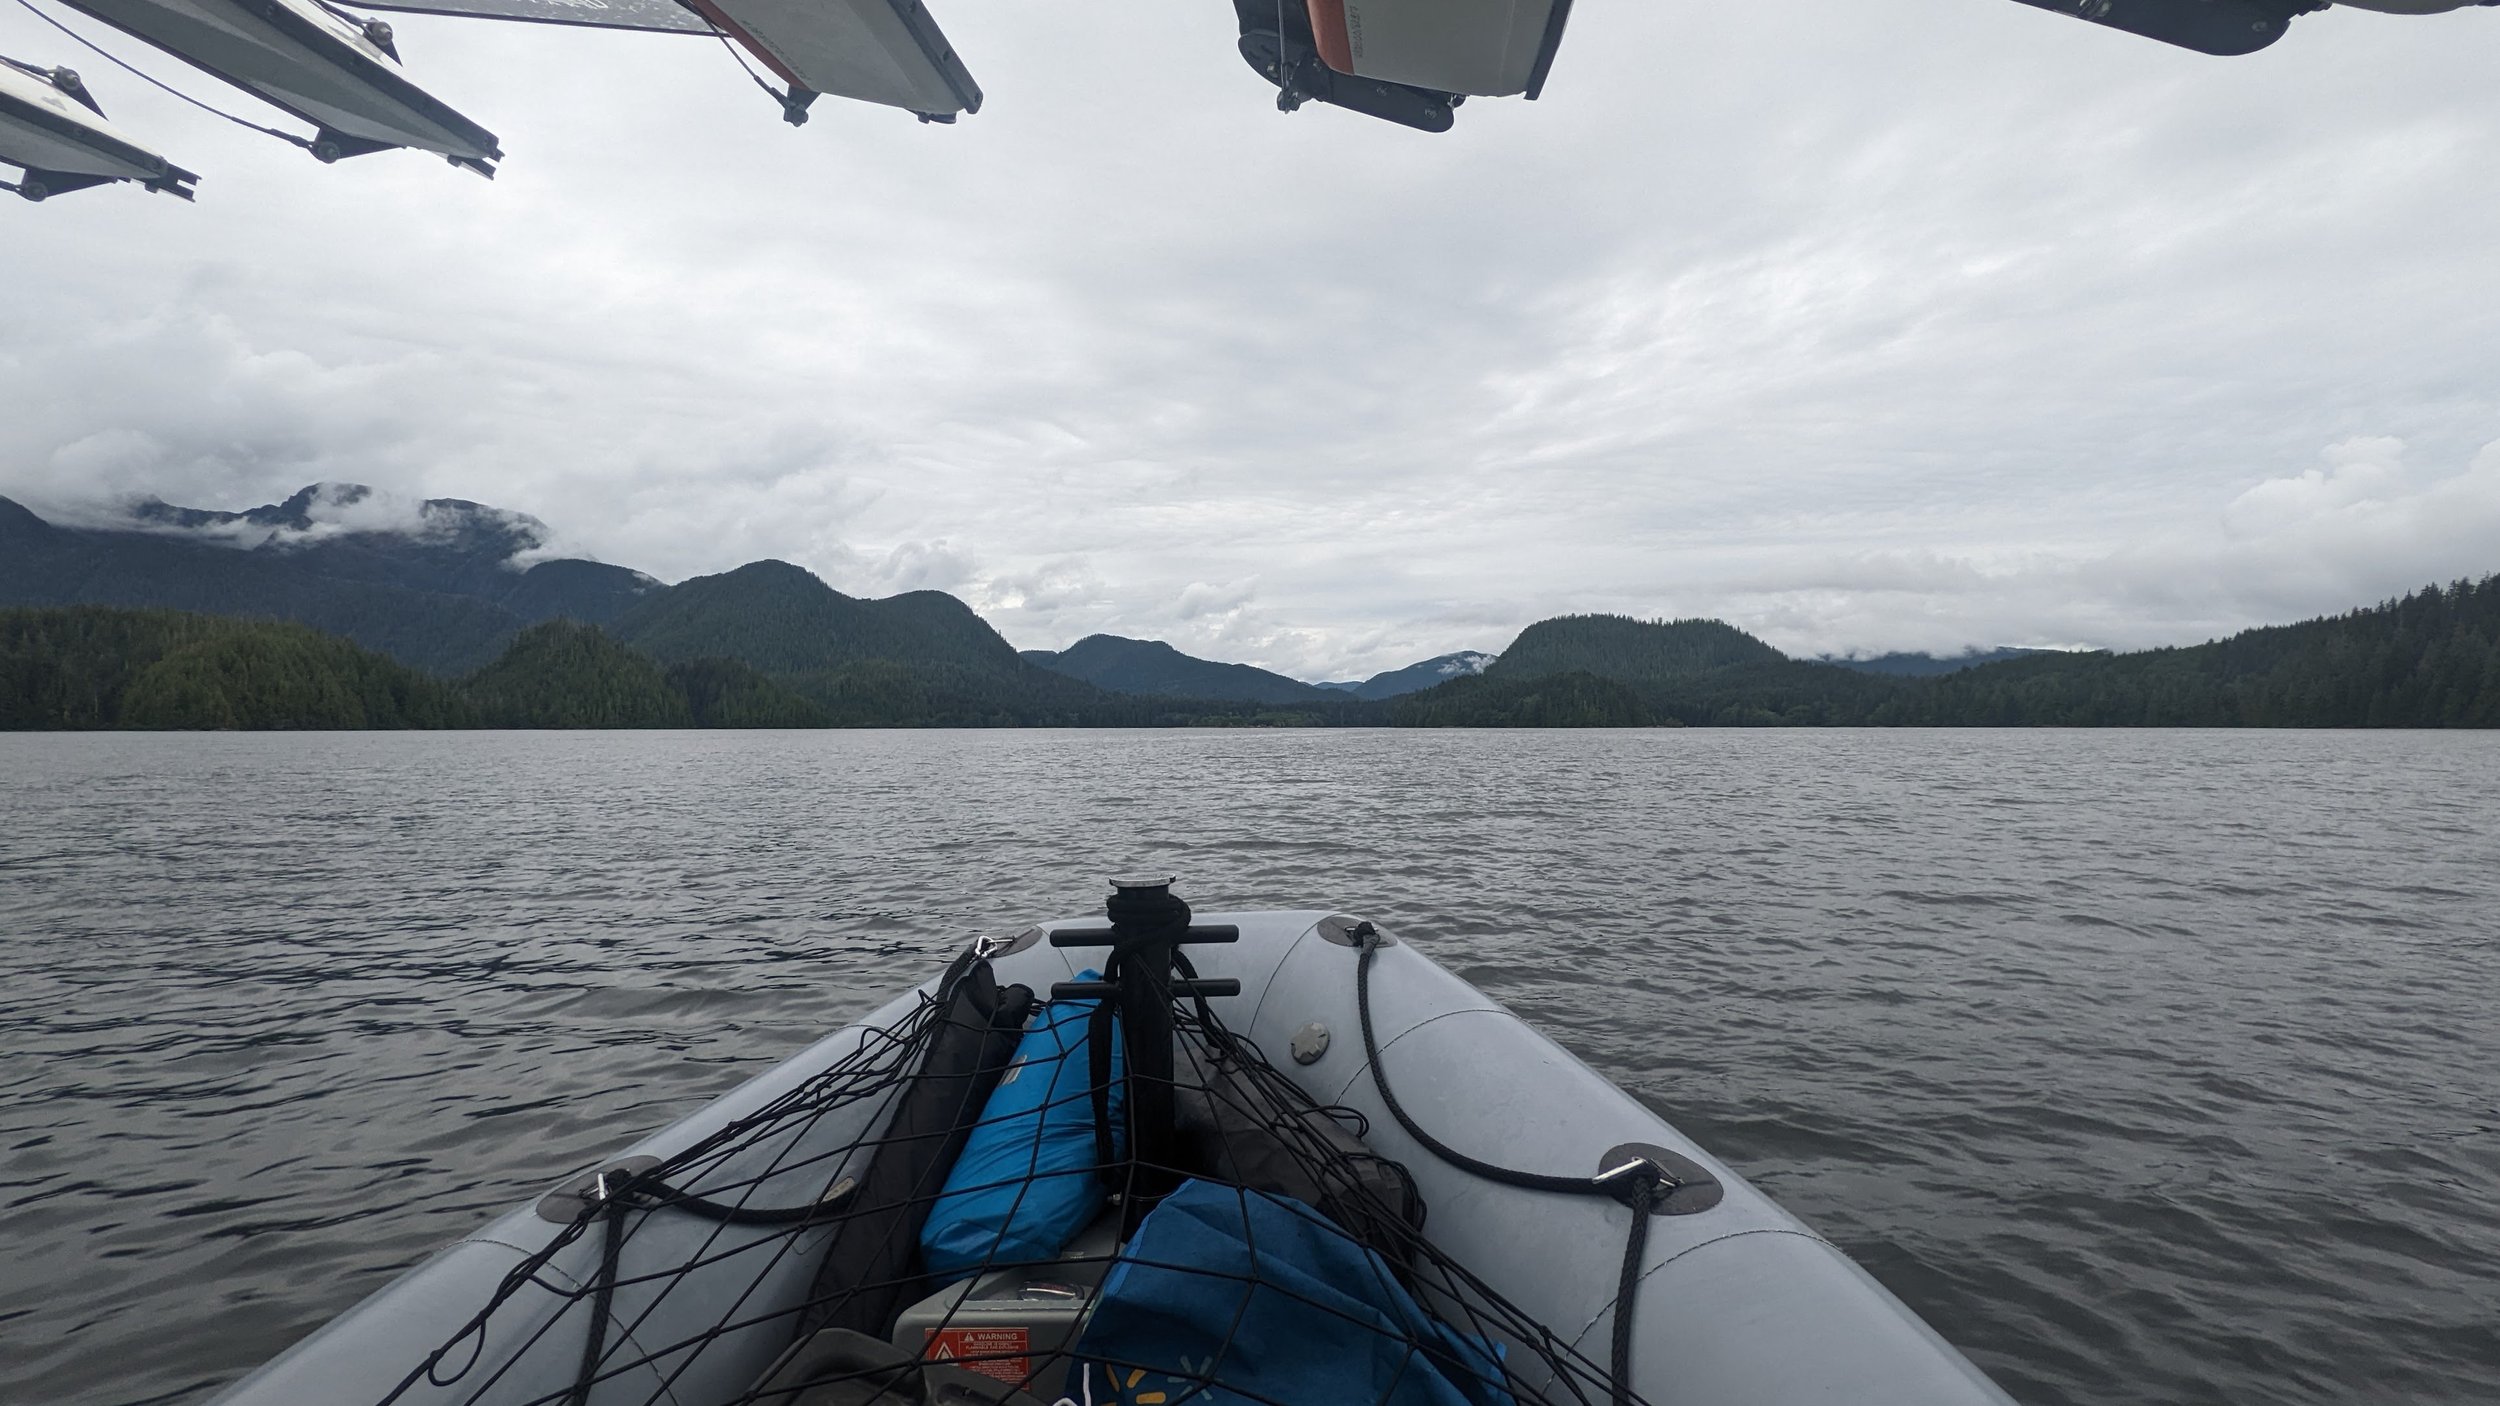
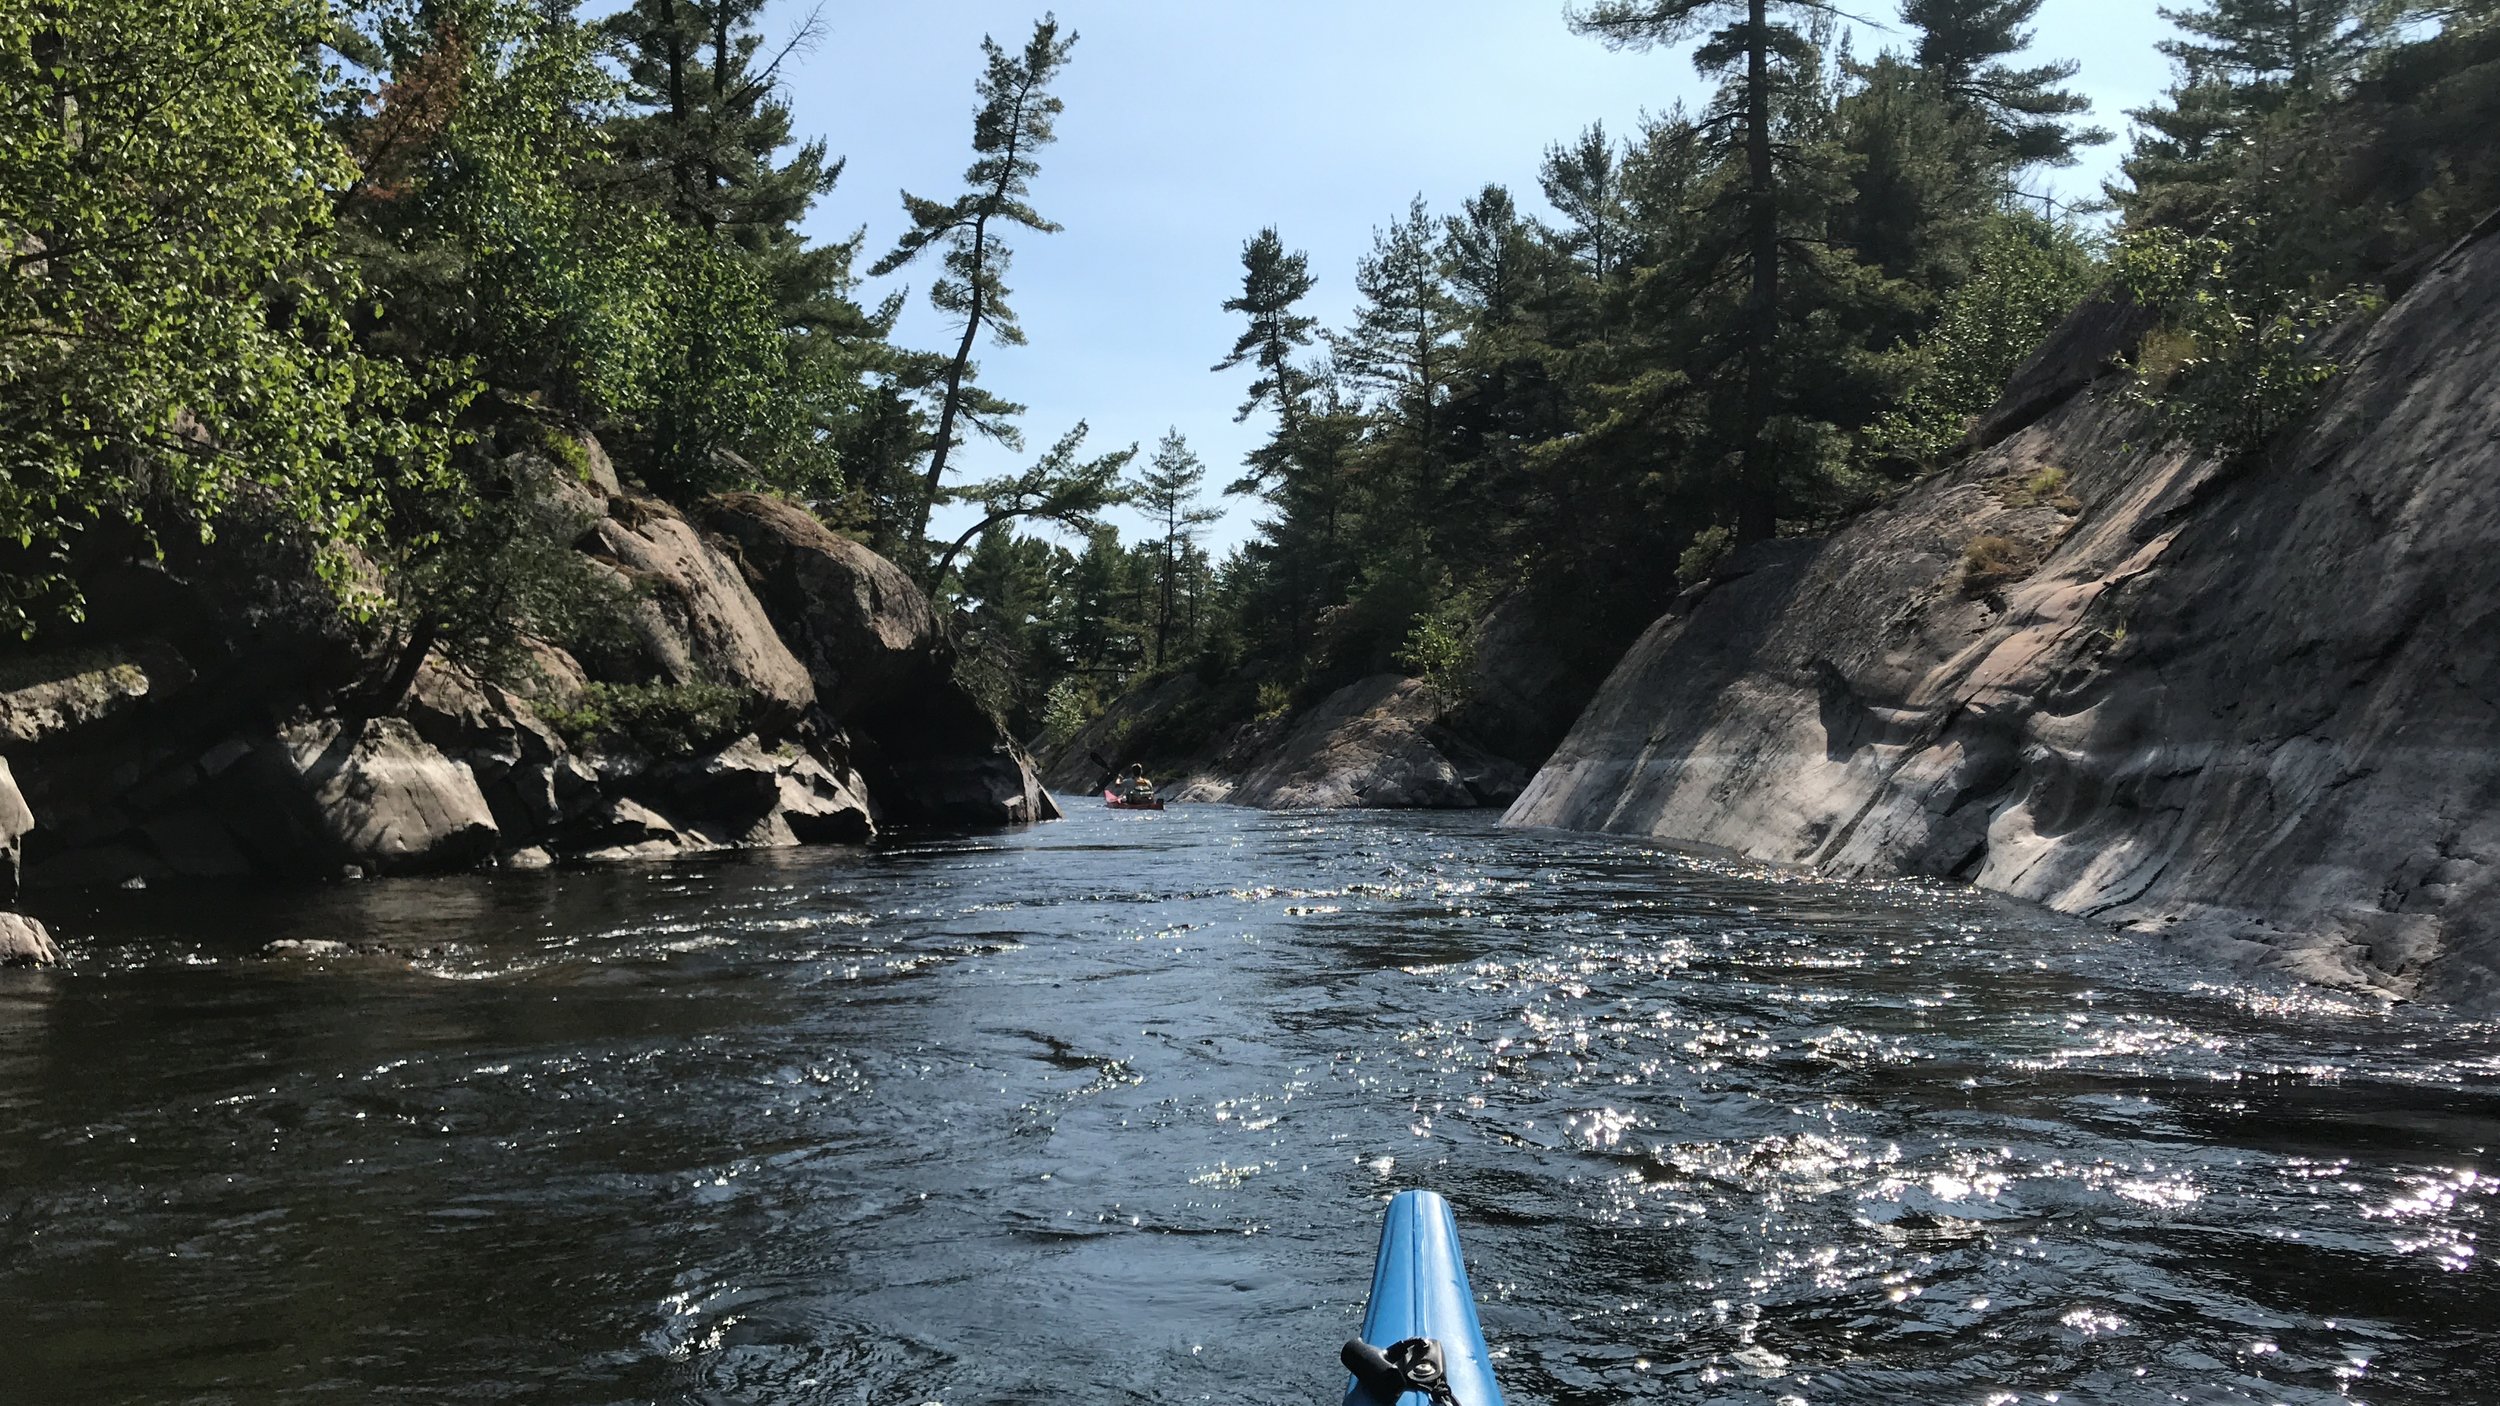
The jaunt across to Croker reminded us how exposed the paddling is around here. It was only a few kilometers across, but that’s more than enough throw distance for waves to pick up and challenge even experienced paddlers. We would look for, and track towards, any scattered shoals to offer us even a brief windbreak as we made our crossings.

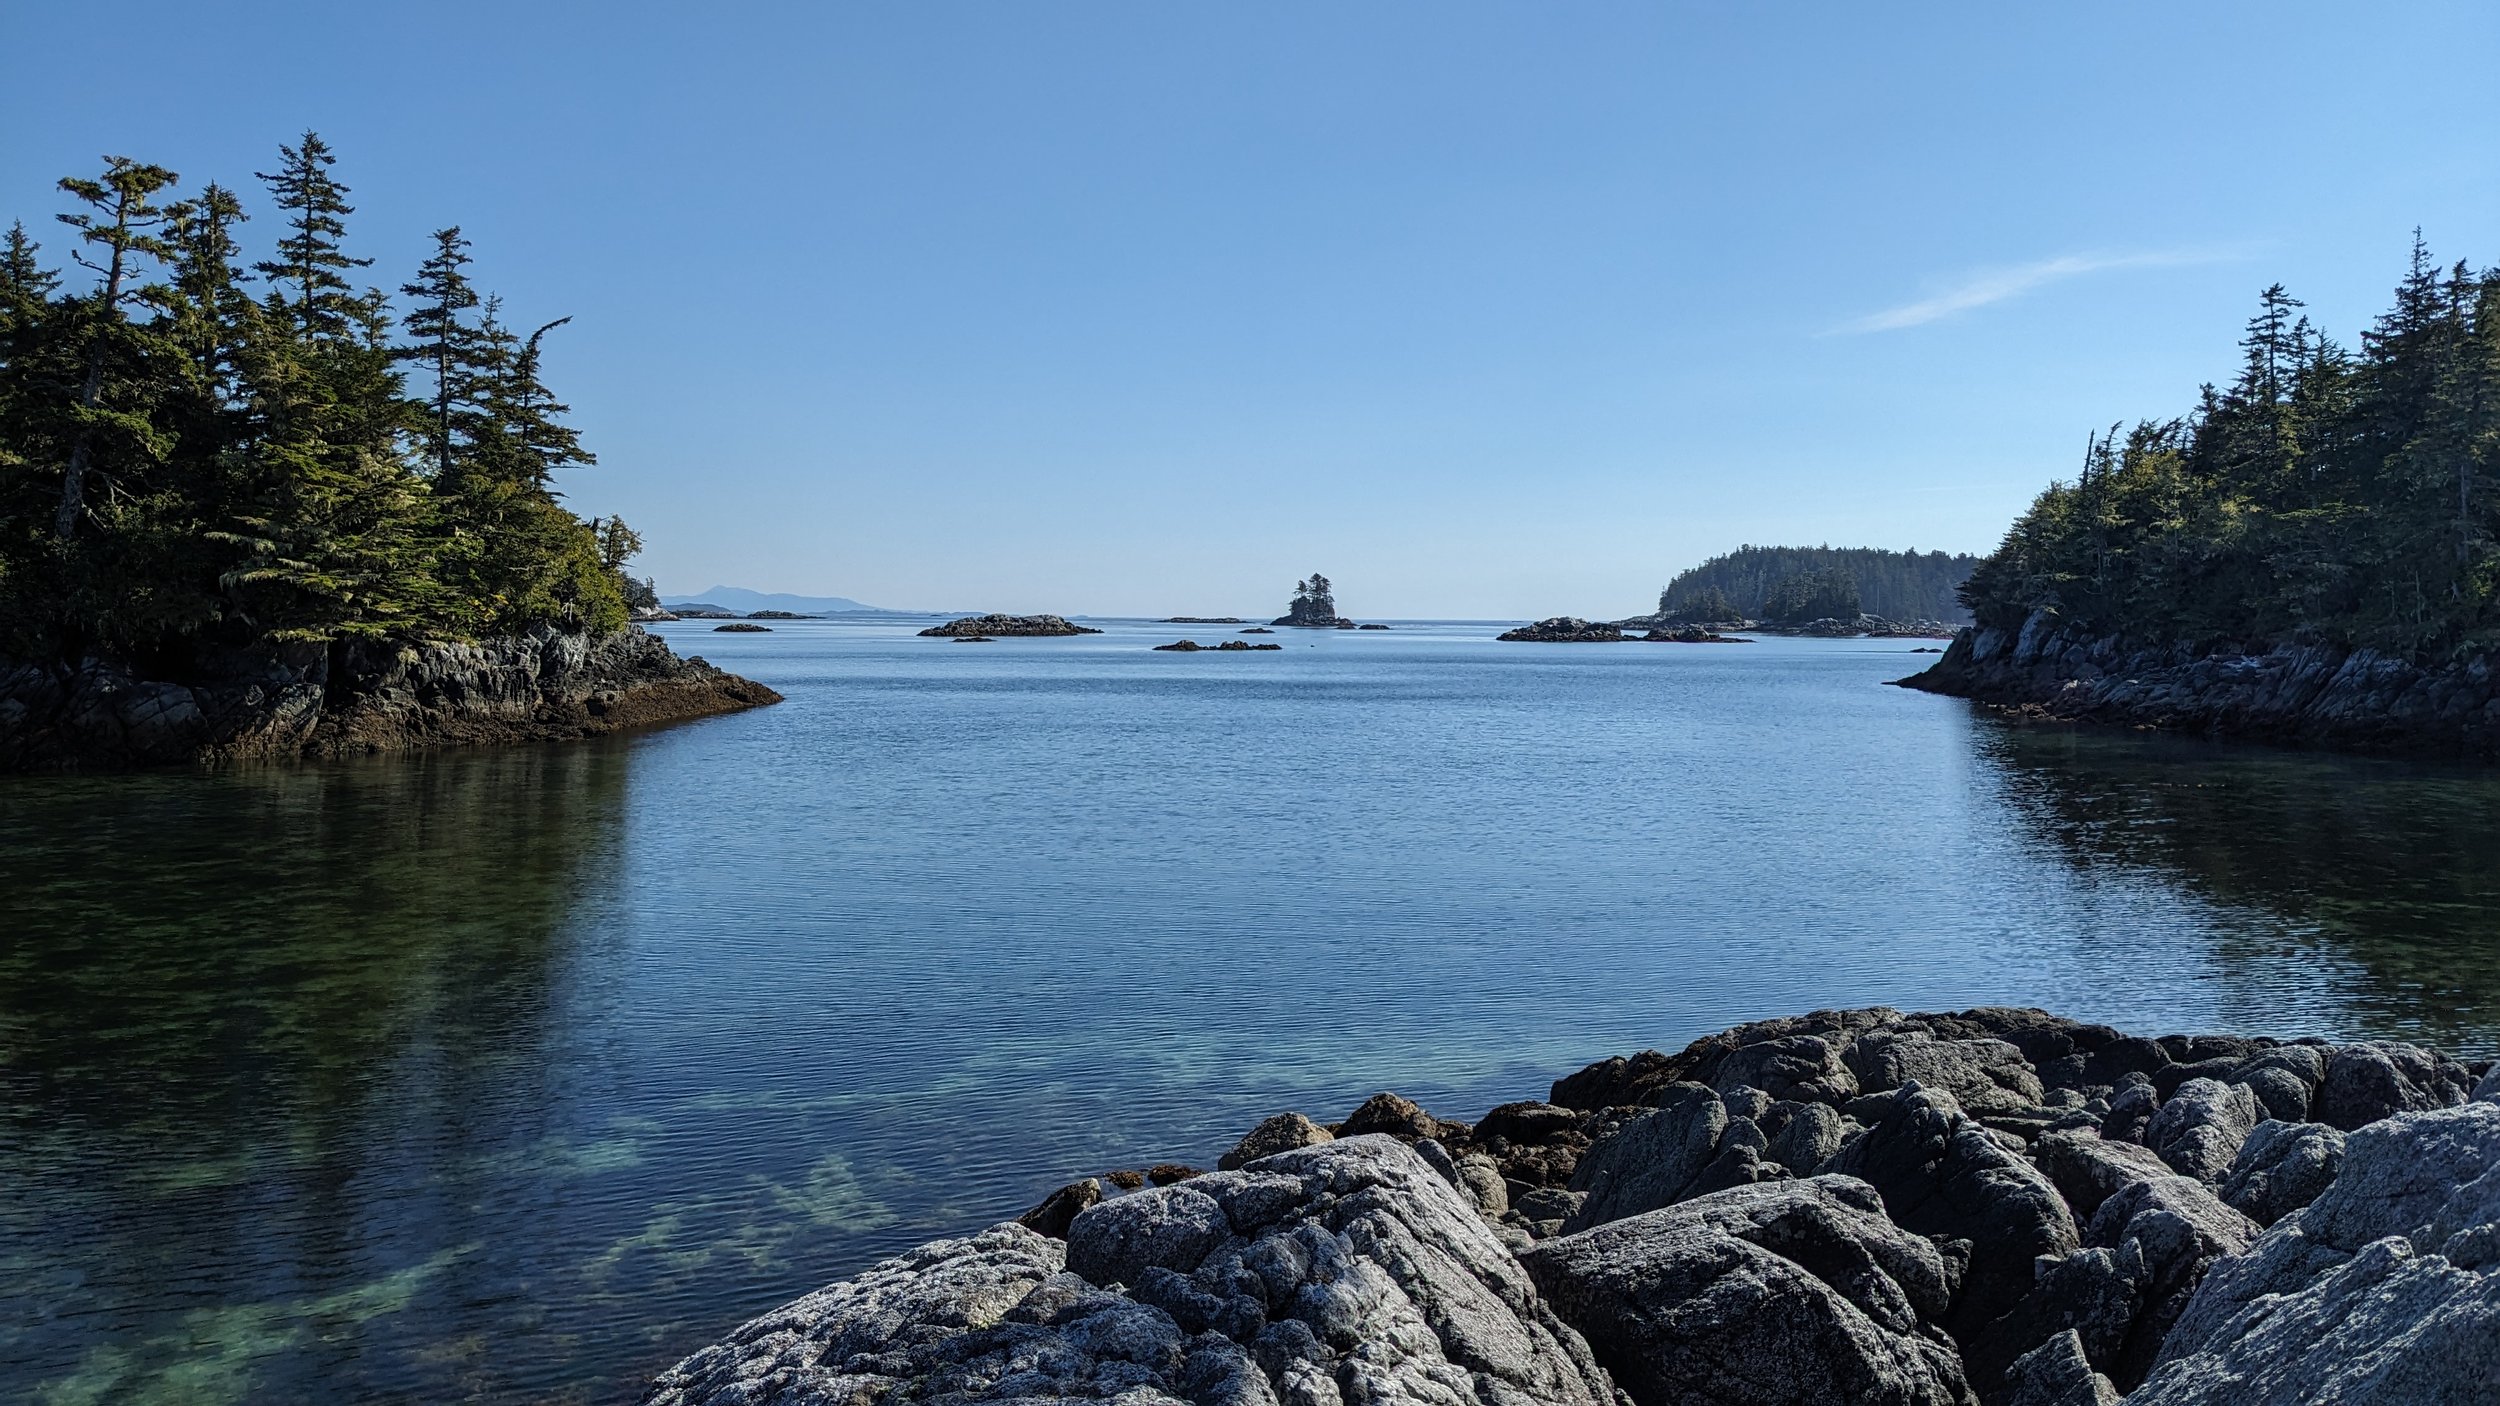
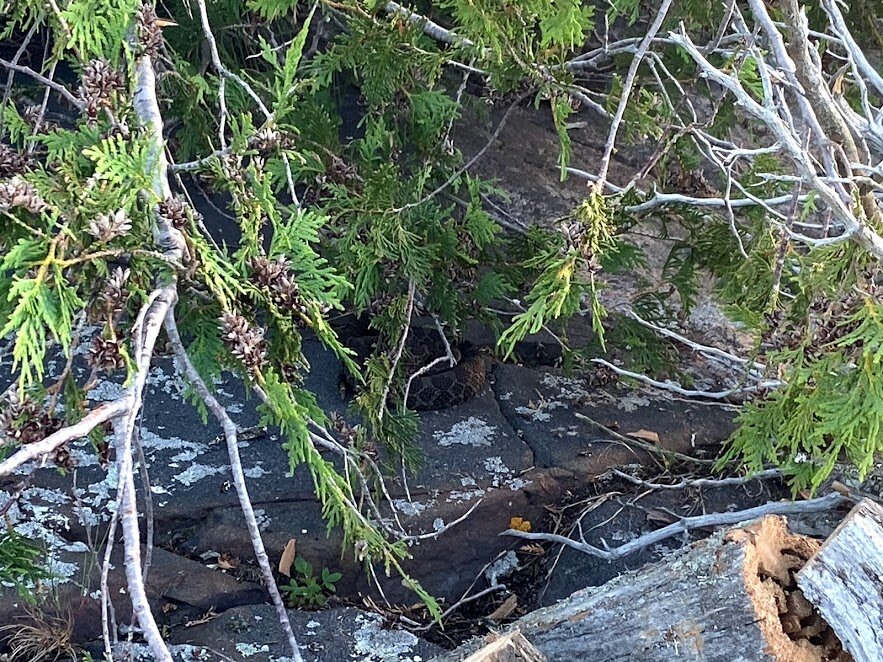
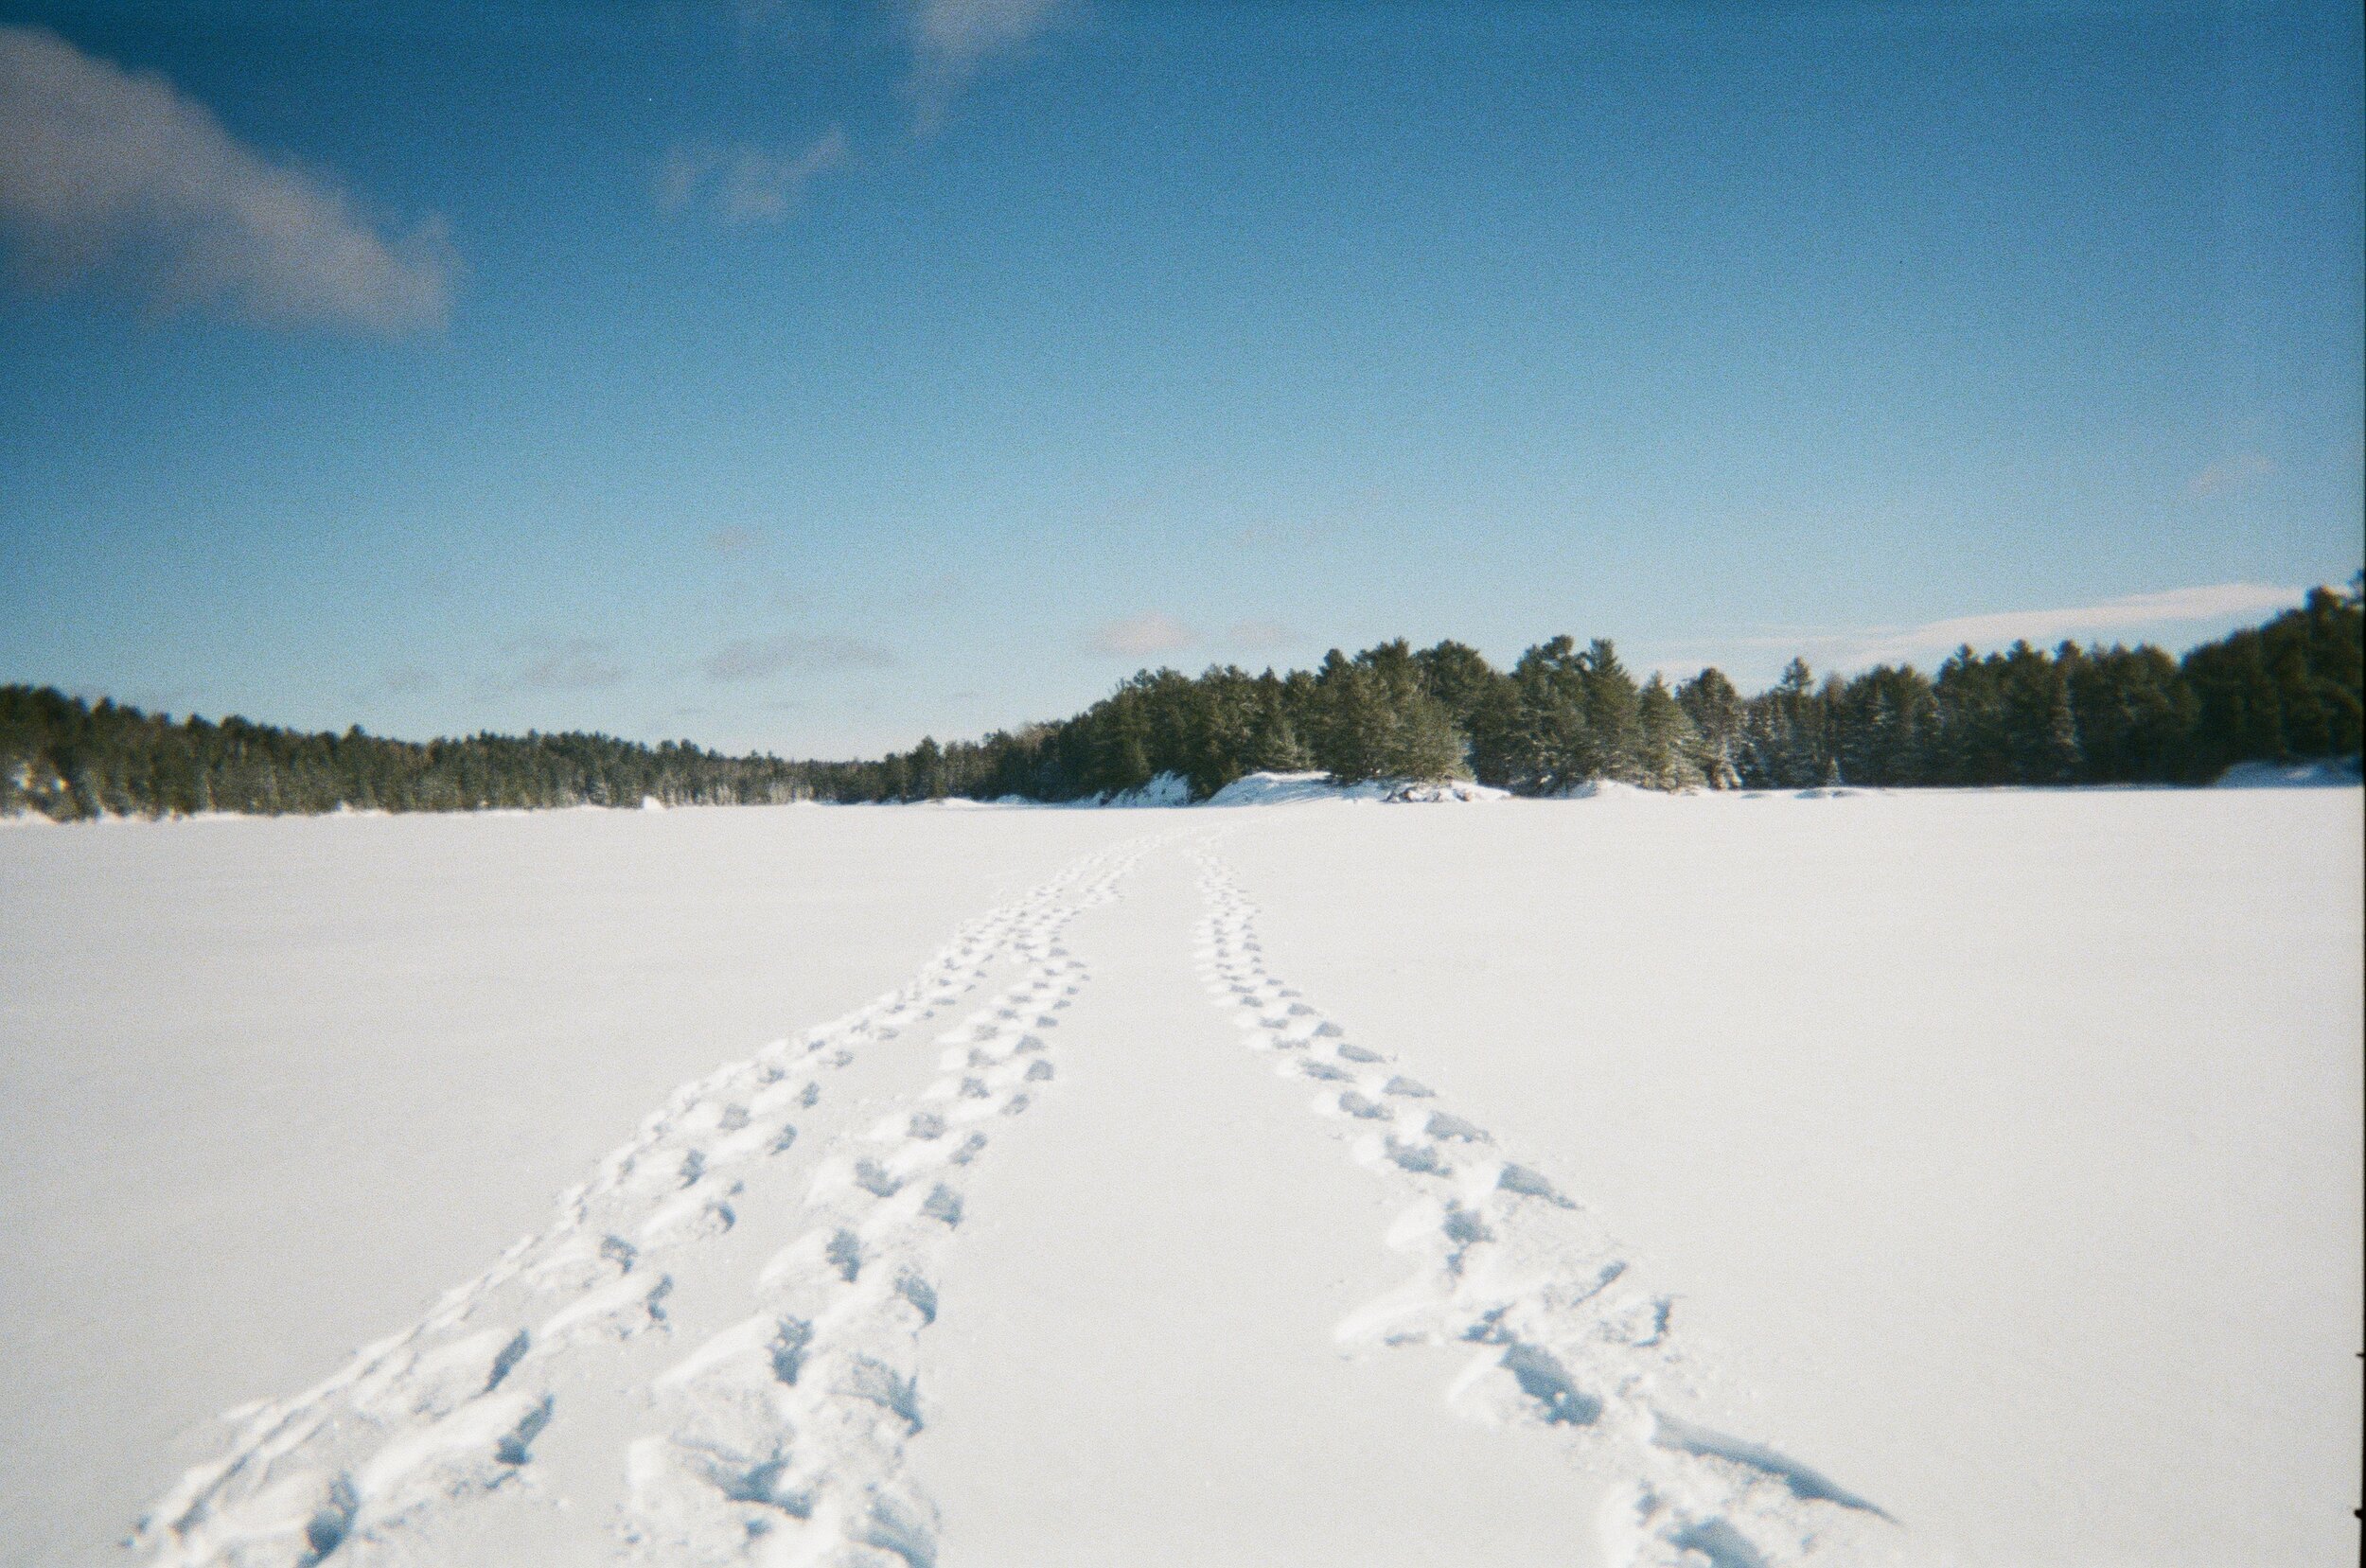
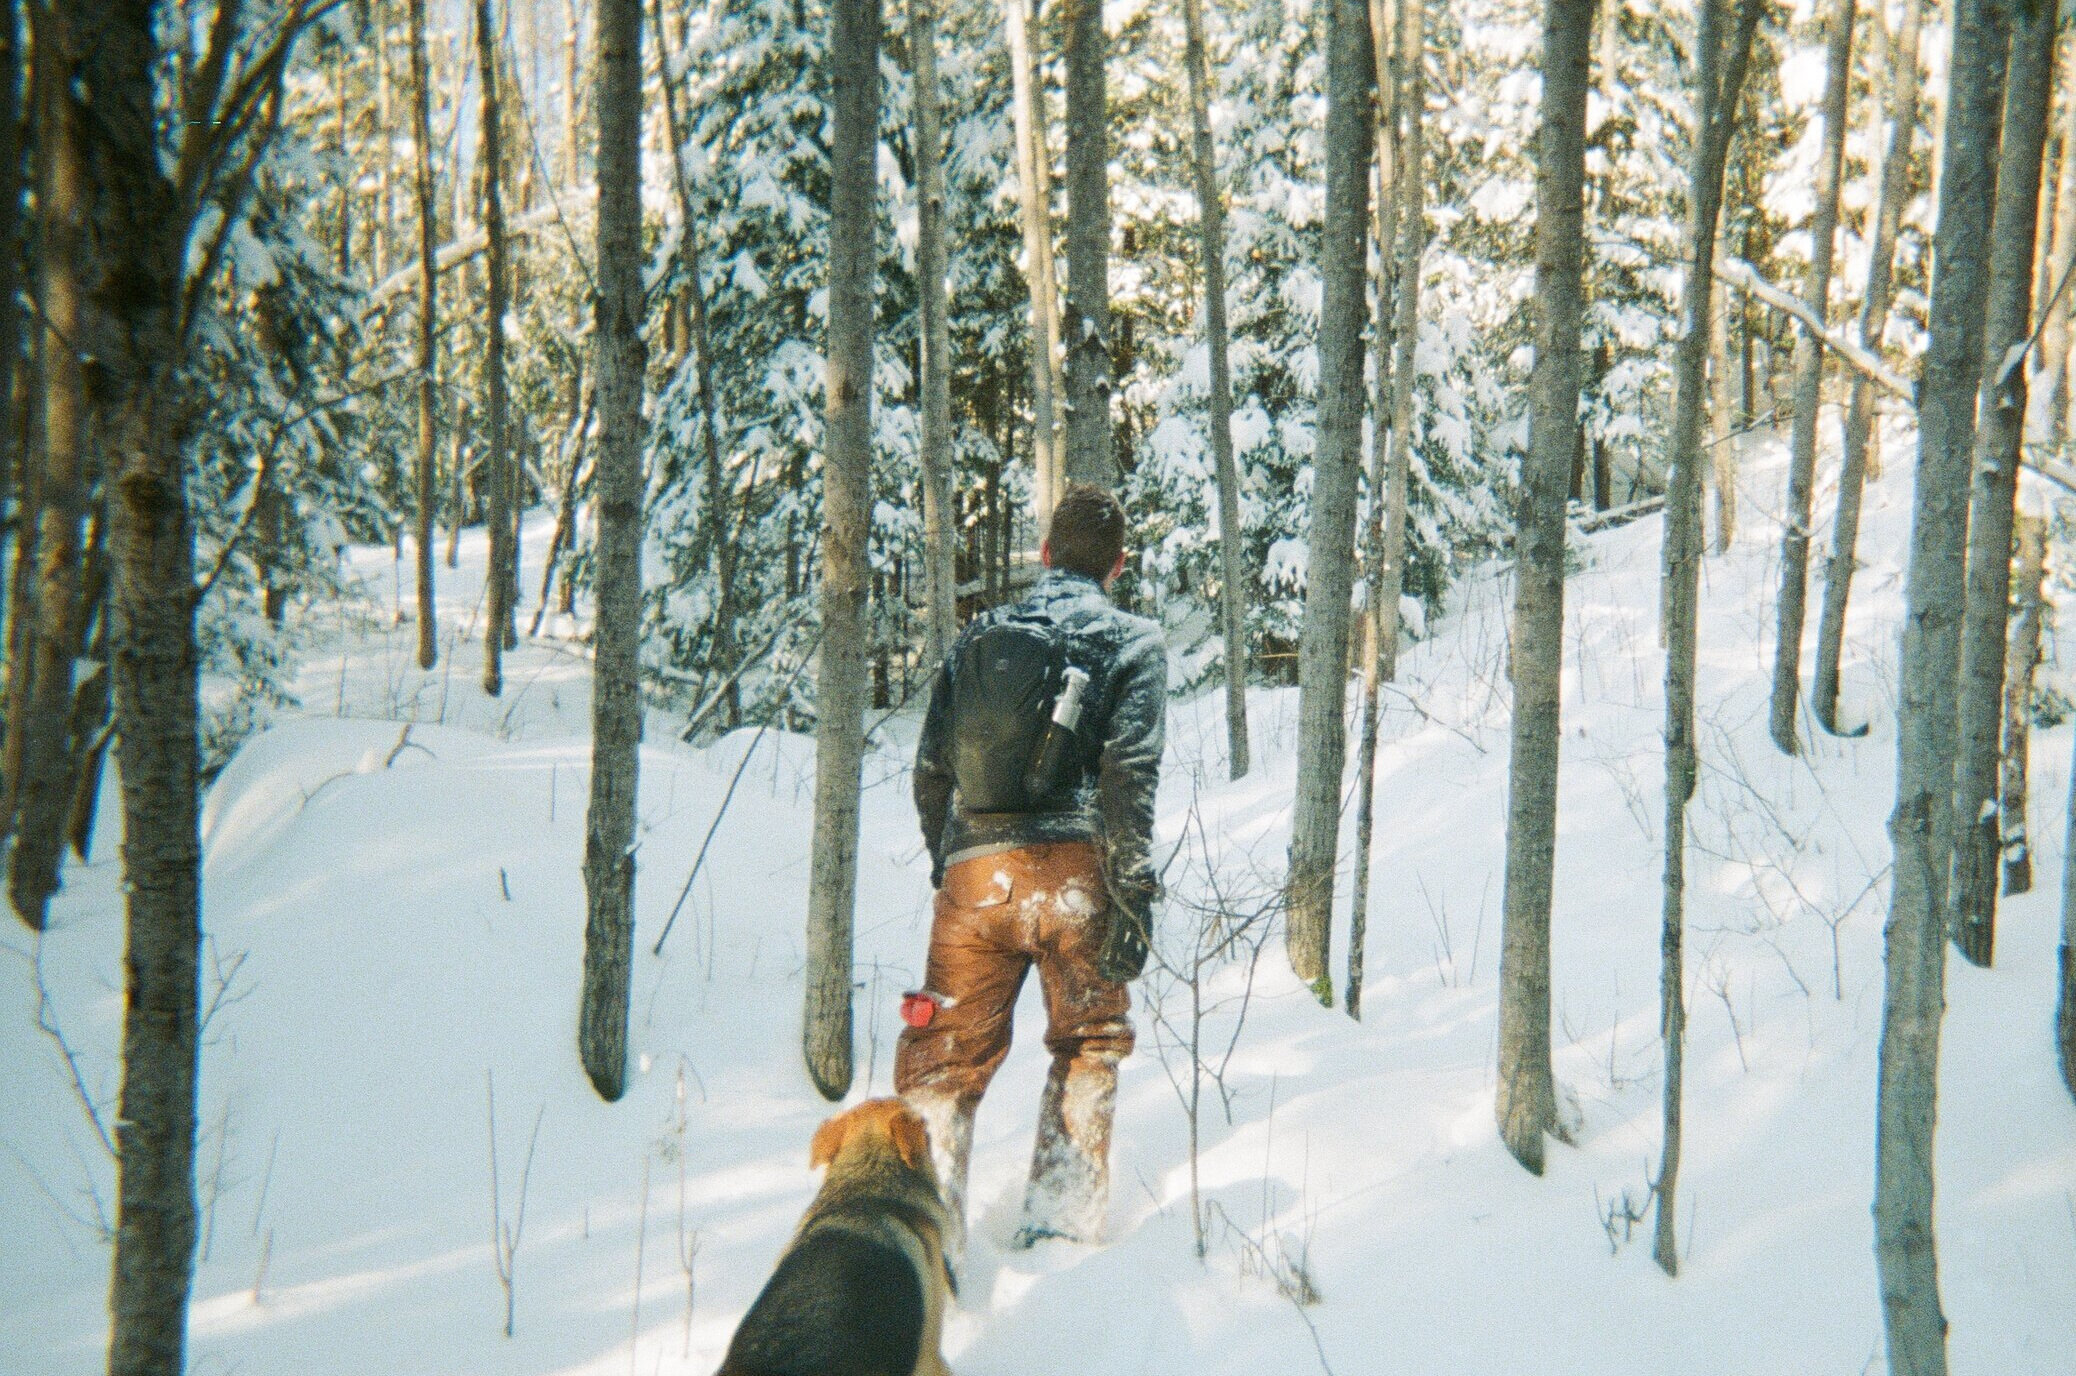
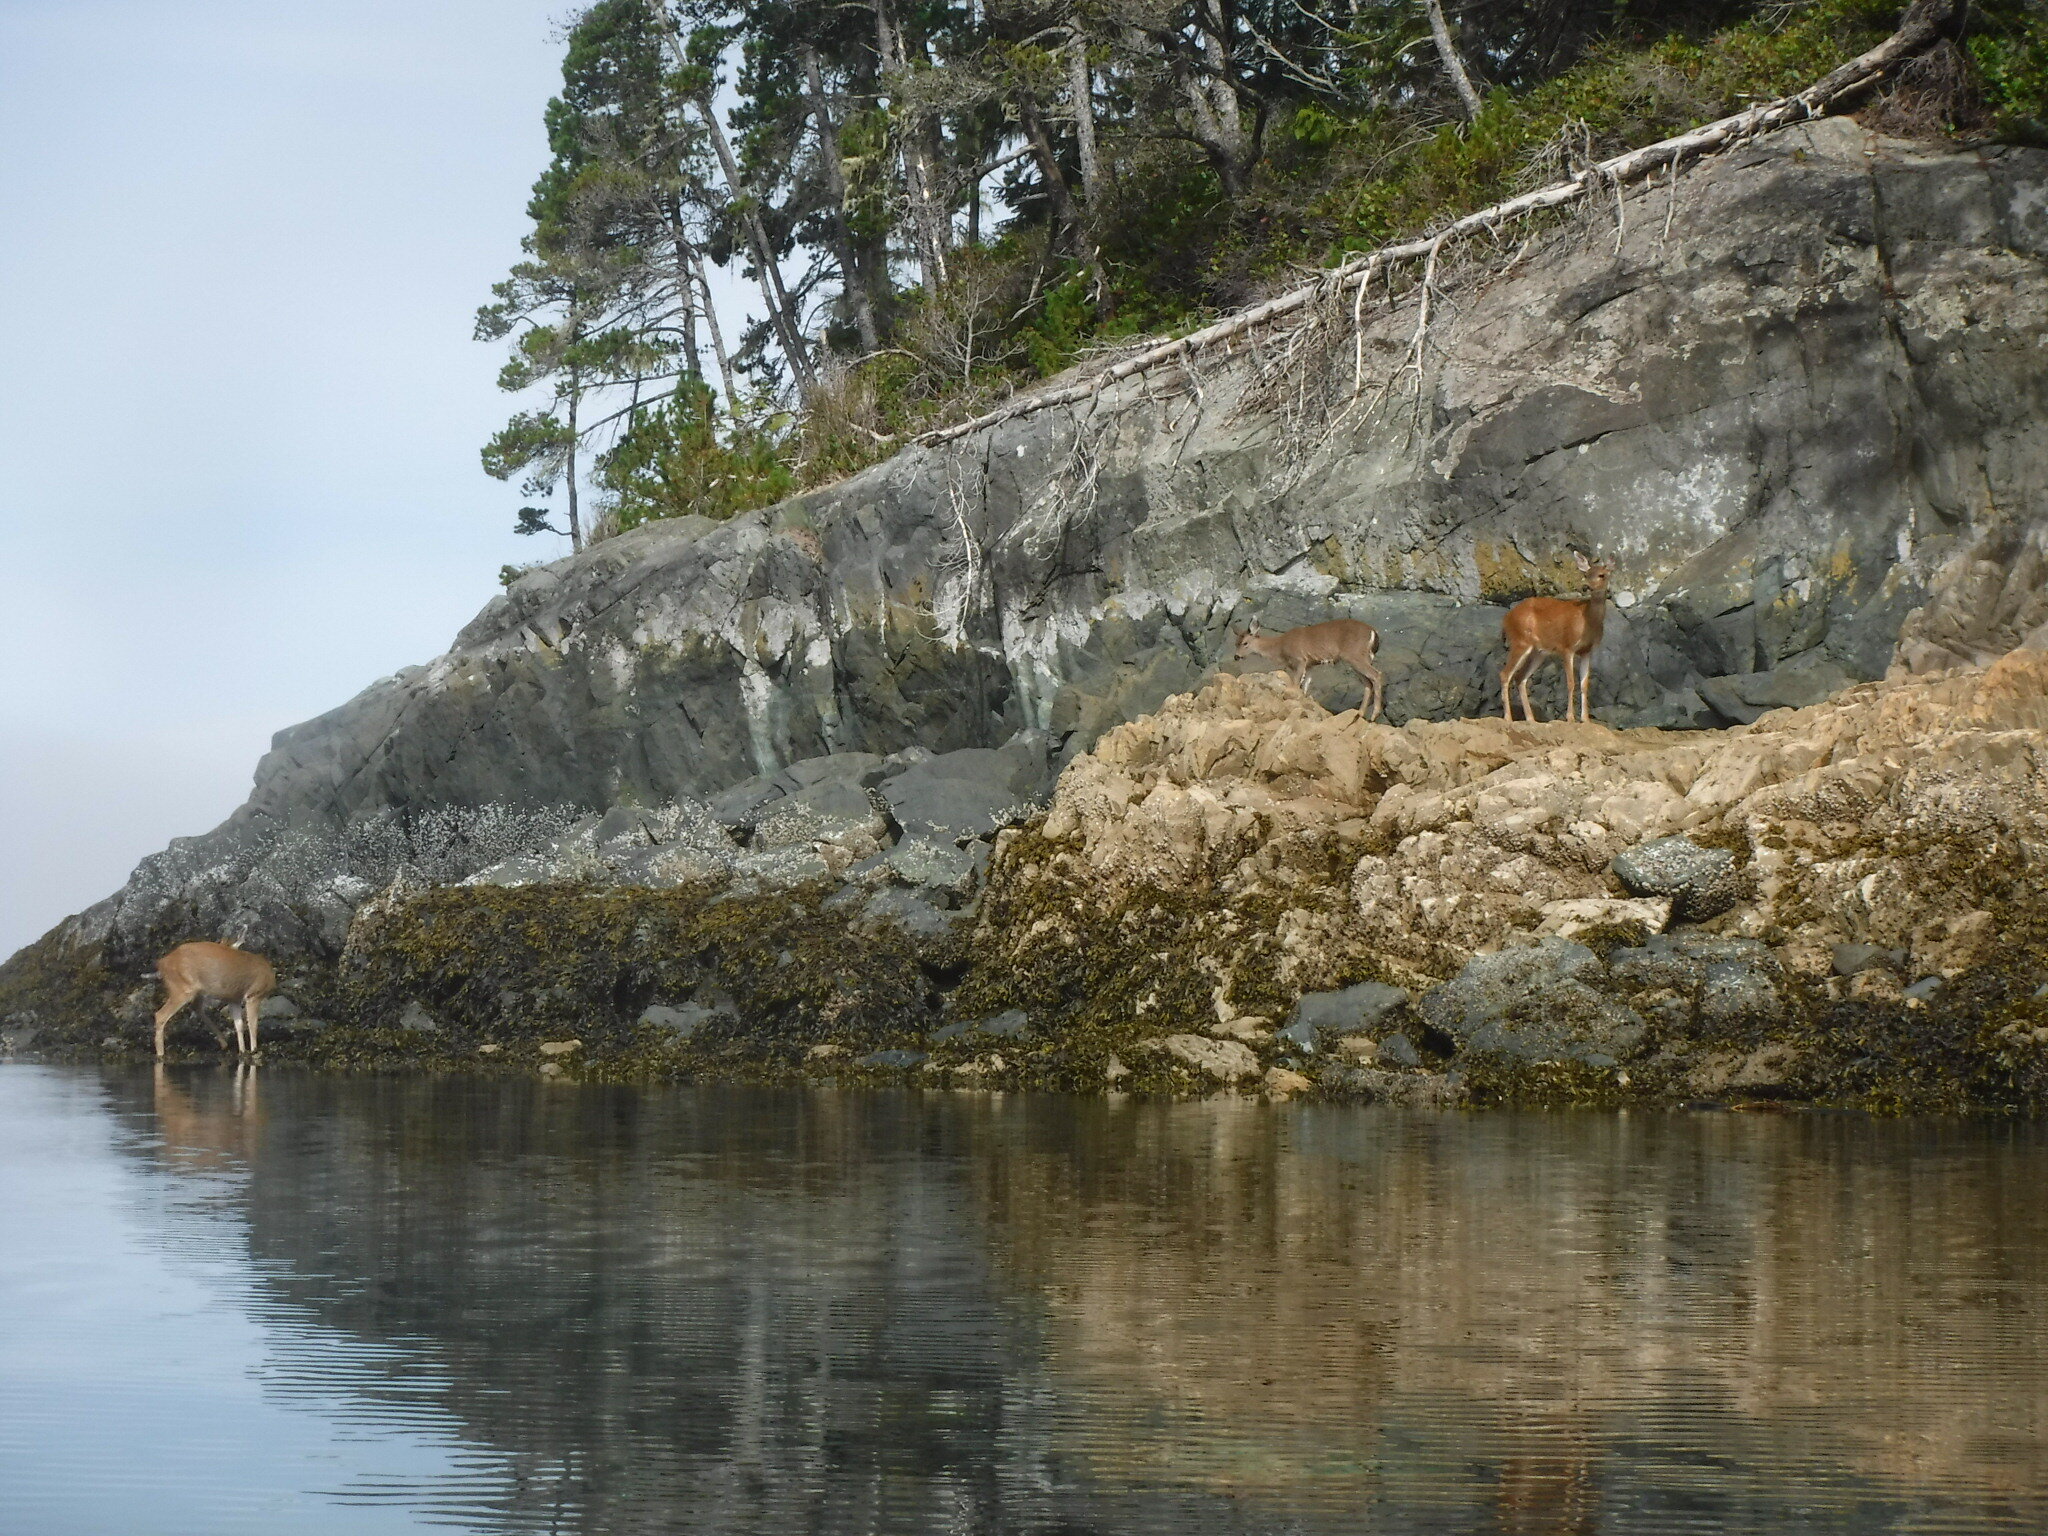
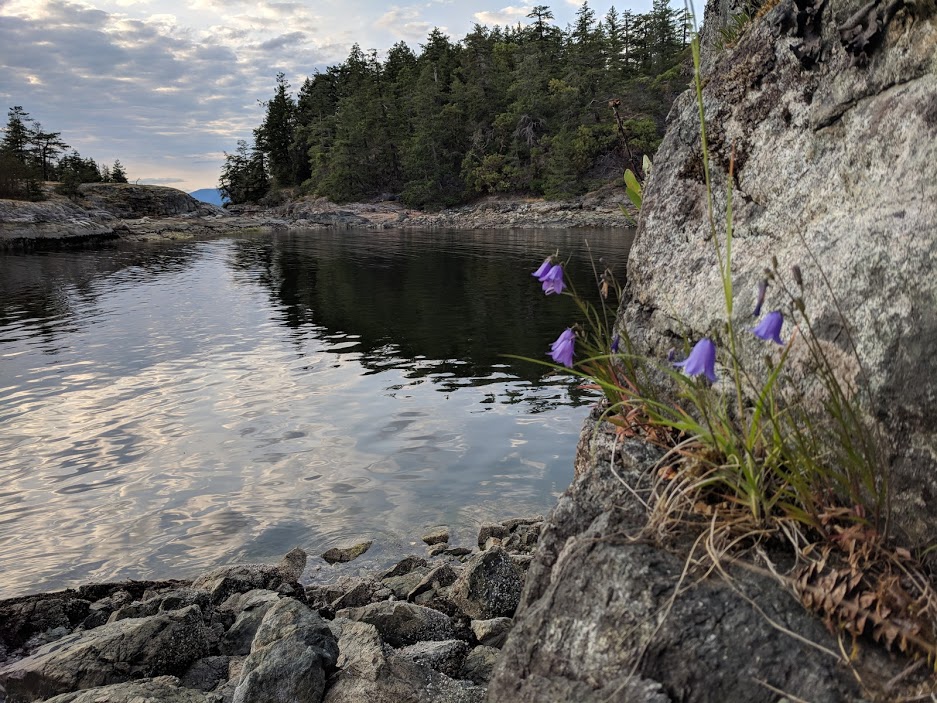
On our final night at South Benjamin, we decided to get some steps in and explore the island on foot. Every corner of the island is connected by exposed rocky sections that let you circumnavigate it without bushwhacking.

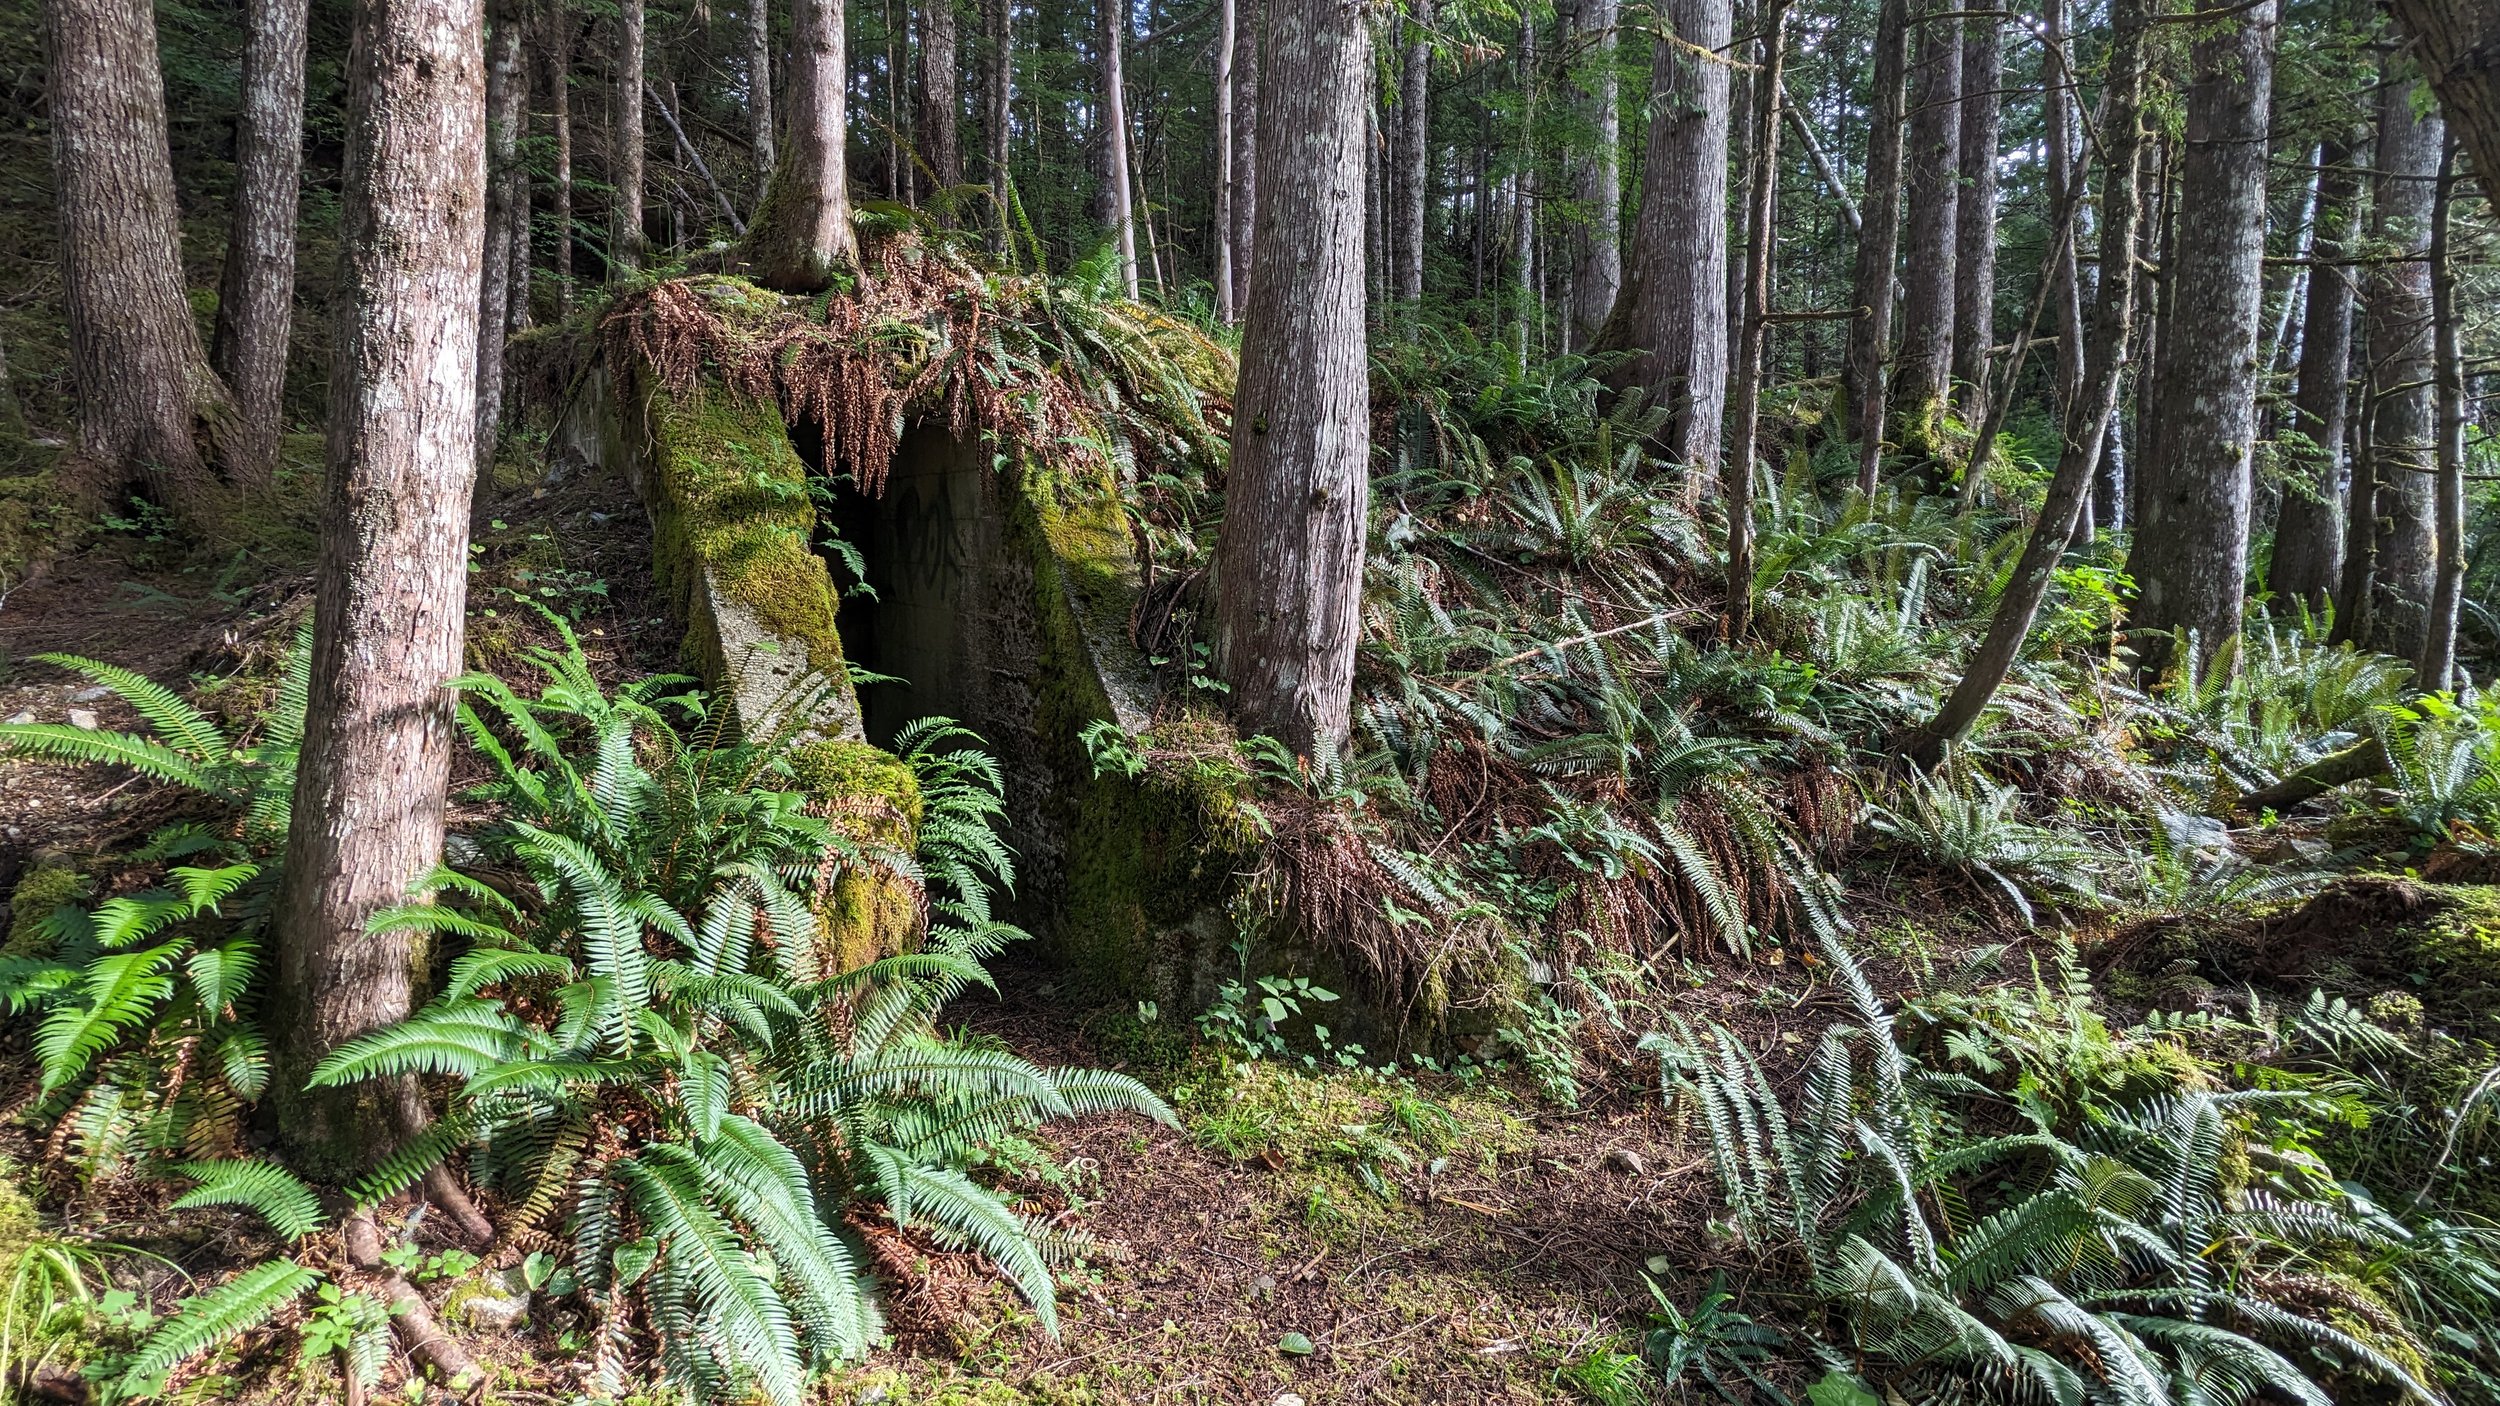
Apparently we weren’t the first people to explore on foot, because someone had ‘blazed’ a trail with pieces of yellow terrycloth tied to tree branches across the north-west coast. It was a blast to follow the winding trail up and down, between valleys and vistas, before returning to camp for a well-earned rest.

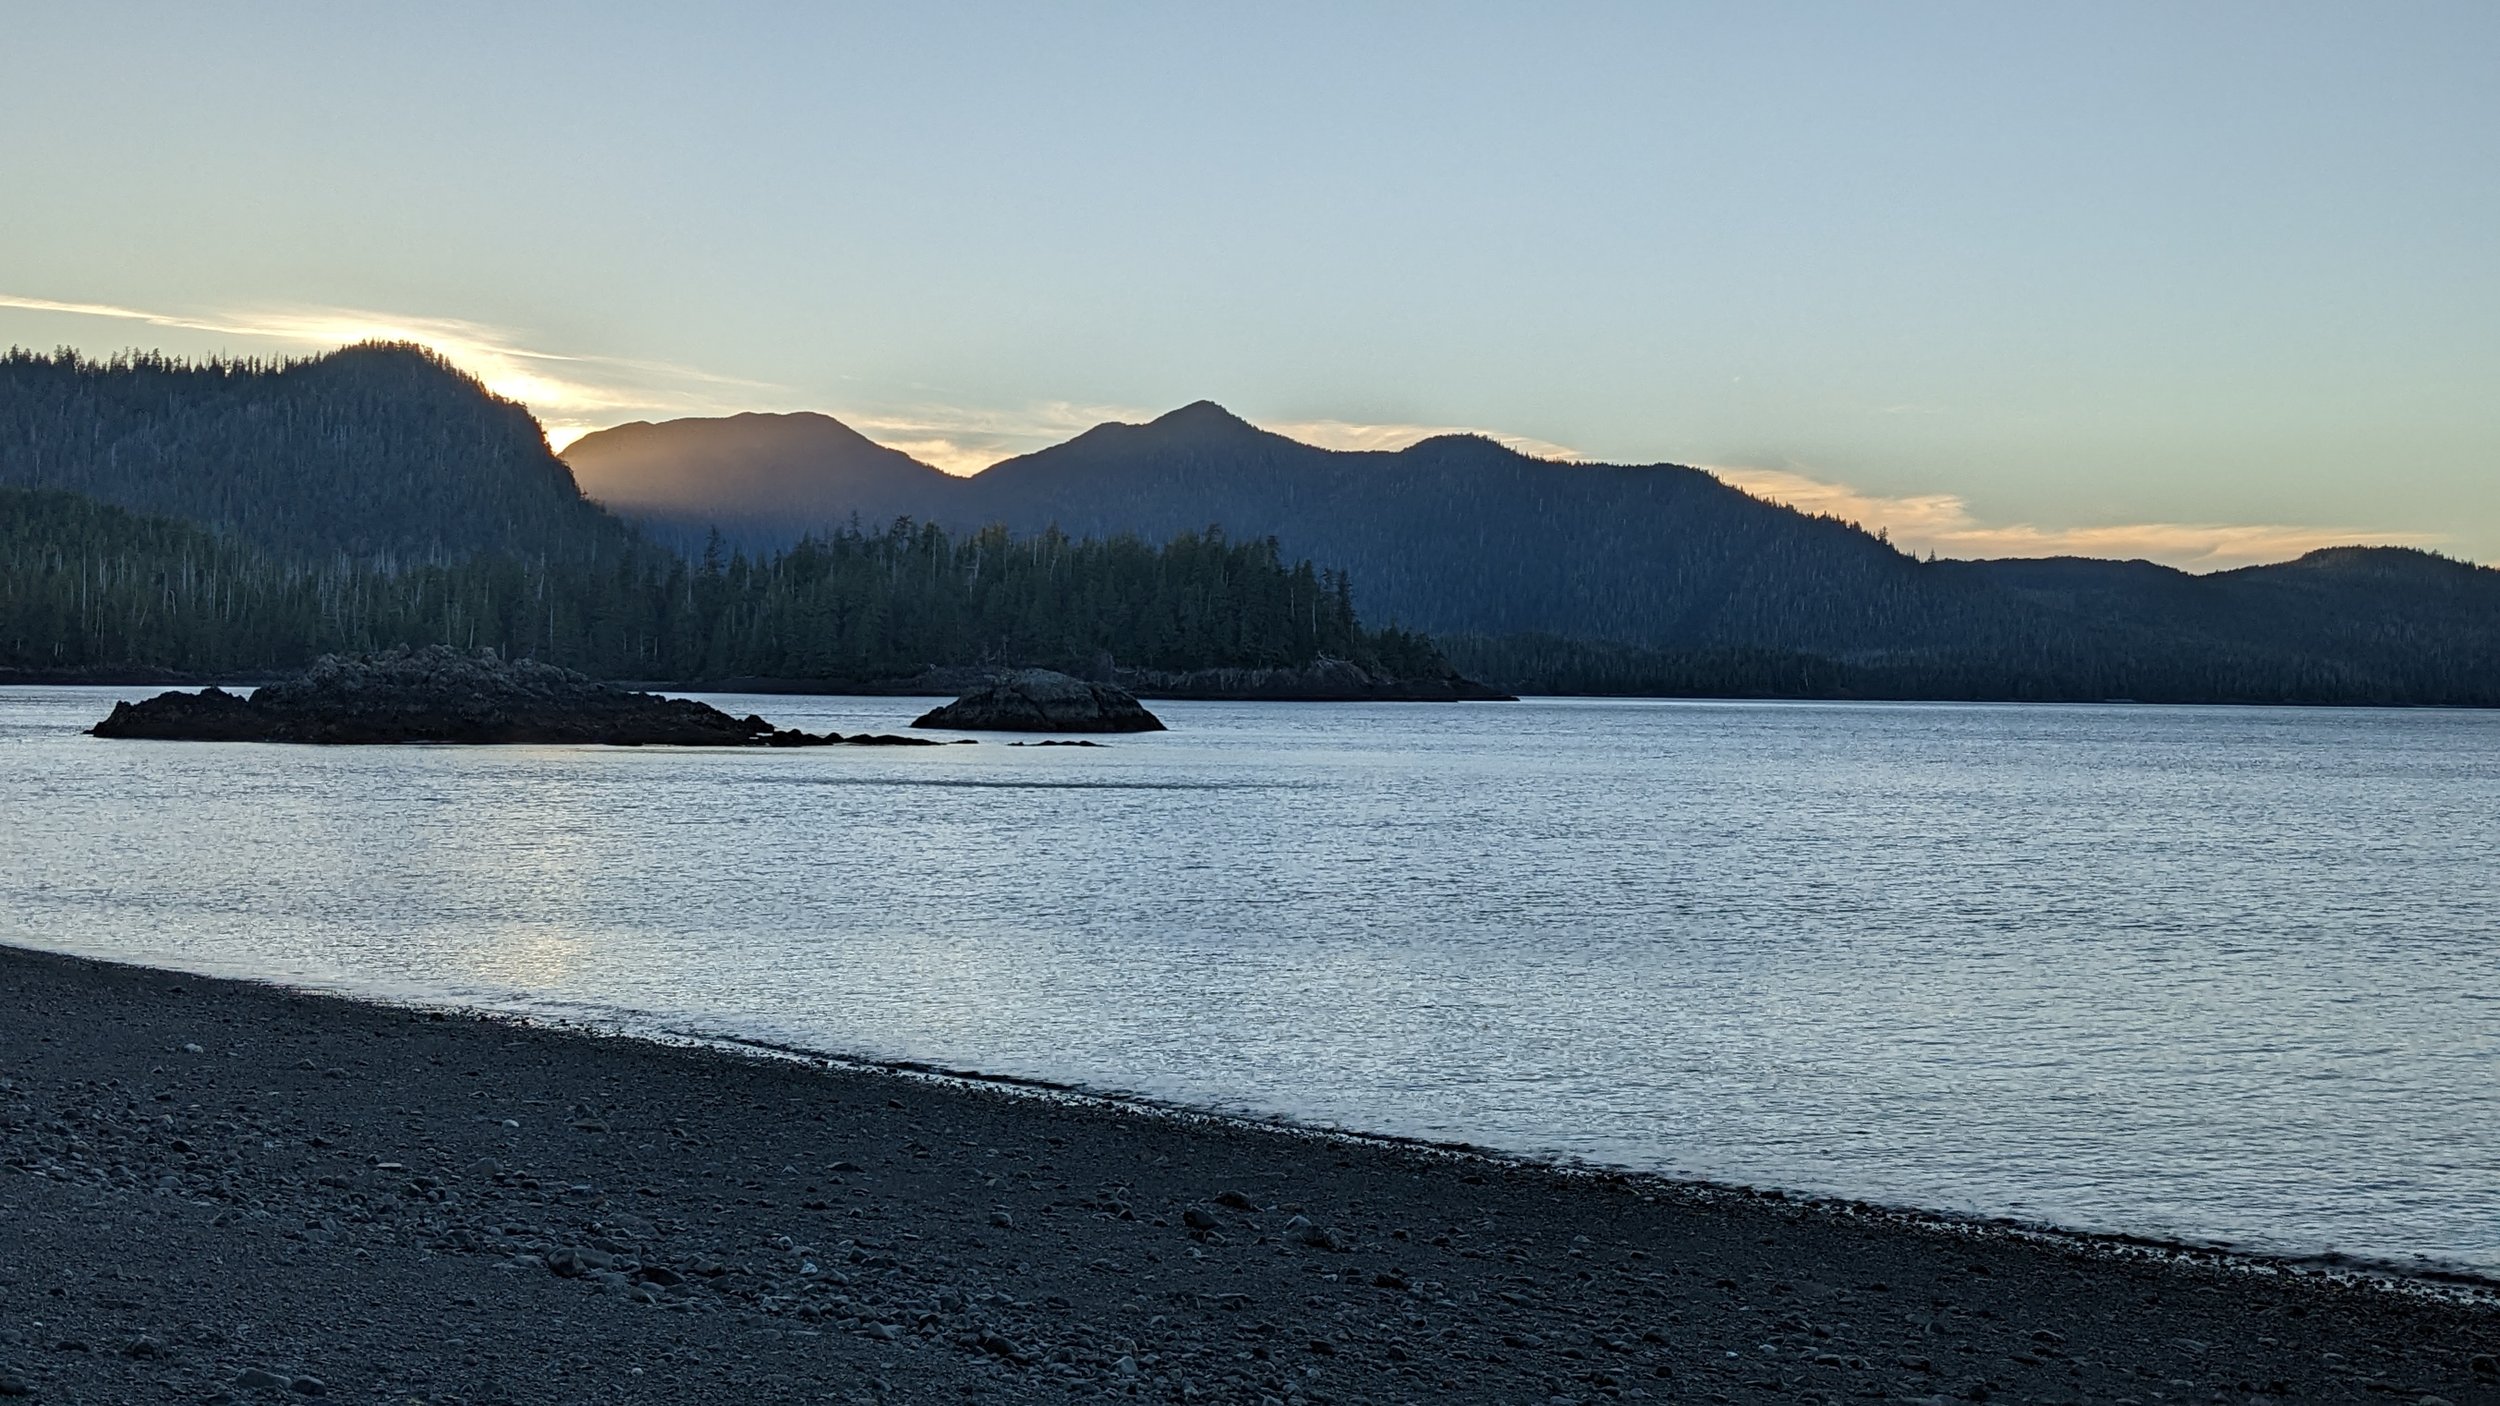
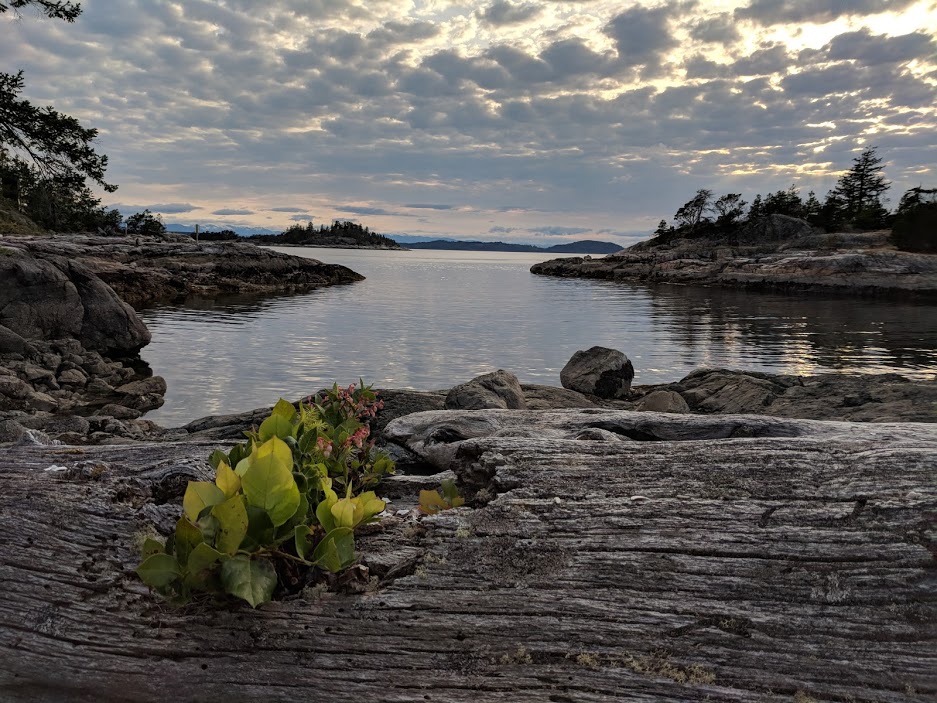
Looking back out towards Manitoulin Island from the ‘Terrycloth Trail’.

We left the Benjamins the following morning, making our way back around the north side of Fox Island to settle in closer to the harbour and give us a shorter final day. Wrongly assuming a tailwind would be more fun than a headwind, we were jostled and thrown along the channel by a northwest wind until we settled in at a quiet site facing back into McBean Harbour.

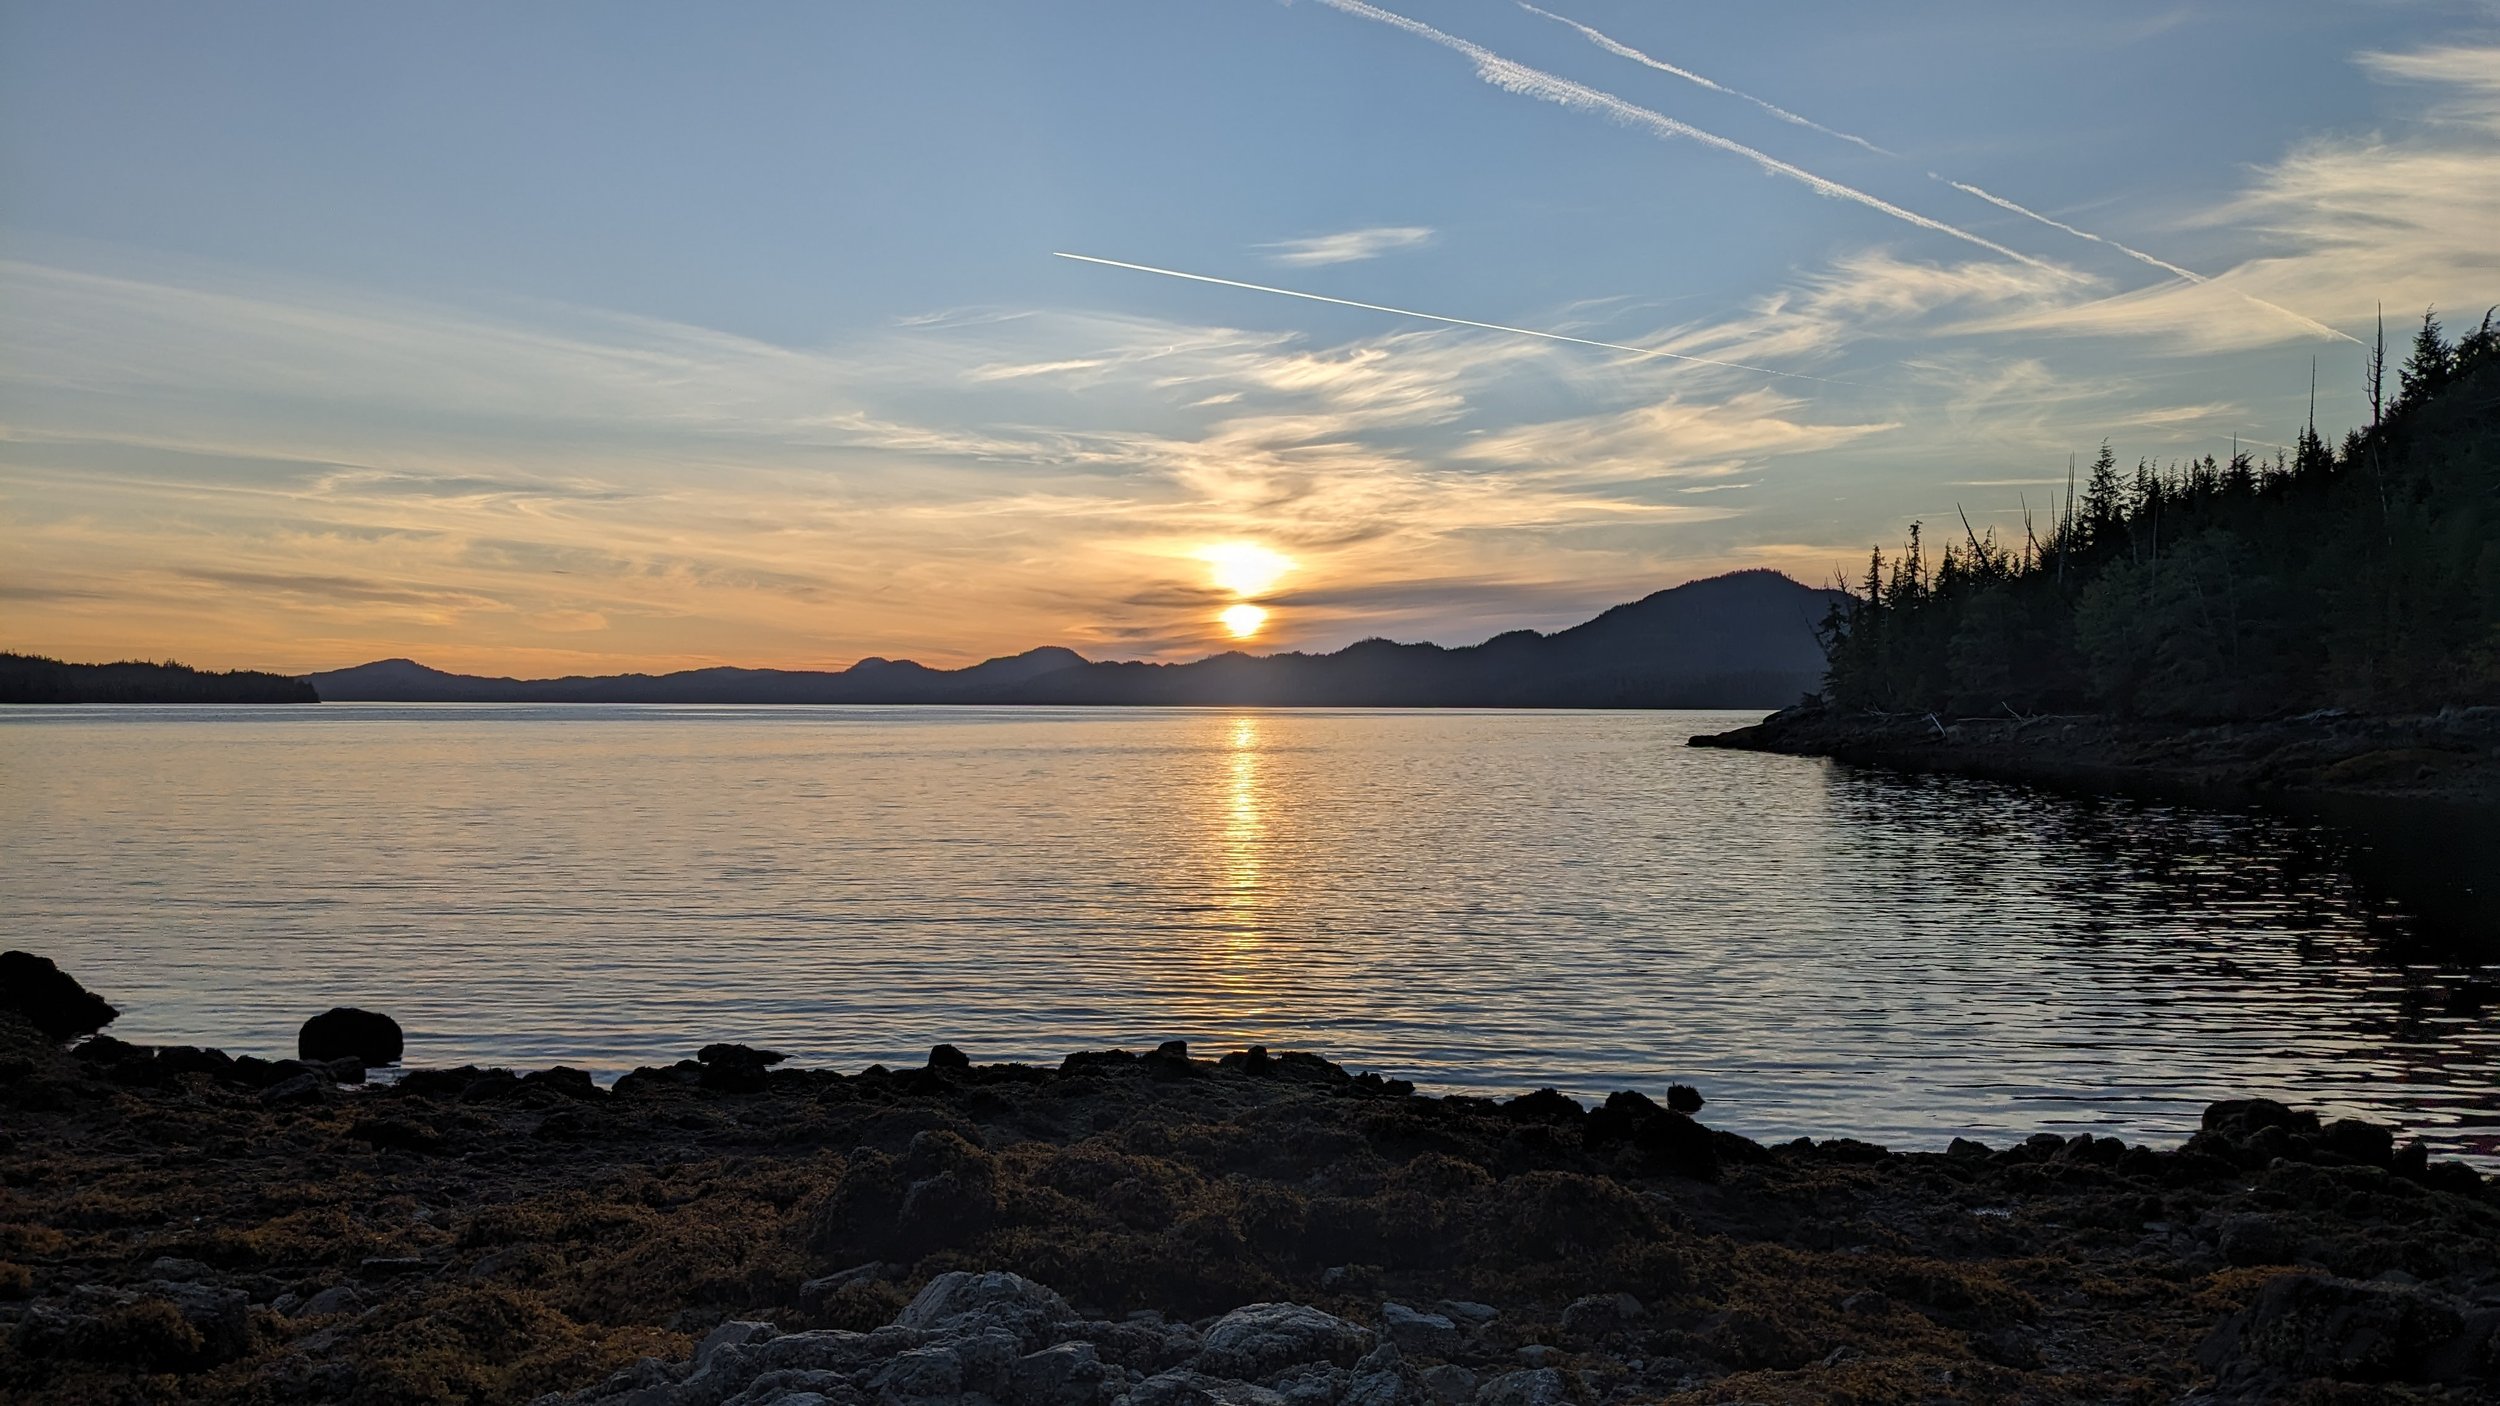
The weather mostly played in our favour over the weekend. Rain was sparse, winds were (fairly) manageable, and temperatures didn’t drop below freezing. For mid-October, I consider all of those a win.

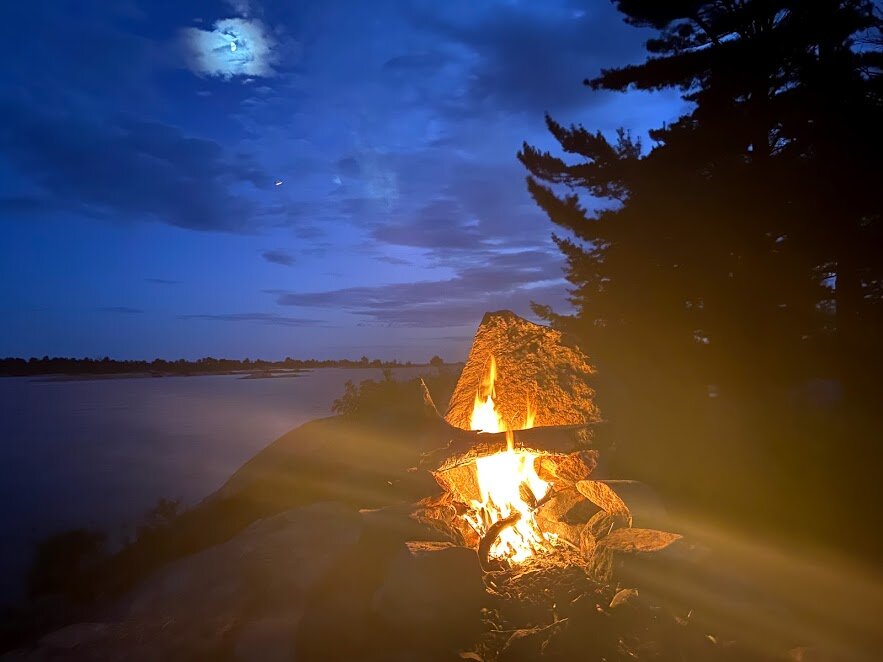
A full rainbow after a brief storm to cap off the trip.

And so, here I am reflecting on the North Channel after a lifetime of not knowing it existed. Is it too exposed to explore? Certainly not, although you may need to be nimble with your routes given the distance between islands and the inbound weather. Too far from Toronto for traffic? It appears so, though the drive is barely longer than getting to Killarney or Algonquin.

Are people keeping it a secret? Absolutely yes. And now I know why.


Pro Tips

  • The North Channel is a combination of private, crown, reserve, and conservation land. Use all available public maps to form an opinion of the right places to go, and plug in potential routes to your mapping app of choice well ahead of time.

  • Stay flexible! Prevailing winds will usually be west to east, but that’s not always the case in this region. Long crossings can be dangerous so plan accordingly: radio, wetsuits, and optimize your route for windbreaks.

  • Use satellite views and contour lines to pick bays and inlets that might make great campsites, and leave yourself options. A few spots I thought would make great sites turned out to have impossible landings, or were too hilly to camp on.

 Our protected campsite on South Benjamin.

Our protected campsite on South Benjamin.

 My bedroom view, looking back onto the LaCloche range.

My bedroom view, looking back onto the LaCloche range.

 Wildlife sighting! A mink introducing itself to a crayfish.

Wildlife sighting! A mink introducing itself to a crayfish.

 Exploring one of the many bays of South Benjamin.

Exploring one of the many bays of South Benjamin.

 Obligatory Georgian Bay sunset after a hike across South Benjamin.

Obligatory Georgian Bay sunset after a hike across South Benjamin.

 Another post-storm sunset from Fox Island.

Another post-storm sunset from Fox Island.

 Our protected campsite on South Benjamin.  My bedroom view, looking back onto the LaCloche range.  Wildlife sighting! A mink introducing itself to a crayfish.  Exploring one of the many bays of South Benjamin.  Obligatory Georgian Bay sunset after a hike across South Benjamin.  Another post-storm sunset from Fox Island.
October 09, 2024 /Andrew Godfrey
kayak, georgian bay, north channel, manitoulin
Trips

Solo Kayaking BC's Outer Central Coast

September 21, 2023 by Andrew Godfrey in Trips

I’ll take any opportunity to plug myself into a kayak and ramble up and down the BC coast. I’m seeing more and more but if I’ve learned anything, it’d take lifetimes to see it all.

Some ‘remote’ areas of BC have become quite popular and accessible - think the Discovery Islands and Desolation Sound, the Broughtons, the Broken Group, and even Gwaii Haanas. New ferry routes, short-haul flights, and commercial outfitters have opened up considerable parts of the coast for easier adventuring. But there are still plenty of less-travelled spots if you’re looking for a bit more solitude.

One of those spots is the vast Central Coast - running roughly from the Northern tip of Vancouver Island to the Southern tip of Haida Gwaii, and home to the Heiltsuk Nation. The Inside Passage cuts right through the middle, and BC Ferries connects Bella Bella, Bella Coola, and Ocean Falls with Prince Rupert to the North and Port Hardy to the South. The Central Coast boasts nearly 25,000km of territory with a population of just over 3,000.

Which makes the Central Coast a perfect spot to get lost for a week.


The Route

A common starting point for a Central Coast kayak trip is Bella Bella. This Heiltsuk town is accessible by ferry or air, with regular routes on both. Once in town, the opportunities for kayak routes are endless: either exploring the inlets of the mainland to the East, the outer islands to the West, or any combination of the two. One common route is to take the ferry to Bella Bella and paddle all the way back to Port Hardy on Vancouver Island (roughly 260km). A trip I didn’t have time for, unfortunately!

The Big House in Bella Bella.

With just a week on the water, I opted to explore the Central Coast’s Outer Islands. The Outer Islands are an archipelago of several island groups (including the Bardswell, Tribal, McMullin, and Goose Groups), the Outer Central Coast Islands Conservancy, as well as countless bays and channels for a paddler to link together.

I’d set a few goals for the trip: get to the Goose Group, get to the McMullin Group, and see the West coast of Athlone Island (the Outer-most part of the Outer coast). A gale blew in half-way through the trip, so I only achieved one of those goals, but my improvised route took me to some places that were just as incredible.


My route started in Shearwater and took me South past Soulsby Point, straight out to the McMullins, up through Gale Passage, into the Lady Douglas-Don Conservancy, and then back to Bella Bella along the Seaforth Channel. All in all, about 130km over 7 days.

This is a well known area for sea kayaking, especially with commercial tours operating in the summer. I kept a close eye on their schedules and strategically booked this trip a week after they’d all finished their seasons - hopefully to run into fewer people. Indeed, I didn’t see another person out there all week (save a few fishing boats in the Inside Passage).


The Trip

Walking on to the Northern Expedition before sunrise.

As with most kayak adventures in BC, the first challenge is actually getting to your launch point.

Getting to Bella Bella isn’t all that difficult anymore, but it isn’t all that cheap either. You can either fly from Vancouver (and maybe other BC airports), or take a 6+ hour ride on BC Ferries’ Northern Expedition out of Port Hardy or Prince Rupert. Flying from Toronto to Victoria, I opted to rent a car, drive the length of Vancouver Island, and then walk on to the Northern Expedition leaving my car at the ferry terminal.

The biggest reason for this approach, versus the convenience of flying, was that I needed to get my kayak up there. Access to kayak rentals in Bella Bella is very limited - more on that below. Renting from Comox Valley Kayaks (where, by the way, BC Marine Trails members get 15% off on rentals!), I conveniently picked up a beautiful Delta 17 sea kayak as I passed through town.

Arriving in Port Hardy late that night, I stayed at the Kwa’lilas Hotel ahead of my early morning departure on the Northern Expedition.

I was quickly reminded of the other reason I chose the ferry option: it’s an unforgettable way to get introduced to new parts of BC. Slowly pulling away from shore, you have hours to appreciate the landscapes, islands, and channels you carve through. And on a boat with the amenities of the Northern Expedition, there’s decent food, a movie room, and numerous decks to wander and views to soak in.

BC Ferries are very accommodating for walk-on kayakers. You park your car in long-term parking, place your boat on a dedicated kayak rack, and it’s hauled off/on the ferry for you.

A view of the Inside Passage aboard the Northern Expedition.

The ferry dock for Bella Bella in McLoughlin Bay is a couple kilometres from the actual town, and a ~5km paddle to the villiage of Shearwater. I’d booked a night at the Shearwater Lodge, a Heiltsuk-run resort that would serve as a basecamp to get final supplies, pack food, and enjoy a beer before heading into the woods.

I didn’t know this while planning, but it is possible to get sea kayak rentals from Shearwater Lodge - I’m just not certain under what conditions. They had a fleet of Current Designs poly kayaks that would certainly suffice for open water, but you may need to be booked at the Lodge to have access to them. It’s worth calling to see, and may save you hauling your kayak on the ferry.

Sunrise from the Shearwater docks.

I changed my route plans almost daily on this trip. Being so close to a new moon (read: strong tides/currents) and with marginal weather on the horizon, I really was at the mercy of the coast. This was a welcome feeling though: needing to stay in equilibrium with the environment, being flexible and thoughtful and clever about when/where to travel.

My first day had me paddling directly South from Bella Bella, through Lama Passage and Hunter Channel, to Soulsby Point. There are a few well known (and beautiful) campsites in the region, and Soulsby Camp is one of them - a gorgeous shell beach with a cleared upland forest and views in nearly every direction.

With a Southeast gale supposedly inbound in the next few days, this would be a good launch point to push out to the Goose/McMullin groups, or escape Northward for shelter from the storm.

Looking back towards the mainland from the Soulsby Camp.

Waking up to a bluebird day and light Southern winds, I felt confident about the 10km open crossing to one of the outer groups. Looking at my options, and the projected gale, I chose to head directly to the McMullin islands, and forego the Goose Group. In hindsight I could have done both, but had the weather pinned me in on Goose Island, I would have been marooned for days.

Dodging a heavy stream of humpback traffic, I made the northern-most McMullin island in early afternoon with a promise of a ‘five-shell’ beach waiting for me. I was not misled!

The island itself is jaw dropping - long, protected white-sand beaches, wrapped around an old growth forest. There’s even a short (but rugged) trail across to the Western side of the island where you can soak in a sunset while listening to waves finally crashing on the shore after an uninterrupted trip across the Pacific.

 Camping among the old growth on North McMullin island.

Camping among the old growth on North McMullin island.

 Washing up on the sandy shore at McMullin North.

Washing up on the sandy shore at McMullin North.

 A view of the McMullin group to the South.

A view of the McMullin group to the South.

 Driftwood washup on the West side of McMullin island.

Driftwood washup on the West side of McMullin island.

 Camping among the old growth on North McMullin island.  Washing up on the sandy shore at McMullin North.  A view of the McMullin group to the South.  Driftwood washup on the West side of McMullin island.

Despite calm waters and clear skies, my ears were locked to my VHF radio for gradually escalating weather reports. A gale at 35 knots was expected to land on the Central Coast the following morning, and I had a decision to make: hole up on McMullin North for a couple days and wait for it to pass, or break camp at sunrise and escape back to the (relative) protection of the Bardswell Group.

Foregoing a few more nights on my island paradise, I woke up with the stars still hanging in the sky and got ready to hit the water with first light. The swells were manageable, and good charts helped me maneuver around the countless boomers and shoals peppering the path back towards Louise Channel.

Paddling that open stretch while watching the sun rise over the mountains is, alone, worth the price of admission to the Outer Islands.

Sunrise over Hunter Island.

With the storm poised to hit sometime that morning, I reoriented my route to let the wind and tide do most of the work, pushing me into safe harbour to the North. I sailed up through Thompson Bay and into Gale Passage (which, I chose to believe, was named for its protection from gales, not because it’s a magnet for them).

Gale Passage is choked off on either side by tidal rapids that can really only be traversed near the high tide turn. Enter on the flood, leave on the ebb. I was hoping to find a decent campsite with rain protection somewhere in the Passage, but my luck ran out. There are plenty of decent beach pull-ups, but I didn’t see anything with room for tarps and upland camping.

Now feeling a steady downpour, I changed my target to Gale Creek at the top of the Passage. I’d read rumours of a Heiltsuk cabin in that area that can be used, with permission, by weary, wet, respectful travellers.

The Heiltsuk cabin at Gale Creek

It’s worth a quick note about the Heiltsuk cabins. The Heilsuk run youth engagement programs through the year to get kids out on the land. They’ve built a handful of cabins across the region to visit as a community and, when they’re not in use, you may be able to visit too. Reach out first.

I’ll mention that the cabins are in various stages of their lifecycles. The one at Gale Creek has slipped off its foundation and is good, in a pinch, to store gear but I wouldn’t trust it in a storm and wouldn’t leave food in there due to mice. I opted to sleep out between a couple of towering hemlock, a stone’s throw from the cabin.

For this trip, I’d originally intended to stay south of Seaforth Channel and largely remain in the Bardswell Group and Outer Central Coast Islands Conservancy. But now with my plans of visiting Goose Island and the West coast of Athlone island dashed, and the escalating Southern storm growing, I adapted.

A classic BC foggy haze paddling up through Oliver Cove.

I’d read about some well-established (and protected) sites North of the channel, nested in the Lady Douglas-Don Peninsula Conservancy. On one of these, there was a better-maintained Heiltsuk cabin that may provide a bit of respite from the storm. Pushing through a more aggressive swell and crosswind in Seaforth Channel, I followed the flood in towards Lake Island and Helmet Peak.

The wind and rain picked up as I landed on the shore of Cockle Bay, met with the sight of a beautiful Heiltsuk cabin nested safely on the Eastern shore of Lady Douglas Island.

The cabin itself needed considerable clean-up, but with nothing but time on my hands to wait out the storm, I was happy to tidy up after the last guests and chop wood for the next ones. I spent the night listening to rain pouring down on the tin roof and watching a fire brew away in the wood stove.

 The view from Cockle Bay. Notice the intricate carvings on the cabin beams.

The view from Cockle Bay. Notice the intricate carvings on the cabin beams.

 A cozy living room.

A cozy living room.

 And well-equipped kitchen.

And well-equipped kitchen.

 And enough bunks for a whole camp.

And enough bunks for a whole camp.

 The view from Cockle Bay. Notice the intricate carvings on the cabin beams.  A cozy living room.  And well-equipped kitchen.  And enough bunks for a whole camp.

With promises that the storm would pass later that day, I waited for the tide to turn, threw on my wetsuit, and enjoyed a short paddle back towards Seaforth Channel. I settled in on the Roar Islets, which have a single (but perfect) upland campsite originally developed by Kayak Bill.

I’ll add here that there are enough campsites on this part of the coast, but they’re limited. Many of the sites and reports you’ll find on coastal maps are out of date. I’d always recommend consulting the BC Marine Trails maps, and talking to as many local folks as you can.

Curling around Watch Island and back towards Seaforth Channel.

The next morning I began my two-day return down Seaforth Channel, towards Bella Bella. With the sun finally making an appearance, I was lucky to have a glassy crossing and minimal commercial traffic to dodge. I stopped to explore a couple potential campsites before settling into Kynumpt Harbour for the night.

It’s only a short paddle from Kynumpt Harbour back into Bella Bella, but I was finally met with a common adversary on coastal kayaking trips: fog. Beyond waiting for the tides to turn, I had to wait until enough fog burnt off so I could see the bow of my kayak. In the picture below there’s a fishing boat less than 200m in front of me, but you’d never know it!

Pulling into Bella Bella near lunchtime, I tied up my kayak and caught a water taxi into Shearwater for a perfect finish to a trip: a shower, beer, and a pound of chicken wings, before my brief paddle back to McLouglin Bay to catch the evening ferry to Port Hardy.

Itinerary
Day 1: McLouglin Bay to Shearwater (6km)
Day 2: Shearwater to Soulsby Camp (24km)
Day 3: Soulsby Camp to McMullin North (19km)
Day 4: McMullin North to Gale Creek (27km)
Day 5: Gale Creek to Cockle Bay (14km)
Day 6: Cockle Bay to Roar Islets (8km)
Day 7: Roar Islets to Kynumpt Harbour (20km)
Day 8: Kynumpt Harbour to Bella Bella/McLouglin Bay (12km)


The Food

I hear gasps when I say this, but I’m done with cooking on trip. The joys of burning time managing ambitious meals with fresh ingredients, over a single gas burner, on uneven ground, and then cleaning the dishes... is lost on me. Maybe someday I’ll rekindle an urge to cook on trip, but for now I’ve almost entirely defaulted to dehydrated food. Here are some of my go-to’s:

Breakfast: Quick oats and freeze fried fruit (strawberries or blueberries). I buy the oats by the kilo and fruits by the can, usually off Amazon. I really should start adding some fats and proteins to these oats with chia seeds or something.. will try that next trip.

Lunches/Dinners: My favourite backpacking chefs are the folks at Packit Gourmet. Most of their dehydrated meals aren’t ‘good for dehydrated meals’. They’re just good.

For lunches, take any of their chicken salads or burrito mixes and wrap in a tortilla. If you’re feeling extravagant, get a cooking fire going and toast the wrap over the coals.

For dinners, the Tuscan Beef Stew with Polenta, All American Works Burger, or Bean Salads are huge hits. In fact the Santa Fe Corn Pudding, Polenta with Pork Sausage, or Poblano Corn Chowder make great anytime meals too.

Snacks: Can’t beat a few bags of nuts and M&Ms to munch on all day.


Pro Tips

  • Call lodges and outfitters in the area to get a better sense of ideal routes and availability of gear (e.g., kayaks) before you head out.

  • Charts you’ll want for the region are: 3936, 3937, 3938, 3939, 3940, 3941 (the last two only if you’re going North of Seaforth Channel).

  • Shearwater has all kinds of great amenities - laundry, restaurant, drinking water, grocery/liquor store, and a hardware store. It’s an excellent base camp.

  • I found lots of water sources, even in September. Look for creeks on your marine charts and where raised earth/mountains intersect.

  • Lots of potential reading for this area but I highly recommend John Kimantas’ Wild Coast Vol. 2. It’s now quite an old print, but there’s good information about the region and specific areas of interest. Also recommend checking out his website and grabbing one of his maps!

  • With a few exceptions, currents are fairly light along the Outer Coast. Even in channels between islands, you may not find yourself gaining/losing too much speed on either side of the turns.

 Fog pouring into the inlets at the end of Seaforth Channel.

Fog pouring into the inlets at the end of Seaforth Channel.

 The overgrown entrance to a WW2 air raid bunker in Shearwater.

The overgrown entrance to a WW2 air raid bunker in Shearwater.

 The outer Tribal Group from the water.

The outer Tribal Group from the water.

 Looking back at Seaforth Channel from the Roar Islets.

Looking back at Seaforth Channel from the Roar Islets.

 Sunset from the South side of Kynumpt Harbour’s ‘Green Neck’

Sunset from the South side of Kynumpt Harbour’s ‘Green Neck’

 The Northern Expedition getting ready to pick us up in McLoughlin Bay.

The Northern Expedition getting ready to pick us up in McLoughlin Bay.

 Sunset on the return trip to Port Hardy.

Sunset on the return trip to Port Hardy.

 Fog pouring into the inlets at the end of Seaforth Channel.  The overgrown entrance to a WW2 air raid bunker in Shearwater.  The outer Tribal Group from the water.  Looking back at Seaforth Channel from the Roar Islets.  Sunset from the South side of Kynumpt Harbour’s ‘Green Neck’  The Northern Expedition getting ready to pick us up in McLoughlin Bay.  Sunset on the return trip to Port Hardy.
September 21, 2023 /Andrew Godfrey
kayak, bella bella, solo, BC, central coast
Trips

Kayakaing Gwaii Haanas National Park

September 25, 2022 by Andrew Godfrey in Trips

Every year it gets harder to find a trip that evades cell signal. They’re adding towers faster than I can book adventures.

So when I stumbled upon Gwaii Haanas National Park on Haida Gwaii in 2019, and was promised a route that was completely off the grid, I started to get excited. The more I read about the history of this incredible place, the more pumped I got. I started organizing a kayak trip for Summer 2020.

And then something happened…

Our plans to cover 100km of BC coastline got completely derailed by a 0.1 micrometer obstacle. Trip planning went on hold, routes became local, and Gwaii Haanas became a distant dream. It wasn’t until August 2022 that we brought that dream back to life.


The Route

The starting point of our trip, the town of Sandspit on Moresby Island, is closer to Alaska than it is to Vancouver Island. There are only two ways in: air or sea. You can fly from Vancouver on a two hour once-a-day flight, or take the seven hour ferry from Prince Rupert.

Once you’ve arrived in Sandspit, you’re only a hop (one hour van taxi on logging roads), skip (two hour zodiac shuttle), and a jump (off the side of the boat to your campsite) to Gwaii Haanas. From there, you have 1700km of coastline and over 100 islands to explore.

Haida Gwaii and Gwaii Haanas have a fascinating, inspiring history. We have the Haida Nation to thank for fighting so hard to protect it. I recommend reading All That We Say Is Ours by Ian Gill before or during your trip. It’s an excellent view into the contemporary history of the Haida and will give you lots of context on the various places you’ll end up visiting. There’s a mandatory orientation to complete in order to access the park, which gives you a rich history as well.

 The view of the Haida Cultural Center and Museum - a must visit.

The view of the Haida Cultural Center and Museum - a must visit.

 A model village of what Skidegate looked like pre-contact.

A model village of what Skidegate looked like pre-contact.

 Countless relics and artifacts, safe from the rain and salt water.

Countless relics and artifacts, safe from the rain and salt water.

 The famous Loo Taas and Bill Reid/Guujaaw’s Dogfish Pole.

The famous Loo Taas and Bill Reid/Guujaaw’s Dogfish Pole.

 The view of the Haida Cultural Center and Museum - a must visit.  A model village of what Skidegate looked like pre-contact.  Countless relics and artifacts, safe from the rain and salt water.  The famous Loo Taas and Bill Reid/Guujaaw’s Dogfish Pole.

We had a plan in mind but were advised that weather will ultimately decide our direction and distance. Being so close to the open Pacific coast, winds can pick up fast and make large crossings dangerous if not impossible. Luckily, unlike our 2019 route through the Broughton Archipelago, there was little boat traffic to deal with. In fact there were only 30 permits out in the whole park when we visited!


Our route from Juan Perez Sound and around the East side of the islands. Download the GPX file here.


Assembling nautical charts of our route.

The route we designed would take us from Ramsay Island down to Rose Harbour over seven days and close to 100km. This would give us a sampler pack of everything you’d expect to find in the park: open water, quiet bays, mountains, wildlife and, if we’re lucky, a couple of Watchmen sites. It also allowed a few storm days which (spoiler) we needed.

Ultimately we spent four days on the water, three days windbound in Rose Harbour, with two days on either side of the paddle for arrival/shuttling. Even with all we saw, it’s obvious we’ve barely cracked the surface of everything that Gwaii Haanas has to offer.


The Trip

This is not the kind of trip you can execute on your own. Even with stacks of information available, we leaned on tons of support from Moresby Explorers. MorEx mostly outfits guided trips and tours inside Gwaii Haanas. But they’ll also happily rent kayaks, offer shuttles, and set visitors up with a basecamp at their Seaport B&B in Sandspit before and after their self-guided trips too. They’re knowledgable, coordinated, and were instrumental in getting us on/off the water. Cannot recommend them enough.

Knowing our trip would be so dependent on weather, we kept our starting point flexible until the last minute. Our MorEx shuttle dropped us right at our first campsite on Ramsay Island, which happened to be a short paddle from the Hotspring Island Watchmen Site in Juan Perez Sound. (This last part was not a coincidence…).

The view of Juan Perez Sound from our site on Ramsay Island.

I was slightly nervous about this site, because it would leave us a 7km open water paddle across Juan Perez Sound the next morning - something that would be damn near impossible if the weather wasn’t right. But the forecast had us feeling optimistic so we settled into our site on Ramsay before making a visit to the Watchmen and enjoying a long soak in hot pools scattered across the island. I’d heard this can be a high-traffic spot, but we were lucky to have the place to ourselves.

 Soaking in one of the pools on Hotspring Island, with Ramsay Point in the distance.

Soaking in one of the pools on Hotspring Island, with Ramsay Point in the distance.

 The walk down to one of the pools.

The walk down to one of the pools.

 Two more of the (hottest) pools on the island!

Two more of the (hottest) pools on the island!

 Soaking in one of the pools on Hotspring Island, with Ramsay Point in the distance.  The walk down to one of the pools.  Two more of the (hottest) pools on the island!

In the morning we found calm water waiting for us on our paddle towards Newberry Cove. We stopped for lunch in a quiet bay south of Marco Island (which would have been an amazing campsite) and headed on for Newberry with humpbacks and sea lions popping up along our path. We arrived at our site just as the tide was coming in, and enjoyed a beautiful sunset and a driftwood campfire before falling asleep nestled in the cove’s old growth forest.

Our cozy campsite at Newberry Cove. We didn’t need an axe/saw and could just collect driftwood off the beach for our nightly fires.

We had big dreams of hiking Yatza Mountain from Island Bay the next day, but the cloud cover wouldn’t burn off long enough to make the summit. So we switched courses and found a beautiful site on the West side of Burnaby Island, just north of the narrows.

Everything is deceptively far away in Gwaii Haanas. What looks like a short paddle across the bay will usually take twice as long as you’d think - because the trees are so big, they give the illusion of being closer than they are.

Clouds capping over Yatza mountain, with the open Pacific just on the other side.

It was on our paddle the following day, from the Burnaby Narrows to Jedway, that we watched the weather start to change. As we passed Bag Harbour surrounded by Risso’s dolphins, the wind started to pick up and gave us a hairy crossing over Skincuttle Inlet. By the time we arrived at our campsite in Jedway, we were watching 20km/hr winds capping in the bay and feeling thankful we’d reached our site!

The site at Jedway (marked as Funter Point) is an old mining camp slowly reforesting itself with wild grasses and alder. As we sat on the rocky beach listening to the radio weather reports, we made some swift adjustments to the tail end of our trip.

Kicking back at Jedway, watching the distant weather start to shift.

Where we had originally planned the last bit of our journey into two paddle days (Jedway > Carpenter Bay > Rose Harbour), we decided to compress the two days into one. We wanted to beat the weather to Rose Harbour, which would help us avoid setting up camp/tearing down/paddling in a storm.

I don’t recommend doing this route in one day.

It’s 33km and, with variable weather/tides, can be pretty gnarly. But other than a choppy riptide coming into Houston Stewart Channel, we got lucky and managed to beat the storm after all - settling in at Raspberry Cove.

A proper foggy, drizzly BC paddle along the east coast of Moresby Island.

The other reason we wanted accelerate this leg of the trip is because Courtenay at MorEx had coordinated with the Rose Harbour Kitchen to prepare a table for us for dinner. The Kitchen does dinner a couple days a week for MorEx tours, and curates a multi-course, locally-sourced feast for weary travellers who have made it to the end of the continent.

This was insanely luxurious, especially after a few days in the woods. It was like finding an oasis. Don’t underestimate the paddle from Raspberry Cove to Rose Harbour, especially at dusk, but also don’t miss the opportunity to enjoy a Michelin-worthy culinary experience.

 Arriving cold and wet at our Rose Harbour oasis.  The guesbook for weary travelers to sign.  Happy. Exhausted. Full.

Having beat our planned route into Rose Harbour, we holed up in Raspberry Cove for the next three days. It rained non-stop for the first two, and the winds held us back from visiting the famous Watchmen site at SGang Gwaay. We spent our time hiking along game trails through old growth, playing cards, and finishing the last of our wine.

Hiking and foraging along the game trails behind Raspberry Cove.

On our final day, we were picked up by D’Leen (a MorEx legend) who shuttled us back along the route we’d just paddled, along the outer coast of the park for a brief visit at the Windy Bay Watchmen site, and then back to the Seaport B&B to dry out and reflect on an incredible trip.

General stokedness on our five-hour shuttle back to basecamp.

Itinerary (download the GPX here)

Day 1: Shuttle to Ramsay Island from Moresby Camp (2.5 hours)
Day 2: Ramsay Island to Newberry Cove (17km)
Day 3: Newberry Cove to Burnaby Narrows (15km)
Day 4: Burnaby Narrows to Jedway (16km)
Day 5: Jedway to Rose Harbour (33km + 4km return from Raspberry Cove<->Rose Harbour)
Day 6-7: Stormed in at Rose Harbour!
Day 8: Shuttle back to Moresby Camp (5 hours)


The Food

Getting outfitted with food for this trip was both simple and complex. Simple in that there is one grocery store on Moresby Island (the Sandspit Super Valu). Complex in that we had to assemble our shopping list ahead of time and send it over to Dean at Super Valu to do our picking for us.

Dean and his team were amazing and got everything prepared for us for when we arrived. If you need your ingredients picked, give them a call. Feel free to make a copy of this ingredients spreadsheet to assemble your shopping list!

On this trip, we tried to limit meats and aim for single pot meals. Some of the highlights included:

  • Cheesy Pesto Pasta. Egg noodles, pesto sauce, shredded cheese, and nutritional yeast.

  • ‘Pizzaritos’. Pizza ingredients (onion, peppers, salami, cheese) chopped up and wrapped in a tortilla, and roasted over the grill on the fire.

  • Lentil Sloppy Joes. Red lentils, black beans, onion, green pepper, powdered sloppy joe mix, served on a bun.


Pro Tips

  • Read. A lot. Gwaii Haanas doesn’t have formally maintained campsites, and you can camp pretty much anywhere as long as it’s out of sight and sound of anyone else. You’ll want to pick up books and maps to help plan your route. We also recommend Nancy Turner’s Plants of Haida Gwaii, but remember that visitors shouldn’t be picking vegetation in the park.

  • If you’re intending to visit the villages of Daajing Giids or Skidegate, just know that they’re operating on island time. Stores/restaurants are only open certain days of the week and only at certain times. And Google might not be accurate. If there are things you really want to do, call ahead and organize around availability. Highly recommend calling Roberta, who runs Keenawaii’s Kitchen in Skidegate, for an amazing locally sourced home-cooked dinner.

  • Depending on rainfall, some water sources may be hard to find or non-existent. Bring a container big enough to last you at least a few days. Look for creeks at the end of bays, and where valleys cut between the mountains.

  • Consume weather reports with a grain of salt. Depending where you are in the park, you will likely find circling winds and very confused waves. Tides generally flood South to North, but this isn’t always the case.

  • Leave. Yourself. Wind. Days. Mentally prepare to use them. Revisit your routes nightly and be flexible with changes on the fly.

 Staging kayaks on Ramsay Island.

Staging kayaks on Ramsay Island.

 Chicken of the woods dominating this standing deadwood.

Chicken of the woods dominating this standing deadwood.

 A glassy paddle across Juan Perez Sound.

A glassy paddle across Juan Perez Sound.

 Stopping for lunch at a beautiful bay south of Marco Island.

Stopping for lunch at a beautiful bay south of Marco Island.

 Sunset at Newberry Cove.

Sunset at Newberry Cove.

 Weather starting to rear its head in Skincuttle Inlet.

Weather starting to rear its head in Skincuttle Inlet.

 Fishing off Jedway. We tried. We really did.

Fishing off Jedway. We tried. We really did.

 The last rays of sun from across Skincuttle Inlet.

The last rays of sun from across Skincuttle Inlet.

 Our chariot (and rescue) back to Moresby Camp.

Our chariot (and rescue) back to Moresby Camp.

 Staging kayaks on Ramsay Island.  Chicken of the woods dominating this standing deadwood.  A glassy paddle across Juan Perez Sound.  Stopping for lunch at a beautiful bay south of Marco Island.  Sunset at Newberry Cove.  Weather starting to rear its head in Skincuttle Inlet.  Fishing off Jedway. We tried. We really did.  The last rays of sun from across Skincuttle Inlet.  Our chariot (and rescue) back to Moresby Camp.
September 25, 2022 /Andrew Godfrey
kayaking, gwaii haanas, haida gwaii, British Columbia
Trips

BC Marine Trails: Linking and Protecting the BC Coast

September 24, 2022 by Andrew Godfrey in Conservation

One of the more complicated parts of organizing a big trip is connecting routes to campsites. Especially when you’re adventuring outside of the boundaries of formal parks. It requires tons of research and planning to find a safe (and achievable) route, and generally you end up taking any advice you can get.

I came across an incredible organization called BC Marine Trails, and they’ve become an invaluable asset for planning a kayak trip in BC.

BCMT is working hard to connect the BC coast, all the way from Washington to Alaska, with safe and clean campsites. The organization’s goal is to have an unbroken chain of well-maintained sites, each no more than a day’s paddle apart. And they’re doing this without owning a single square foot of land.

Between the complexity of negotiating across private/public/First Nations landowners, and managing a database of sites in some of the coast’s most remote areas, it’s a hell of an ambition. It was so inspiring that I joined the board of directors in 2021 to offer any help I could.

If you’re planning a kayaking trip in BC, this is an organization you’re going to want to support. Here are a few reasons why.

In connecting the coastline, BCMT has amassed a deep database of campsites of all kinds. You can access the map for free online, and paid members have some extra features including a route planning tool, and the ability to download site data for GPS devices.

The BCMT Map tool

Our organization is working hard alongside First Nations, governments, and private landowners to grow the list of sites across and make travelling the coast even more accessible. Our Code of Conduct helps educate paddlers on how to visit the coast responsibly and respectfully.

Removing ivy at Gerald Island. Photo by V. GIbberd.

Sites are regularly visited to take condition reports and tidy them up from garbage and invasive species. Where possible, we work to add some level of infrastructure to make your trip even more comfortable. (Like the new composting toilet at Freedom Point in the Discovery Islands!)

freedompointtoilet2.jpg freedompointtoilet1.jpg

Lastly - members get some amazing discounts on tours and kayak rentals all along the coast.

A membership will cost you $30 a year, and I will tell you (in a completely unbiased way…) that it’s worth its weight in gold - especially as you plan your next adventure in BC.

Join BC Marine Trails today!
September 24, 2022 /Andrew Godfrey
BCMT, Kayaking
Conservation
bustardsfirepit.jpg

Kayaking the Bustard Islands

February 24, 2021 by Andrew Godfrey in Trips

It doesn’t seem to matter how many times I paddle Georgian Bay - every trip is different and each one leaves me wanting more. I can’t shake how lucky I feel to live so close to the most beautiful coastline in the world.

After surviving a winter trip with Jake and Jeff, we quickly made plans to spend another week out in the wilds and settled on a mid-summer trip to the playground that is French River Provincial Park. It’s one of the few places I’ll consider camping in July in Ontario; the Georgian Bay winds provide a much needed shelter from summer heat and bugs.

Screen Shot 2021-02-24 at 10.22.34 PM.png

Hugging the north-east coast of Georgian Bay, the French River park boasts staggeringly beautiful landscapes and, compared to Algonquin and Killarney, it sees very little traffic. Being a fairly new park (est. 1989), you’ll see the occasional cottage and fishing camp, but otherwise it’s an excellent spot for a taste of solitude and scenery.

As the name suggests, the park follows the French River as it empties Lake Nipissing into Georgian Bay. It’s the track that Samuel Champlain took when Europeans first arrived at the Bay, with Voyageurs following the same route for centuries to exploit the area for the fur trade. There is no shortage of paths from the main channel into the bay, with the river emptying through multiple arms - giving a backcountry tripper lots of options.


The Route

With a couple guys who haven’t spent much time in the area, I wanted some general exploration but ultimately to highlight a special part of the park: the Bustard Islands.

The Bustards are a bit of a geologic anomaly. They cover a significant landmass, are unusually far offshore, and are reasonably undeveloped. On windy day, it can be difficult to even get to them in a kayak (and impossible in a canoe). So for a few guys with time to burn, it was a perfectly reasonable target.

Our route - all in all, around 110km.

Our route - all in all, around 110km.

We carved off a full calendar week for the trip, which left us with tons of options for a healthy loop. In the end we decided to launch from the Pickerel River Marina, connect with the French and ride the West arm to open water, curl back East to the Bustards, and head home up the main channel. We covered around 110km over seven days (only five of which were spent between sites).

I had hoped to do some exploring around Fox Island to the East, but we didn’t get quite that far. And it’s always nice to leave something for next time.


The Trip

I’ve been up to this area twice in recent years, and introduced the Pickerel River segment to shake things up a little. It saved us some driving and gave us a bit more distance to play with. Water levels were insanely high in 2020, so we had very little swift water to worry about in either direction. There are plenty of campsites along the Pickerel, although they can be widely spaced so plan accordingly. As it approaches the French, the Pickerel bends and carves through some incredible channels and valleys. If you can afford the time, it’s far superior to the segment from Hartley Bay to the main junction of the French’s ‘figure 8’.

Carving through cliffs on the Pickerel River.

Carving through cliffs on the Pickerel River.

As much as I love tracking new routes, some are just too perfect to change. I had to take the boys through the Old Voyageur Channel, which I highlighted on my 2019 route around Philip Edward Island. The water levels were much higher and the rapids less exciting, but the channel always reminds me why I keep coming back.

In true Georgian Bay form, reality didn’t set in until we hit open water. Winds picked up dramatically and didn’t let up for the rest of the trip. The title of this blog isn’t just some playful alliteration. I am a fucking headwind magnet.

Landing in Green Bay, we found ourselves at the westernmost point of the park. We settled in at a glorious island site for two nights - spending our days surfing waves, drinking swampy bay water, dodging rattlesnakes, and soaking in sunsets.

Shoals around Green Bay, the Westernmost point of the French River park.

Shoals around Green Bay, the Westernmost point of the French River park.

After a couple days of island life, we saw a window of sub 15km/hr winds and decided to make our 10km push across open water to the Bustards. Aside from Jake’s rudder popping off ten minutes into the trip, we had little friction getting to the Bustard lighthouses and began our hunt for a campsite.

Despite the vast landmass of the Bustard Islands, there are only a handful of campsites marked on the map. This would create a bit of a challenge if you got all the way out there and all were taken, and indeed we saw plenty improvised sites along the shoreline. Not ideal, but in a pinch you can make it work. At this point we still hadn’t seen anyone in days, and we settled in at a beautiful and quiet site nested in the belly of Tanvat Island.

Traversing the bay towards the Bustard Island lighthouses.

Traversing the bay towards the Bustard Island lighthouses.

We decided to stay another night on the Bustards, but ended up moving out to the coast after being accosted by in-land mosquitos. The exposed point we settled at was stunning, rugged, and certainly the highlight of the trip for me. You can see it in the headline picture of this post!

For our final push back up-river, we chose the Canoe Channel route back towards the French. I hadn’t gone this way before and was so pleased we did. The cliffs and canyons made for a gorgeous detour back to our original route, which we traced back to the marina the following day.

Sunset on the Pickerel.

Sunset on the Pickerel.

Itinerary
Day 1: Pickerel River Marina to Pickerel River (17km)
Day 2: Pickerel River to Green Bay (27km)
Day 3: Island day (no travel)
Day 4: Green Bay to Bustard Islands (16km)
Day 5: Island day (no travel)
Day 6: Bustard Islands to Pickerel River (23km)
Day 7: Pickerel River to Pickerel River Marina (17km)


Hot Tips

With Georgian Bay trips it’s good practice to pick a start and finish point, a general route, and leave yourself plenty of flexibility to make changes based on wind/mood.

As of July 2020, there is a massive wind power installation around the Henvey Inlet at the Eastern arm of the park. Thumbs up for renewable energy, but it’s absolutely hideous. Flashing red lights all through the night. Try to snag a West-facing site in this part of the park.

There are only a handful of sites on the Bustards. If you’re in peak season and worried about not getting a site, start your trip on a Thursday or earlier. Weekend traffic may pick up, but mid-week things are dead.

 All you can eat!

All you can eat!

 I’m not sure it ever gets dark in Green Bay.

I’m not sure it ever gets dark in Green Bay.

 The gorgeous rock formations once you reach the Bustards.

The gorgeous rock formations once you reach the Bustards.

 A rare visitor joined our hangout circle.

A rare visitor joined our hangout circle.

 Lunch Break on the French.

Lunch Break on the French.

 Canoe Channel cliffs falling into the French.

Canoe Channel cliffs falling into the French.

 A glassy morning paddle.

A glassy morning paddle.

 All you can eat!  I’m not sure it ever gets dark in Green Bay.  The gorgeous rock formations once you reach the Bustards.  A rare visitor joined our hangout circle.  Lunch Break on the French.  Canoe Channel cliffs falling into the French.  A glassy morning paddle.
February 24, 2021 /Andrew Godfrey
Georgian Bay, French River, Bustard Islands, Kayaking
Trips
WhatsApp Image 2020-01-21 at 1.55.39 PM.jpeg

Winter Camping in Espanola

March 16, 2020 by Andrew Godfrey in Trips

It’s been said that there are three types of fun.

  • Type 1: The kind that’s fun to do and fun to talk about.
    (Think about a long weekend in Algonquin with perfect weather, a couple short portages, no bugs, and lots of lazing around in camp.)

  • Type 2: The kind that’s not fun to do, but fun to talk about.
    (Think about painfully long hikes/paddles, questionable odds of survival, but with an amazing sense of accomplishment and pride afterwards.)

  • Type 3: The kind that’s not fun to do, and not fun to talk about.
    (Think about the time you forgot some important gear, fucked up your route, and got to camp after dark because you left the city too late.)

Winter camping is an unusual beast. It can be amazing and it can be painful, and often those two can be a few hours apart. I do one trip a year, and each year I try to make it more comfortable.

My first year, three of us showed up to Algonquin in January with a 3-season tent, no snowshoes, wearing jeans (okay that was just me), and expected to thrive for a weekend on the Western Uplands trail. We survived one night, and swiftly turned back. (We also got beaver fever on the way back from drinking untreated river water. Yay.)

The next year, we swore to do it right. We found out about Algonquin Basecamp (Hi Chris!) who set up outposts on a crown land lake that you can rent. A big canvas prospector ‘hot tent’ (i.e., with an indoor stove) and promises of a cushy weekend of snowshoeing and chopping wood. It was glorious.

 Setting out on the trail with our pulks.

Setting out on the trail with our pulks.

 A cozy campsite about to get toasty warm.

A cozy campsite about to get toasty warm.

 Elk salami mac and cheese, fireside.

Elk salami mac and cheese, fireside.

 Nature’s gasoline.

Nature’s gasoline.

 Quality butt shot of the Snowtrekker.

Quality butt shot of the Snowtrekker.

 Setting out on the trail with our pulks.  A cozy campsite about to get toasty warm.  Elk salami mac and cheese, fireside.  Nature’s gasoline.  Quality butt shot of the Snowtrekker.

For a few years, we rented our gear from Chris and hauled it in ourselves - a canvas Snowtrekker tent and wood stove, carried on sleds over backcountry trails. Tons of crown land to explore and rarely any company - with the exception of snowmobilers ripping down the trails from time to time.

But we caught a bad habit of booking our trip on the coldest weekend of the year. Every year. The average seemed to spin around -30. I’ll tell you right now, there’s almost no way to make that comfortable. If you’re not shoveling wood into a fire, you’re not having a good time.


The Route

In my old age, I’ve been looking for ways to get winter camping as close to Fun Type 1 as possible. I found Kielyn and Dave at Lure of the North (LOTN), homesteaders and artisans who have set up an impressive camp in the backwoods outside Espanola. Just take a minute to watch the amazing video below, and you can start to understand what I mean.

In addition to their stunning (hand-made) home, and when they’re not leading multi-week expeditions into the backcountry, they’ve built a couple glamping-style camps: big canvas prospector tents, steady on wooden platforms with no shortage of amenities - including bunk beds, a propane stove, and board games.

For the last couple years, this has been my way to escape the city in the winter for a quick weekend adventure.


The Trip

Late in January, Jake, Jeff and I started a trek to Espanola for a weekend at the LOTN camp. Anticipating a big dump on the Saturday, we drove out Friday and spent the night at the Pinewood Inn, and enjoyed a few beer at a nearby sports bar.

From Espanola, we only had a 15-minute drive to our starting point - where we picked up our sleds (aka pulks) for the 7km hike into camp. Worth noting that pulks are the only way to haul gear in the winter. You’re welcome to carry yours on your back, but I’m going to pull mine on a 7-foot plastic sled that glides on the snow as if Clark Griswold waxed it himself.

When we left, the snow had only just started falling. It made for an amazing scene as we approached Golden Pond.

There are legends about the few voyageurs who carried disposable cameras.

There are legends about the few voyageurs who carried disposable cameras.

Everything is a bit less hurried when you’re winter camping. You hike slower. Cooking takes longer. Dressing/undressing is a bit of a production. Getting camp ready can be a half-day affair. For first timers (and even veterans) finding a place like LOTN takes a lot of the pressure off and lets you enjoy a weekend in the snow.

When we made it to camp, we were able to settle in quick, get a fire going, and thaw ourselves out with a warm meal and a cold glass of wine. The glamping-style tent is full of amenities and despite being separated from -20 weather by a thin wall of canvas, you’d hardly notice with the fire chugging along.

Simmering chili and warm toes.

Simmering chili and warm toes.

Not having to worry about moving camp and chopping wood, it freed us up to do some serious exploring. The LOTN homestead is adjacent to some quality crown land, and beautiful Moose Lake. It’s a popular spot for ice fishing, and rises up from the Canadian shield only a few kilometers inland from Georgian Bay.

We packed our bags for the day, strapped on the snowshoes, and headed out on a wander with a new friend, Hank, who made for an excellent hiking companion. We weren’t able to communicate that it was going to be a full-day hike, but he didn’t seem to mind.

Fresh tracks on a bluebird day.

Fresh tracks on a bluebird day.

After an 11km wander, a bit of bushwhacking, another night at -25, and a 7km hike back to our car, we were both exhausted and already planning next year’s adventure. There is a tendency to push the boundaries of comfort, so the next story may involve more backcountry and less glamping. But either way, this is a great way to spend some a weekend in the snowy wilderness without too much suffering.


The Food

Two fun realizations I had after that first winter trip into the Western Uplands: food freezes, and frozen food is hard to cook. This precludes certain recipes, even with a hot tent. It also turns out the human body can’t survive entirely on whisky, at least not for long, so we were pretty deliberate about food. Breakfasts were instant coffee (Nescafé Gold Espresso for the win) and oatmeal/fruit. Lunches were mostly snack food administered as required. And as for dinners:

Meal Plan
Day 1: Chicken Mulligatawny Soup (I copied this recipe from Goodfood, which I love. Prepared the ingredients ahead of time in separate bags for easy work in the kitchen).
Day 2: Vegan Chili (Prepared by Jeff using a recipe I can only assume is classified).


Pro Tips

  • Get a pulk. Rent one from your outfitter or make your own, but don’t carry your gear on your back - it’s no fun.

  • Your sleeping bag temperature rating is a survivability rating. For comfort, add 10˚C to it. (e.g., a bag rated at -10˚C is comfy down to 0˚C.). Layering two bags works surprisingly well - add the two ratings together for a decent estimate. Otherwise, rent from MEC or your outfitter.

  • Layers. Always layers. I recommend starting a hike cold, because you’ll heat up quick. You want to be ready to strip down to a mid layer at a moment’s notice. Also bring a big fancy parka for when you’re not moving - it gets cold fast, especially when you’re sweating.

  • There are lots more tips if you’re planning to haul your own tent/stove/gear into the backcountry. I’ll have to cover those another time, but in the meantime watch as much Youtube as you can.

 Hijacking snowmobile trails on our hike home.

Hijacking snowmobile trails on our hike home.

 On guard at our watering hole.

On guard at our watering hole.

 An afternoon wander into the void.

An afternoon wander into the void.

 The boys admiring our view.

The boys admiring our view.

 The only way to drink coffee at -30

The only way to drink coffee at -30

 Fresh tracks on Moose Lake.

Fresh tracks on Moose Lake.

 Bushwhacking - does not make me envy the Voyageurs.

Bushwhacking - does not make me envy the Voyageurs.

 An elegant shot of a handsome hiker.

An elegant shot of a handsome hiker.

 FRESH POTS

FRESH POTS

 Jeff showing gravity who’s boss.

Jeff showing gravity who’s boss.

 Hijacking snowmobile trails on our hike home.  On guard at our watering hole.  An afternoon wander into the void.  The boys admiring our view.  The only way to drink coffee at -30  Fresh tracks on Moose Lake.  Bushwhacking - does not make me envy the Voyageurs.  An elegant shot of a handsome hiker.  FRESH POTS  Jeff showing gravity who’s boss.
March 16, 2020 /Andrew Godfrey
winter, snowshoe, espanola
Trips
Vu1dgS0Gwd9sF56H4XQyRJ5BN2VKE91uIJ3aCcsN-Loz80scKWU6zB1QwzUSqq-4NLhMUGNOBAH4r_DLSUA3Oy_GRfXc7VnGyPrOOa4Z8Tbotp1ZujB-Av6O4Pg7pLdQfivF49T9vS3fgndAI1NrX__X4qNCSa8s2j64bCbUenvDwLK5qOeS8-qjQ0gugi7_HFUFL_0ygL7DAuu2aBqxOWGfB2URU.jpg

Dutchware Chameleon Hammock

March 01, 2020 by Andrew Godfrey in Gear

I switched from a tent to a hammock in 2012 and never looked back.

There are times where you need a tent. Above the tree-line, deserts, tons of islands on Georgian Bay. So depending where I am, I’ll bring one just in case. But once you get comfortable sleeping in a camping hammock it’s very unlikely you’ll go back unless you’re forced. Here are a bunch of reasons why:

  • It’s lighter. Hammock/tarp rigs keep weight and bulk down.

  • Rain sucks less - you’re off the ground.

  • Tons of storage underneath you. It’s like having two storeys.

  • It’s comfier, no matter how you sleep - back, stomach, side. In an asymmetrical hammock, lying diagonally means you’re pretty much flat.

  • You get to sleep alone, 50 feet away from your buddy that snores like a chainsaw.

I’ll admit that there’s a ton more variability involved with hammocks. You want the right trees, the right diameter, the right distance apart. The right insulation (spoiler: a regular sleeping bag isn’t enough). But it’s worth all the complexity.

Quality rain protection.

Quality rain protection.

Just like with coolers, there’s an outspoken hammocking community online. Lots of cottage companies, and some big ones. Ultimately you need a handful of things to be successful with hammocks. I could spend a post on each of them, but in the interest of brevity here the summaries.

  • A tarp - You can go all the way from the blue Canadian Tire classic, up to custom silnylon tarps designed specifically for the length of your hammock. Ideally you want an extra 6” on either side for wind/rain coverage. 

  • Insulation - Without the ground for insulation, you need something under the hammock to keep you warm. Either a sleeping pad stuffed in the hammock with you, or an underquilt - a sleeping bag that goes underneath the hammock, outside. 

  • A hammock - Thin as you can for your weight. Some have an extra layer of nylon that lets you slip your sleeping pad in between, which is nice, but I recommend an underquilt. Having a fully detachable bug-net gives you some flexibility to use the hammock more casually.

  • A suspension - How you connect your hammock to the trees. For your first hammock, just get straps and carabiners. There are all kinds of other suspensions but they’re complicated. You’ll want to watch some Youtube videos on hang angles to maximize comfort - try it out at home a bunch before your first trip.

  • A bunch of cord, and pegs. You want cordage that doesn’t slack when wet. Basic paracord is okay, reflective is better, but Dyneema-based cord is best. Get lots of it - it’s super light. I would suggest 50ft (6ft x2 for the long ends of the tarp, 6ft x4 for the tarp corners, extra just in case).

If you’re looking for a quality hammock to start with, look no further than the Dutchware Chameleon.


The Good, The Bad, The Ugly

The Chameleon is a super versatile piece of equipment. Immense flexibility on type and colour of material, thickness, and accessories. When you consider the cost of the hammock and all the other items I listed above, the cost will generally come out to be the same as a nice brand name tent.

Quality views with the detachable bug-net removed.

Quality views with the detachable bug-net removed.

Dutch’s manufacturing is excellent, too. Quality materials (think fabric, zippers, cordage) and well-sewn. I haven’t run into any issues that would put me at risk of a structural failure.

My only qualms come from the inherent customizability of the hammock itself. My underquilt wasn’t built by Dutch, and because there are fixed hooks on the hammock it means the two pieces of equipment don’t perfectly match up. If I was able to shuffle them around, I’d get a better fit.

Likewise, the removable bugnet makes for a great daytime-hammock, but it leaves very small holes on either end where (theoretically) bugs could get it. I haven’t seen it happen, because when taut the holes all but disappear, but it’s still a possibility.


The Results

This is an awesome piece of equipment, and would be a great starter hammock. It’s not overly expensive, wait times are non-existent (which can’t be said of some other cottage manufacturers), and you can customize it to your size and needs. Best to get a simple suspension to start, and branch out from there. If you really hate how hammocking feels, there are lots of online communities where you can sell your gear second hand.

A hacky hang on the Bustard Islands.

A hacky hang on the Bustard Islands.

I also recommend getting the peak shelf to store night-time gear, but it seems like Dutch has a come up with a few new tricks since I bought mine.

Pros

  • Hammocks are great for all the reasons I listed above, and the Chameleon has the most versatility of any of them.

  • The materials and manufacturing are super high quality.

  • It’s cheap enough that if you find out you don’t like hammocks, you haven’t spend an absurd amount.

Cons

  • Hammocking is tricky in certain environments and you have to be prepared for that.

  • The Chameleon’s versatility can make using non-Dutchware accessories a challenge.

  • The peak shelf is good, but not great.

  • I suppose you’re basically like a pre-wrapped burrito if a bear decides it wants a snack.

March 01, 2020 /Andrew Godfrey
sleep, hammock, tent
Gear

Kayaking BC’s Broughton Archipelago

December 29, 2019 by Andrew Godfrey in Trips

After a trek into BC’s Desolation Sound, I knew I’d be back. In fact, I started planning the next trip almost immediately.

Throwing darts at a map, I noticed a cluster of islands near Port McNeill, on the north-east side of Vancouver Island, called the Broughton Archipelago. After looking at some photos on Google it took me all of ten minutes to decide that this was the spot for my next BC tour.

I had initially planned on a solo, but the more I talked about the trip the more interest I had. To be honest, I was kind of relieved - this area was a lot more exposed and remote than Desolation Sound, and I was glad to have some company. Two pals (Chris and Tyler) ended up following through, and in September 2019 we landed in Nanaimo ready for some adventure.

Screen Shot 2019-09-17 at 12.29.52 AM.png

The Route

From the northern tip of Vancouver Island, the Pacific wind blows down the Queen Charlotte Strait past Port Hardy, Port Macneill, and eventually it hits a chain of islands and the Broughton Archipelago Marine Park. Established in 1992, it’s BC’s largest marine park and has over a hundred (varied-quality) campsites peppered across native, public, and private land. The area also crosses the Johnstone Strait and Blackfish Sound, both endearingly referred to as ‘whale soup’: a superhighway for orca and humpbacks. I’d never paddled with our distant cousins, but was excited at the idea.

I came across the folks at BC Marine Trails, who have amassed an ocean of campsite data. With their generous help, I was able to piece together a number of possible routes. It’s worth mentioning that the Archipelago is remote, but well-known - it shows up on tons of sea kayaking Top 10 lists. Even after Labour Day, I was assured we’d see other folks out there and that we may have to contend for campsites.

Our five-day/100km adventure. In order: black, red, green, purple, blue. Download GPX file here.

Our five-day/100km adventure. In order: black, red, green, purple, blue. Download GPX file here.

Starting out of Telegraph Cove we’d planned a 5-day/4-night route that, truthfully, was pretty loose. I’d heard lots about tides and currents in the area, and had no idea what our pace would be. The plan was to cross the Johnstone Strait and see how far we could get, turning back a few days later and finishing in Telegraph Cove.

Above you’ll see the actual route we pulled off. All in all, just over 100km. I had a rough idea that we should see Village Island (more on that later), and we should get beyond the Knight Inlet and into the northern part of the park. We were traveling just after a new moon so the tides were at their highest, which meant the currents were at their strongest, so ultimately they decided where we went.

In planning, I was also reasonably conservative with crossing such big segments of open water. We tried to limit that as much as possible, but ended up with perfect weather so we did it anyways!


The Trip

Air Canada just started direct flights from Toronto to Nanaimo, which made it a great rally point. We rented an SUV and ventured four hours north - past Comox (where we picked up kayaks at Comox Valley Kayaks and Canoes) and into Telegraph Cove, a tiny town with a vibrant history. Today, Telegraph Cove is owned by a resort and made for a phenomenal base camp. We were able to rent a cabin the night before launch, and grab a hot dinner/cold beer(s) at a restaurant in the harbour.

Our cozy foggy basecamp in Telegraph Cove.

Our cozy foggy basecamp in Telegraph Cove.

On Day 1, the plan was simply to cross the Johnstone Strait and find a spot along the southern coast of Swanson Island or the western bay of Harbledown Island. We timed our launch with the tide, but were met with a common adversary in BC: fog. We could see all of twenty metres in front of us. We crossed the channel and made it into Blackfish sound, where we found… more fog. We had lunch and hoped it would pass, which it did briefly, and we powered across the bay to sounds of humpbacks breaching and ships cruising in the mist.

We were ready to settle in at Flower Island when a group of passing kayakers warned us there was a grizzly sighted there all of 45 minutes prior. Heeding the warning, we quickly crossed the channel to Parson’s Bay where we posted up at a sandy site on Red Point with a perfect view of Blackney Passage.

The very paintable view from Village Island back towards Vancouver Island (in the distance).

The very paintable view from Village Island back towards Vancouver Island (in the distance).

Day 2 took us eastward to a small cove on Turnour Island. The site was rugged, but at medium-to-low tide we had a nice midden beach and a rocky shoal to sit and watch the sunset. We caught a favourable current on the way out to Turnour, which left us with a lot of time on our hands - enough to make a day trip to Village Island, the former home of the Mamalilikulla First Nation. The island holds some interesting relics and abandoned buildings, and it’s necessary to clear your arrival with the nation before visiting.

Day 3 was… interesting. After another foggy start, we mistimed a current and got held up for a long lunch. By the time the current had calmed, we had lost quite a bit of time with a lot of distance to go. We passed several occupied sites, including one that served as a base camp for protestors of the local fish farming industry. (They won, by the way!) The Broughtons are light on places to camp, so we ended up tracking over 25km on Day 3, finally arriving at a secluded campsite in Spiller’s Passage, between Mars and Hudson islands.

Questionable docking locations abound.

Questionable docking locations abound.

Following a late night where we celebrated our survival (after a field injury involving an impressive fall off a ten-foot cliff) we woke up late to a calm and sunny Day 4. This gave us the option of an open-water paddle, and turned into the greatest day I’ve ever spent on the water. Humpbacks breaching everywhere you looked, a swift current (in the right direction, for once), and a perfect view of mountains made for happy paddling. We made incredible time and decided to return to our beach site at Red Point for our last night.

An amazing bluebird day on open water.

An amazing bluebird day on open water.

In the spirit of the rollercoaster ride that was this trip, our final return to Telegraph Cove on Day 5 was nothing short of terrifying. We had to beat a current early in the morning, which meant departing into another pea-soup fog. It’s difficult to express how uncomfortable it is to hear (but not see) whales breaching a mere ten metres away, or to have a sea lion pop up at the bow of your kayak and show you its massive teeth. Beautiful, but highly uncomfortable. We beat the current, and made it into the Johnstone Strait (crossing, again, in a deep fog - not ideal) for a leisurely paddle home as the tide ebbed out.

I’m sure there are mountains back there somewhere..

I’m sure there are mountains back there somewhere..

Itinerary (GPX file)
Day 1: Telegraph Cove to Parson’s Bay (17km)
Day 2: Parson’s Bay to Turnour Island (18km)
Day 3: Turnour Island to Mars Island (25km)
Day 4: Mars Island to Parson’s Bay (21km)
Day 5: Parson’s Bay to Telegraph Cove (14km)


The Food

The big complexity in meal planning for this trip was that I didn’t have my trusty cooler, so keeping food frozen wasn’t practical. I also wanted to avoid meat as much as possible because I heard grizzlies like meat, and I wanted to avoid grizzlies.

We didn’t have the benefit of a home kitchen to prepare anything, so we basically took stuff right off the grocery store shelf and into our bag. Once again, we did our own breakfast and lunches (which I highly recommend) and shared dinners. Think boxed PC White Cheddar Mac and Cheese, a curry kit, and Mr. Noodles repurposed with various sauces. Some day I will document some of these recipes.

Meal Plan
Day 1: Thai Green Curry with Lentils (Using a package like this)
Day 2: Mac and Cheese w/ Salami
Day 3: Knock-off Dan Dan Noodles w/ Tofu (Mr. Noodles, firm tofu, and a bottle of this peanut sauce)
Day 4: Poor Man’s Carbonara (w/ pancetta, Mr. Noodles, eggs, parmesan, pepper)


Pro Tips

  • Get a membership at BC Marine Trails. They have awesome campsite data you can download into your GPS, and you get 20% off rentals at Comox Valley Kayaks and Canoes. I would not have had as much fun as I did without their help.

  • Study the tides and currents of your route (a lot), and be flexible to the possibility you might have to change your plans.

  • There is some cell service, but consider getting a GPS. Fog is common and it can completely destroy visibility. Having a clear read on bearing and route is essential.

  • If you’re interested in an A-B route instead of a loop, there are water taxis in the area that could take you out at the beginning (and you paddle back) or pick you up at the end and return you to Telegraph Cove. They’re expensive (~$150 per person each way), but could help you explore even further.

 Telegraph Cove is used to kayakers taking over the place.

Telegraph Cove is used to kayakers taking over the place.

 A common sight.. fog rolling in and out to reveal mountains hidden behind.

A common sight.. fog rolling in and out to reveal mountains hidden behind.

 Chris’ legendary shot of a humpback breaching in front of our campsite.

Chris’ legendary shot of a humpback breaching in front of our campsite.

 A phenomenal (tidally dependent) beach.

A phenomenal (tidally dependent) beach.

 Massive arches on Village Island.

Massive arches on Village Island.

 A group circle and the view from Village Island.

A group circle and the view from Village Island.

 This little dolphin followed us around through the fog.

This little dolphin followed us around through the fog.

 Opportunistic wildlife crossing to an island at low tide.

Opportunistic wildlife crossing to an island at low tide.

 A well deserved pint in Telegraph Cove to cap the trip.

A well deserved pint in Telegraph Cove to cap the trip.

 Telegraph Cove is used to kayakers taking over the place.  A common sight.. fog rolling in and out to reveal mountains hidden behind.  Chris’ legendary shot of a humpback breaching in front of our campsite.  A phenomenal (tidally dependent) beach.  Massive arches on Village Island.  A group circle and the view from Village Island.   This little dolphin followed us around through the fog.  Opportunistic wildlife crossing to an island at low tide.  A well deserved pint in Telegraph Cove to cap the trip.
December 29, 2019 /Andrew Godfrey
Kayaking, British Columbia
Trips

Exploring Brantford and the Grand River

August 06, 2019 by Andrew Godfrey in Trips

I’ve been spending an unusual amount of time in Brantford lately. It’s not the first place you’d think of if you want to disappear into the great outdoors but, as it turns out, this sleepy little town has some hidden gems worth hunting for. Between the Grand River and the surrounding fields and forests, there’s no shortage of possibilities for adventuring.

I’m about halfway through Original Highways, a history of Canada written in rivers. In a nutshell, we wouldn’t have this beautiful little country of ours without the waterways that allowed us to explore it. The Grand is one of the book’s highlights and, being so close, I figured it was time to experience it for myself.

The river begins north of Grand Valley and runs all the way into Lake Erie. You can hop in almost anywhere, but I was focused on the segment that runs from Glen Morris down to Brantford - about 30km of windy, shallow waters that would certainly carry you into town without you even bothering to paddle. In fact, many of the folks we passed on the river weren’t paddling at all!

Wetlands in and around the Grand River

Wetlands in and around the Grand River

A tempting option for traversing the Grand is to pump up a bunch of river rafts (or inflatable pool floaties), fill a cooler full of beers, and spend the day meandering through a series of light rapids and rocky beaches. I opted to float in my sea kayak, which was not ideal for a shallow river, but it did the trick.

I’ve been twice now - early July and early August - and the water level was wildly different. The water moves fast regardless, but it was much lower later in the season. Expect some challenging reads on the rapids and all-but-certain pullovers at various points. You’ll also (almost certainly) have to dangle fleets of kids crushing Bud Lights while blasting Old Town Road shitty bluetooth speakers.

A well-paved rail trail between Brantford and Waterford

A well-paved rail trail between Brantford and Waterford

On land, Brantford also has an impressive bike trail that (allegedly) runs all the way from town into Port Dover on Lake Erie. It’s an old railway that has been smoothly paved, and is peppered with scenic views of the countryside and historical waypoints. From Brantford to Waterford (the only part of the trail I’ve seen) the trail is remarkably flat and beautiful.

If you happen to find catch a flat tire in Brantford, or find yourself not so exhilarated by the Wayne Gretzky museum, these are two solid options for unexpected adventures in Ontario’s heartland.


Pro Tips

  • Weekends on the river are busy! If you’re renting a boat from Grand River Experiences or the Grand River Rafting Company, book in advance and consider off-weekend days if you can swing it.

  • Water levels are a real thing. The best rapids are between Glen Morris and Paris, and after that it gets a bit easier. If you have a boat full of Bud Lights you’re gonna be hauling through the shallows south of Paris.

August 06, 2019 /Andrew Godfrey
Kayaking, Cycling, Brantford
Trips
Tz6MjK7lUtw6Cor3YtxwR7HmMO1dBG3SAJWydzfnoLy-TPlaC4HNjaHksh_Y_zV9oBmsZyj_p0QEdhQievYhwss-udzUE063GYqZt15MWp4nXC1NETLmC0op3Gp94flzvUYGJcLvd0u4LkgJyanLX67GKegQdcfTqYiUSvJ3reDcB54wSTkgbODGvKR68zjrbLd72_wdAt44VWjPF009HMr6CcDgU.jpg

Solo Kayaking in Desolation Sound, BC

July 17, 2019 by Andrew Godfrey in Trips

In June 2018, I had to be in Vancouver for work and figured I’d use the opportunity to tack on a trip. Up to then I hadn’t done any real tripping outside of Ontario, and was really excited at the idea of kayaking the coast of BC. I generally do one solo trip every year and, unable to convince my usual camping buddies to travel cross-country, this ended up being the one.

Without any knowledge of routes and parks in BC, I turned to Reddit to get some advice on the best spots. A few folks mentioned Tofino and the Broken Group islands, but warned that they’re highly trafficked. Others suggested the North Coast of the island, in an around Telegraph Cove, but with only three nights to spare it was a bit too far. (Worth noting, I did convince a few adventurers to join me up in the Broughton Archipelago this fall - so we’ll be back that way in a few months!).

One Redditor ended up reaching out to me in a private message and spilled some quality intel. He (or she) suggested checking out Desolation Sound - a marine park just north of Powell River, and a quick hop from Vancouver. After checking out a few pictures (and lifting my jaw off the floor) I was sold, and started planning.

You’ll find Desolation Sound just east of Campbell River.

You’ll find Desolation Sound just east of Campbell River.


The Route

Tucked away on the northern end of the Sunshine Coast, Desolation Sound is a group of coves and islands world-renowned by sailors and paddlers. Some 60km of shoreline has been protected since 1973 as a marine park and, despite some residential development and logging in the area, it looks pretty untouched. I’ve heard there’s plenty of boat traffic in the summer, but June is the shoulder season so I was promised a bit of peace and quiet.

I planned a four-day/three-night route that would take me from the Okeover Inlet, up to the Mink and Curme Islands, and back down to Lund. The route was only about 40km, but being in saltwater for the first time and solo, I wanted to keep it pretty simple. (In hindsight, I should have done this the opposite way because of prevailing winds. But then again if I did that I wouldn’t be living up to the name of the blog...)

My route from the Okeover Inlet back into Lund.

My route from the Okeover Inlet back into Lund.

I had the loose idea of staying on the Curme Islands and the Copeland Islands in some combination, with a couple day trips to explore the area. Because it’s all contained in the park, there are designated campsites all over the place.

One interesting curveball I came across planning for a paddle in BC is managing your water. You can’t just dunk your Nalgene off the side of the boat. So I picked up a 10L MSR Dromedary water bladder that I could stretch for four days if I absolutely had to, but was hoping I’d find a source of freshwater somewhere along the way.


The Trip

The first challenge with this trip was actually getting up there. From Vancouver, you can take a couple ferries and drive the Sunshine Coast, which I’ve heard is beautiful, but I didn’t have a car and it’s quite a ways - about 5 hours from the city. I ended up booking a flight on Pacific Coastal airways to Powell River, and booking a shuttle to the Okeover Inlet through Sunshine Coast Shuttles. Combined, the cost was only a few hundred bucks and the whole trip took a couple hours.

My chariot.

My chariot.

Generous headroom (but still had to bend at 90˚ to get to my seat).

Generous headroom (but still had to bend at 90˚ to get to my seat).

I had booked my boat with Powell River Sea Kayak, who have locations in Okeover and Lund. This meant I could grab my kayak at one location and return it to the other for a few bucks extra, which was a bonus. I’d left Vancouver at 10am, and was in my kayak paddling up the Okeover Inlet by noon.

Day 1 was roughly 17km, getting from the Inlet and out into the Sound, and I decided to scope out the Curme Islands first. The Curmes are a small chain of islands with over a dozen well-developed campsites - tent platforms, an outhouse, some picnic tables and benches. You’re not allowed to have campfires, but it’s a fair compromise for the luxury of a well-maintained site. After a rainy and windy paddle, I settled in alone on the island for the night.

The view from one of the tent platforms on West Curme Island.

The view from one of the tent platforms on West Curme Island.

My campsite was so spectacular, I decided to settle in and stay around another day. This gave me time to explore the island and head across the bay to Unwin Lake, where I was hoping to refill my water supply.

The route to Unwin Lake takes you across the Sound to a quiet bay, where you’ll find a couple more well-developed campsites carved out along a bubbling stream. It’s a short hike up to the lake, and absolutely worth the trek.

The silent hike up to Unwin Lake.

The silent hike up to Unwin Lake.

There had obviously been some logging in the area some time ago, and hundreds of logs jammed themselves up where the lake filters down into the stream. It was a bit cold for a dip, but I refilled my water stash and found a nice spot to have lunch on top of the log jam. Afterwards, I packed up and headed back to my site for the night.

The log jam on Unwin Lake.

The log jam on Unwin Lake.

One variable I’d considered when planning (but admittedly not considered enough) were the tides. We don’t have to worry about tides back in Ontario but, holy hell, they are very much in play in BC. During my trip, the tides had a range of about 8 feet (!) and made for some very challenging entries and exits.

If the tide is high, you’re golden. But in a low tide you’re stepping precariously over slippery seaweed and razor-sharp oysters to get in and out of your kayak. Because the high and low times change every day, deciding when to make and break camp requires careful planning. Luckily, tides are very predictable and you can get the information you need months in advance from Fisheries and Oceans Canada.

Low tide on Day 2. My kayak is in the exact same spot as the first pic in this post!

Low tide on Day 2. My kayak is in the exact same spot as the first pic in this post!

In the afternoon on Day 2, a fairly large group of kayakers had arrived at the island, and we ended up sharing the space for the night. They were a lovely group on a Spirit of the West expedition, and we enjoyed some wine and desserts before hitting the hay. The next morning, I broke camp and started the 14km paddle down to the Copeland Islands for my last night.

On my way out of the Sound and into the open channel, I was swiftly reminded that I was on the ocean. The wind picked up, and before I knew it I was taking 3-4 foot waves over the bow and riding massive swells between them. Thankfully, these massive fiberglass sea kayaks can take a beating. I surfed into the North Copeland Islands and found a beautiful site in a quiet cove between the islands.

A quick hike up a hill on the island rewarded me with this view.

A quick hike up a hill on the island rewarded me with this view.

The campsites in and around Desolation Sound have absolutely spoiled me for camping anywhere else. Well-constructed wood platforms kept me off the ground, and with it raining every few hours that made a huge difference. There were tables for cooking and well-kept outhouses nearby.

I absolutely could have posted up here for another few nights (once again, being the only guy on the island) but had to start the long road back to civilization the following day.

My campsite on one of the North Copeland islands.

My campsite on one of the North Copeland islands.

I broke camp early on Day 4, finally getting cell service and reading that winds and rain were supposed to get pretty hairy later in the morning. Apparently I didn’t break camp early enough because I was absolutely manhandled by wind and waves throughout the entire 8km paddle back into Lund. Truthfully, I can say I’ve never experienced waves like that before.

Luckily the route is well trafficked, and multiple boats approached me in the channel and yelled over to ask if I was alright, which simultaneously made me feel safer (knowing I could get bailed out) and less safe (knowing pretty much everyone figured I needed help). Having boats nearby helped keep my head straight, and I landed safely in Lund in a little over an hour. (Oddly enough I find I actually move faster in a headwind because unlike in a cushy tailwind, you have to paddle at max power with no breaks).

After returning my gear, I hopped a shuttle back to the airport, a flight back to Vancouver, and I was sipping a Negroni in Coal Harbour by dinner time.

Itinerary

Day 1: Okeover Inlet to West Curme Island (17km)
Day 2: Island day and Unwin Lake Hike
Day 3: West Curme Island to North Copeland Island (14km)
Day 4: North Copeland Island to Lund (8km)


Pro Tips

  • There is no such thing as having too much information when you’re planning for an ocean trip. Topographic maps, tide tables, marine charts, and on-demand weather reports are all extremely valuable, and I wish I had done more due diligence here.

  • Seasonality is a big factor on weather and crowds. High season out here is June-September, so if you’re looking to avoid crowds plan your trip on the shoulders. (i.e., early June, or after Labour Day). If you want to see whales, I understand August/September are best.

  • Lean on the outfitters for intel. They know the area, and can give plenty of advice on the best spots and places to go. I also recommend paying $25 to get full access to the BC Marine Trails maps, which have plentiful data on campsites and areas of interest. Also they’re awesome and deserve the support.

  • Cell reception is spotty, so bring a VHF radio or an SOS device in case of trouble.


Editor’s note: I did this trip before I had my GPS, so unfortunately I don’t have defined coordinates/tracks to share. Luckily the folks at BC Marine Trails have already done most of the work, and you can download GPX/KML files of the area from their maps. Likewise, I didn’t track my food so I don’t have that information for you either. Next time - I promise.


 The cove at West Curme Island

The cove at West Curme Island

 The bubbling stream running alongside the hike to Unwin Lake

The bubbling stream running alongside the hike to Unwin Lake

 Some sea dogs around the Curmes. As close as they’d let me get!

Some sea dogs around the Curmes. As close as they’d let me get!

 Oyster field at low tide.

Oyster field at low tide.

 The cove between the North Copeland Islands

The cove between the North Copeland Islands

 Life finding a way on the Copelands

Life finding a way on the Copelands

 Dusk at the Copelands

Dusk at the Copelands

 The cove at West Curme Island  The bubbling stream running alongside the hike to Unwin Lake  Some sea dogs around the Curmes. As close as they’d let me get!  Oyster field at low tide.  The cove between the North Copeland Islands  Life finding a way on the Copelands  Dusk at the Copelands
July 17, 2019 /Andrew Godfrey
Desolation Sound, Kayaking, Solo, British Columbia
Trips
2 Comments

The Icemule Boss Cooler

July 15, 2019 by Andrew Godfrey in Gear

Scouring the internet, I’ve realized there’s an obsessed community for everything. When I started looking for a way to keep food (and beverages) cold on trip, I found there’s one for coolers too.

Armed with temperature guns and digital thermometers, there are folks who have put every cooler out there to the test. The big name is still Yeti (good on them for some effective marketing), but there are other players with competitive products that have generated fierce loyalties. Pelican, Orca, and RTIC come to mind. Some of these coolers are hilariously expensive - especially compared to the $30 Canadian Tire special we all know and love. We’re talking prices well above $500.

The Classic.

The Classic.

I’ve always avoided bringing coolers on trips. Portaging is a nightmare, ice doesn’t last, and you’re stuck lugging the thing around even when the food is gone. Then I started to see companies coming up with innovative designs that had me wondering whether I could find one that works for the backcountry. I set my requirements and started hunting:

  • I want to be able to keep food frozen for 3+ days

  • I want to be able to carry the cooler around easily

  • I want it to be rugged enough to handle being tossed onto rocks/off a boat/out of a moving car

I found that the main distinction in coolers is hard shell or soft shell. Good hard shell coolers are generally rotomolded, they can keep food frozen for over a week, they’re super rugged, and they weigh an absolute ton. 20 pounds plus is normal for the cooler alone. Good soft shell coolers can’t keep ice cold as long, they’re not as rugged, but they’re easier to haul around.

A typical hard shell rotomolded cooler.

A typical hard shell rotomolded cooler.

A typical soft shell cooler.

A typical soft shell cooler.

The Icemule Boss is an interesting balance. It’s a roll-top backpack with a hip-belt, weighs about 5lbs, has unusually thick insulation for a soft shell cooler, and claims to be able to keep ice for 5+ days. It can carry 30+ pounds of whatever you want to put in it. In terms of usable space, it can fit a 24-pack of beer cans on its side plus ice. Or food. If you’re into that.

Filling the Icemule Boss. (Pic from Icemule.com)

Filling the Icemule Boss. (Pic from Icemule.com)

The pack strapping. (Pic from Icemule.com)

The pack strapping. (Pic from Icemule.com)

The roll-top latching clip. (Pic from Icemule.com)

The roll-top latching clip. (Pic from Icemule.com)

So in the summer of 2018 I picked one up at the REI in Rochester for $300 USD. That STILL feels like a ridiculously high price for a cooler, but I’m a sucker. If you’re a sucker too, you can get it at Wayfair for $399 CAD plus tax (as of July 2019).


The Good, The Bad, The Ugly

I’ve run two real tests with this cooler so far.

A few weeks ago, I filled it with about five bags of grocery store ice and left it in the sun on my driveway, checking twice a day to see if there was ice. The temperature was anywhere between 15-25 degrees through the week. In that test it took the ice 5.5 days to melt, which honestly kind of blew my mind. This made the idea of having meat late into a trip possible.

1.5 days in: about 75% of the ice left

1.5 days in: about 75% of the ice left

2.5 days in: about 50% of the ice left

2.5 days in: about 50% of the ice left

4.5 days in: still three inches of ice and chilly water (brutal pic sorry)

4.5 days in: still three inches of ice and chilly water (brutal pic sorry)

So before my five-day Georgian Bay trip this year, we filled it with about 10lbs of frozen meat, filled the rest of the space with ice, and headed out on the water.

Long story short, it took the ice about 3.5 days to melt, so we still had frozen meat for our Day 4 dinner. I actually think we could have stretched it a bit further had we flash frozen everything - only two of the four meals were flash frozen, and the other two thawed much quicker.

Cooler strapped to the deck of my kayak - handled surprisingly well, and made a great backrest.

Cooler strapped to the deck of my kayak - handled surprisingly well, and made a great backrest.

The pack itself is great to haul around, and certainly easier than carrying a hard shell cooler by its handles. Even fully loaded (40lbs+ if you’re so inclined) it carries the weight well. Unfortunately for my size (6’ 3”), the nonadjustable hip belt is pretty much useless. The waterproof pockets have been useful, but it’s more space than I need so they’re just extra bulk.

Icemule’s only real competitor here is Yeti’s Hopper backpack. I haven’t seen any comparisons between the two, and haven’t tested the Yeti myself, so the only differences I can highlight are the ones I see. The Yeti has fewer pockets and has a zippered ‘lid-top’ versus a roll-top. The two are about the same price here in Canada as of July 2019.


The Results

This cooler is great. I’ve hauled it on trails, strapped it to a kayak, and I’m sure at some point will try throwing it out of a moving car. Honestly the only way it could be better for me is with an adjustable hip-belt.

I will say that if you bury a few cans of beer at the bottom, it can be kinda tough to dig them out because it’s such a tight space. But that’s an acceptable price for a cold beverage 3-days into a camping trip.

Cons

  • One-size-fits all means the hip belt might be useless to you too

  • More pockets than I need, so it’s bulkier than it could be

  • The rigid walls and tight space inside the cooler make it hard to fit certain foods/drinks

  • People might make fun of you for buying a $400 cooler

Pros

  • Phenomenal ice retention

  • Rugged and easy to carry

  • Waterproof pockets and webbing mean it might be the only pack you need for a day trip

Rating: Treat Yourself

July 15, 2019 /Andrew Godfrey
Cooler, Icemule
Gear

Kayaking the French River and Phillip Edward Island

July 15, 2019 by Andrew Godfrey in Trips

I don’t need an excuse to head out into the woods, but in July 2019 I had one. An Australian friend was going to be in Canada for a few weeks, and insisted we help find him some good fishing.

My fellow camping compatriots suggested we use this opportunity to get out onto Georgian Bay to (among other things) hunt bass, pike, pickerel, and whatever else we could convince to bite a hook. I’m no fisherman, but figured we would have some luck in one of my favourite places on earth - the Lower French River.


The Route

Running the Lower French is a phenomenal long-weekend route. You get a little of everything: river paddling, light rapids, and the inevitable descent into one of the most beautiful sections of Georgian Bay. Canadian Shield, the mighty pine, and white-capped waves abound. There are plenty of routes that will take you down and back up in three days, but we had five set aside in the calendar and I wanted to try something a bit more ambitious.

Download the GPX file here

Download the GPX file here

I’ve spent lots of time in the rocky bays of French River Provincial Park, but had never been beyond Point Grondine. If you can get around the Point, it opens up a whole new section of the shoreline - including the vast length of Phillip Edward Island. The Island is on crown land (for now), and camping is a bit more rugged and less trafficked than many of the parks.

We decided on a route that would take us from Hartley Bay Marina, down the French River’s Old Voyageur channel, around Point Grondine, and across the open shoreline of Phillip Edward Island into Killarney. We opted for poly sea kayaks as the open bay can be pretty shaky in a canoe when the weather turns. All in all, about 75km over five days.


The Trip

We planned on a mid-week jaunt, from Monday to Friday, hopefully avoiding the weekend warrior crowds. Unfortunately mosquitoes don’t have the same 9-5 schedule as the rest of us, but we figured getting out to the open water would keep them windbound. We were right about the crowds, and partially right about the mosquitoes.

Sunday night, we drove up to Killarney and stayed at the Sportsman’s Inn. This gave us the flexibility of an early start on Monday and the (unexpected) option of a couple dozen oysters, shrimp jambalaya, and French rosé at Big Willy’s Bait Shop the night before. Highly recommended.

The Sportsman’s Inn in Killarney

The Sportsman’s Inn in Killarney

We had organized kayaks and a shuttle to Hartley Bay through Killarney Outfitters. They are an incredibly organized outfitters, but get busy in the high season and I recommend booking your gear early, even if you’re not 100% locked and loaded - they’re flexible with changes.

In our oyster/jambalaya/rosé haze, we made the aggressive call to push the entire French River on Monday, to give us more time on the Bay through the week. Day 1 ended up being 28km, and took us through a headwind for most of the day and into a jaw-dropping paddle down the Old Voyageur channel and rapids. Staying in Batt Bay on Night 1 reminded me why I typically only camp in the fall - the mosquitoes were insane. But after a long day (and Morne's 60cm pike!), we didn’t need an excuse to crash early.

Rapids along the Old Voyageur Channel

Rapids along the Old Voyageur Channel

We left early on Day 2, having been warned that the exposed route around Point Grondine can be treacherous (if not impassible). We lucked out with manageable winds, but I can understand why we got the warning. This is a gnarly pass with plenty of shallows and shoals that could force you back into Horseshoe Bay until the winds calm. If in doubt, take it wide. After 16km, we landed on a gorgeous site at Moose Bay where we had a bass and BBQ dinner, followed by a late night of banter, bourbon, and more mosquitoes. Maybe not in that order.

“Docking” kayaks on West Fox Island

“Docking” kayaks on West Fox Island

Our plan for Day 3 was to buzz around Phillip Edward’s inner bays and find a place to camp for the next two nights. We settled on a 12km paddle to West Fox Island which had a protected cove to dock at, and plenty of potential for sunsets and exploring. Not to mention some exposed points to (hopefully) mitigate the bugs. We settled in and spent the next two days and nights, swimming, hiking, and playing cards.

Sunset on West Fox Island

Sunset on West Fox Island

Originally, we had intended to finish the trip in Killarney. To make it home a bit earlier on Friday, we opted to finish at the Chikanishing boat launch and have our shuttle pick us up there instead. (We found cell signal at West Fox and were able to contact Killarney Outfitters to change our itinerary.) This 9km route saved us a couple hours and bought more time to explore the coast of Philip Edward on the way in. If the wind had been heavy, this might have been a necessity.

Itinerary (GPX File)
Day 1: Hartley Bay Marina to Batt Bay (28km)
Day 2: Batt Bay to Moose Bay (16km)
Day 3: Moose Bay to West Fox Island (12km)
Day 4: Island day (no travel)
Day 5: West Fox Island to Chikanishing Boat Launch (9km)


The Food

Trip cooking for four people is ideal - any more and you have to deal with bigger (or more) pots, and more complex food requirements. Breakfasts and lunches we typically do solo, to avoid over-engineering meals that people typically like to enjoy at their own pace. But a big communal dinner brings everyone together at the end of the day to break (gluten-free) bread. We had two interesting constraints to work with: no gluten, and no dairy. I actually found those constraints easy to plan for, frankly because they eliminated so many options.

This was my first field test of the Ice Mule Boss cooler, which I had strapped on the deck on my kayak. They claim that it’ll keep ice for 5+ days - in practice, we were able to keep ice through 3.5+ days (in the middle of July!), which I think we could have stretched a bit had we flash frozen some of the food.

As much as the Canadian Shield makes a good hard surface for cutting veggies, we aimed to minimize prep and cleaning with simple single-pot recipes. Chili pressure-cooked and frozen in ziplock bags, BBQ pre-cooked and vacuum-sealed, and Jordan’s more decadent (and trip-winning) Dan Dan Noodles with sauce pre-made.

Meal Plan
Day 1: Beef Chili (Josh’s home-made pressure cooker recipe)
Day 2: Brisket Tacos (meat from Adamson BBQ, with peppers, shallots, and tortillas)
Day 3: Dan Dan Noodles (Jordan’s go-to, with ground pork, rice noodles and a peanut/soy/sesame sauce)
Day 4: Pulled Pork Tacos (again from Adamson)


Pro Tips

  • Designing the route to have less and less distance each day made the experience a lot more fun - we powered through the first bit, and really got to relax through the lazy bays of Philip Edward.

  • Stressing about trip planning? Get your travel pals to sort out their own (simple) breakfasts and lunches, and only plan for group dinners. People tend to enjoy the freedom to eat at their own pace earlier in the day anyways.

  • If you’re going to run the rapids in the Lower French, consider poly boats. It can be shallow and rocky at certain parts, and you don’t want to punch a hole in your craft before you get to the good stuff.

  • Cell reception (as of July 2019) is pretty scarce. Once you approach Killarney it gets stronger, but assume you won’t have bars unless you can find a high point or you are beginning to approach the western end of Phillip Edward.


 Shooting the Dallas Rapids in the Old Voyageur Channel

Shooting the Dallas Rapids in the Old Voyageur Channel

 Morne’s 60cm pike

Morne’s 60cm pike

 Sunset in Moose Bay

Sunset in Moose Bay

 Hammock camping among the blueberries on West Fox Island

Hammock camping among the blueberries on West Fox Island

 The unreal rock formations of West Fox

The unreal rock formations of West Fox

 Josh summitting the highest peak on West Fox

Josh summitting the highest peak on West Fox

 There are worse ways to enjoy a sunset!

There are worse ways to enjoy a sunset!

 Shooting the Dallas Rapids in the Old Voyageur Channel  Morne’s 60cm pike  Sunset in Moose Bay  Hammock camping among the blueberries on West Fox Island  The unreal rock formations of West Fox  Josh summitting the highest peak on West Fox  There are worse ways to enjoy a sunset!
July 15, 2019 /Andrew Godfrey
Georgian Bay, Kayaking, Phillip Edward Island
Trips
1 Comment
cf-lg-7723cfb6-c11b-4761-a41e-96dd0983e10e.jpeg

Garmin inReach Mini - GPS and Satellite Messenger

July 14, 2019 by Andrew Godfrey in Gear

On the last day of a recent winter camping expedition, we got back to our cars a couple hours later than we planned. It left my family and friends a bit anxious, so I decided it was time to bite the bullet and get a satellite communicator. I figured it would be a good way to keep in touch, and could even use some of the other GPS features for route planning and tracking.

In my research, I was surprised to find that there aren’t a lot of players in the space. Garmin dominates the industry, followed by SPOT, and then a couple of new entrants. For better or worse, this made searching for products a bit easier simply because there just aren’t a lot of options out there. I set a list of requirements and started hunting:

  • I wanted to be able to send (and possibly receive) messages in places where I won’t get cell signal

  • I wanted to be able to share locations and waypoints along my journeys

  • I wanted to be able to do some rudimentary route planning ahead of time

  • I wanted to be able to track my progress on the the trip itself

  • Ideally, I wanted to monitor weather conditions on-demand

With those requirements, there are really only a handful of solutions available and I immediately starting seeing a buzz around Garmin’s new line of inReach products - the Explorer+, SE+ (essentially two models of the same device), and the Mini. The inReach hardware/software ecosystem came to Garmin via the acquisition of Delorme in 2016 and, as Delorme products, had strong reviews.

Garmin inReach Mini

Garmin inReach Mini

Garmin inReach SE+

Garmin inReach SE+

Garmin inReach Explorer+

Garmin inReach Explorer+

So I picked up the Explorer+ and started playing around. The device cost me $590 plus tax (in January 2019), and the monthly subscription required to access messaging, SOS, and tracking features was another $45/month plus tax.


The Good, The Bad, The Ugly

Maybe it was my lack of familiarity with using GPS, but right away I found the experience to be super clunky. The menus weren’t intuitive, and every action felt like it took three more clicks than it should have. Likewise the integrations to the browser-based planning tool and accompanying mobile app were inconsistent and equally complicated. I let out a deep sigh when I realized there are no fewer than five tools that you have to interact with to get the most out of your device (the hardware itself, the inReach browser app for planning, the mobile app for communication and tracking, the MapShare browser app for friends/family to see your routes, and the desktop app required to sync firmware to your device).

Earthmate App - Map View

Earthmate App - Map View

Earthmate App - Track View

Earthmate App - Track View

Over the winter, I probably spent two hours on the phone with Garmin product support trying to wrap my head around how to use this thing: how to import maps, waypoints, and routes; how to actually use the (pretty brutal) web app to isolate those maps, waypoints, and routes to reduce clutter; how to troubleshoot when something isn’t working as expected. Because of inconsistencies in the experience across the applications, none of this is very intuitive.

inReach Browser App (*shudders*)

inReach Browser App (*shudders*)

I realized quickly that the Explorer+ was overpowered for my needs. I could do downsize to the Mini, use that device to initiate tracking and messages, and do all my map viewing on the mobile app (which I don’t really need to do on the water anyways). I returned the Explorer+ to MEC, traded it for a Mini, and got $140 back. (FYI - subscriptions are the same price regardless of what device you use)

I will say that the hardware itself is impressive and super functional once you understand how the whole ecosystem fits together. It’s waterproof, rugged, uses about 1000mAh of power per charge (based on my tests), and is remarkably easy to use considering there are only four buttons to navigate the menus and features. You won’t want to use it to type anything more than a few words, but for that you can just connect to your mobile app and do the heavy lifting there.

After feeling like I finally navigated the chaos, I brought it out on my first trip this past week.


The Results

On trip, the inReach Mini and Earthmate app did everything they were supposed to. And somewhat impressively, the device lasted nearly four days on a single charge (tracking our routes for a few hours each day, logging locations every 10 minutes and broadcasting it every 30 minutes). I was able to send custom and preset messages, was able to retrieve detailed weather reports quickly, and was able to monitor our progress against our route. My friends and family were able to use MapShare to see all the data clearly, and were happy to be able to follow along.

MapShare browser app - check out my latest track here. Password is trek

MapShare browser app - check out my latest track here. Password is trek

The only missing feature, for me, was the ability to adjust routes on the fly. I was essentially stuck with whatever I had synced via the browser app - so there was no way to make changes during the trip.

Despite the ridiculously clunky software experience, I’m pleased with how the device performed and am eager to take it out on another adventure.

Pros

  • Impressive battery life (but bring a back-up power pack just in case!)

  • Good size, rugged, and has a functional hardware interface

  • Fast and reasonably intuitive messaging and weather requests/responses

  • The MapShare tool for sharing routes, tracks, and locations with friends and family is great

Cons

  • The browser and mobile app interfaces are frustratingly bad. Managing waypoints, routes and tracks in meaningful ways is effectively impossible. Filtering and exporting the right information is hard to do right without significant trial and error.

  • You can’t build new routes using the device or mobile app, so you can’t make changes without accessing a browser.

Rating: Functional and frustrating


Pro Tips

  • The device seems to use a lot of extra charge trying to find a clear GPS signal. If you’re not using it, turn it off. Bring a back-up power pack if you’re out longer than a few days.

  • Because of how clunky Garmin’s software is, consider using Google Earth to plan your routes and waypoints, export the KML file, and import that directly into the inReach browser app.

  • Take it on a practice run to make sure you did everything correctly - even just to a park or down the street. If you set it up incorrectly, you won’t be able to fix it out in the woods.

July 14, 2019 /Andrew Godfrey
Garmin, GPS, inReach
Gear
Comment

Paddle the Rouge 2019

July 14, 2019 by Andrew Godfrey in Conservation

Earlier this year, I got connected to the Wildlands League - a really impressive organization that works with governments and communities across Canada to protect critical natural habitats from development.

It’s an uphill battle, for sure, but they’ve made amazing progress in helping us retain important blocks of Canadian wilderness. They’re actively working to get logging out of Algonquin Park, to protect species like the Boreal Caribou, and to develop new urban parks that bolster our connection with nature even in highly populated areas.

One of the Wildlands League’s most recent successes is helping secure Rouge National Urban Park - a 50km² park system at the base of the Rouge River watershed, on its way into Lake Ontario. The park runs from Stouffville and the Oak Ridges Moraine right down to the lake. In between, you’ll find a stunning tract of endangered Carolinian Forest, over 1700 species of plants and animals, and the last intact watershed in the area.

I ended up volunteering to be a paddling instructor for the Wildlands League’s annual ‘Paddle the Rouge’ event - the intent being to bring city folk out into the woods and help them connect with nature. The park’s entry points may have been underwater, but that didn’t stop us.

We spent the day exploring the watershed, teaching kids (and some adults!) how to canoe and kayak, and hearing from leaders of the community on why spaces like Rouge Park are so important to maintaining our connection with the land. Thanks to the Grand River Rafting Company for hooking up the boats!

Carly-Wade-15.jpg

I went into Paddle the Rouge, really, without any knowledge of the Wildlands League itself. Any excuse to get on the water was good enough for me. But hearing more about their successes made me realize that it only takes a small group of strong voices to make a massive impact for nature conservation in Canada.

If you get a chance, rent a kayak or canoe and do some exploring yourself this summer. You can access the park just East of the Rouge Hill GO Station, or straight in from Lake Ontario. In the meantime, keep an eye out for updates on next year’s event and come join us on the water!

https://paddletherouge.com/
https://wildlandsleague.org/

July 14, 2019 /Andrew Godfrey
Wildlands League, Paddle the Rouge, Rouge National Urban Park
Conservation
Comment